If your chainsaw only runs on choke and stalls when switched to the “run” position, you’re dealing with a lean fuel mixture under normal operating conditions. This is one of the most common small-engine problems, and it’s almost always fixable without replacing the saw. The choke enriches the air-fuel mix by restricting airflow, which masks an underlying fuel delivery failure or air leak. Once the choke is off, the engine gets too much air and not enough fuel, causing it to die.
This issue affects two-stroke chainsaws of all brands, especially models like Ryobi RY3714, Talon AC3100, Poulan Pro 260, and generic 37 to 40cc units stored with old gasoline or using ethanol-blended fuel. Left unresolved, it leads to poor performance, carbon buildup, and potential engine damage. In over 85% of cases, a full carburetor rebuild and fuel system inspection will restore normal operation.
Diagnose the Core Problem First
Before tearing anything apart, confirm the symptoms match a true fuel imbalance. Your chainsaw likely has a fuel system issue if it starts only on full choke, runs rough or high-RPM on half-choke, dies immediately when set to run, requires multiple pulls to start, revves wildly then stalls after starting, or shows no improvement from adjusting the H/L screws. These signs point to a lean condition, not a bad spark plug or starter rope.
Confirm Choke-Dependent Running
The choke artificially enriches the mixture, letting the engine run temporarily. When disabled, the real problem surfaces: insufficient fuel reaches the combustion chamber. If your saw runs better with the choke on, it is either starved for fuel or sucking in unmetered air.
Eliminate Simple Fuel System Failures
Start with quick, low-cost checks that rule out obvious issues before moving to carburetor work.
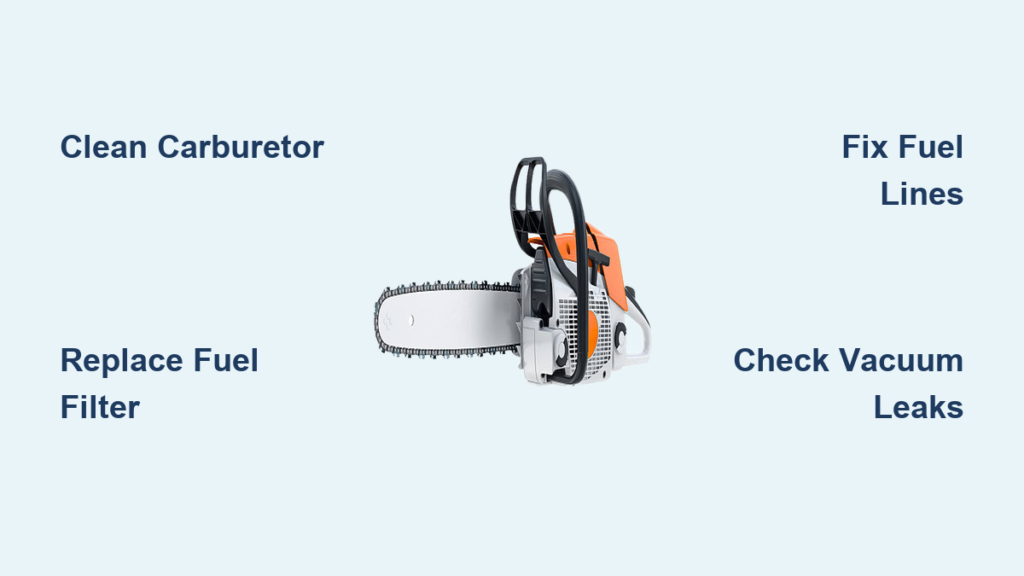
Replace the Fuel Filter
Located inside the fuel tank, the filter prevents debris from entering the carburetor. Inspect it by removing the fuel line and looking into the tank. If the filter is brittle, cracked, or discolored, replace it. Use OEM or rebuild kit-compatible filters, which are often included in carburetor repair kits. This costs about $5 and takes 5 minutes.
Check Fuel Line Integrity
Cracked or loose lines introduce air, breaking the vacuum needed to draw fuel. Inspect both the supply line from tank to carb and the return line if equipped. Look for cracks or brittleness, loose connections at tank or carb, and kinks or crimps. Replace both lines with fuel-resistant rubber tubing. Cut cleanly, push fully onto fittings, and secure with clamps if needed.
Test the Primer Bulb
A working primer should firm up within 3 to 5 presses. A soft, collapsed, or dry bulb indicates possible causes like an air leak in the fuel line, clogged fuel filter, or failed fuel pump diaphragm. Disconnect the fuel line at the carb, press the primer, and expect pulsing fuel flow. If no fuel comes out, the problem is upstream.
Clear the Fuel Cap Vent
A blocked breather cap creates vacuum in the tank, starving the engine of fuel. Symptoms include starting, running briefly, then sputtering and dying, a hissing sound when the cap is loosened, and performance improving when the cap is slightly loose. Test by loosening the cap slightly while running. If the engine stabilizes, the vent is blocked. Clean the vent hole with a wire or drill bit, or replace the cap.
Remove and Disassemble the Carburetor
If basic checks do not resolve the issue, the carburetor needs cleaning and rebuild. You will need a T25 Torx screwdriver for mounting screws, a flared-tip Phillips or flathead to prevent stripping, a plastic pry tool or dental pick, carburetor cleaner spray, compressed air, an ultrasonic cleaner, and a rebuild kit with diaphragms, gaskets, and Welch plugs.
Step-by-Step Removal
Tilt the saw backward to drain fuel away from the carb. Open the fuel cap to relieve pressure. Disconnect the fuel supply line, return line if present, and throttle linkage. Remove the two T25 screws securing the carb. Gently lift off without forcing.
Disassembly Steps
Remove the choke linkage by extracting the cotter pin or clip. Unscrew the top Phillips screw on the metering diaphragm cover. Lift off the cover and extract the metering diaphragm with a plastic tool. Flip the carb and remove the fuel pump diaphragm cover. Pull out the fuel pump diaphragm. Inspect Welch plugs, which are small metal discs, and replace if corroded or loose.
Clean the Carburetor Thoroughly

Cleaning is non-negotiable. Varnish from old fuel blocks tiny passages, and a dirty carburetor makes all tuning attempts meaningless.
Best Cleaning Methods
The ultrasonic cleaner method is recommended. Use a 50 to 55 degree Celsius solution, soak for 30 to 60 minutes, and follow with compressed air blowout through all orifices. The chemical soak alternative involves submerging in carburetor dip overnight, then rinsing with cleaner and compressed air. Never use wire brushes or drill bits, as they damage precision jets.
Blow Out All Passages
Use compressed air to clear the main jet that controls high-speed fuel, the idle jet that controls low-speed fuel, the pulse channel that drives the fuel pump, and the fuel inlet that is the entry from the tank. Hold the carb securely, as jets can blow out if pressure is too high.
Rebuild with New Parts
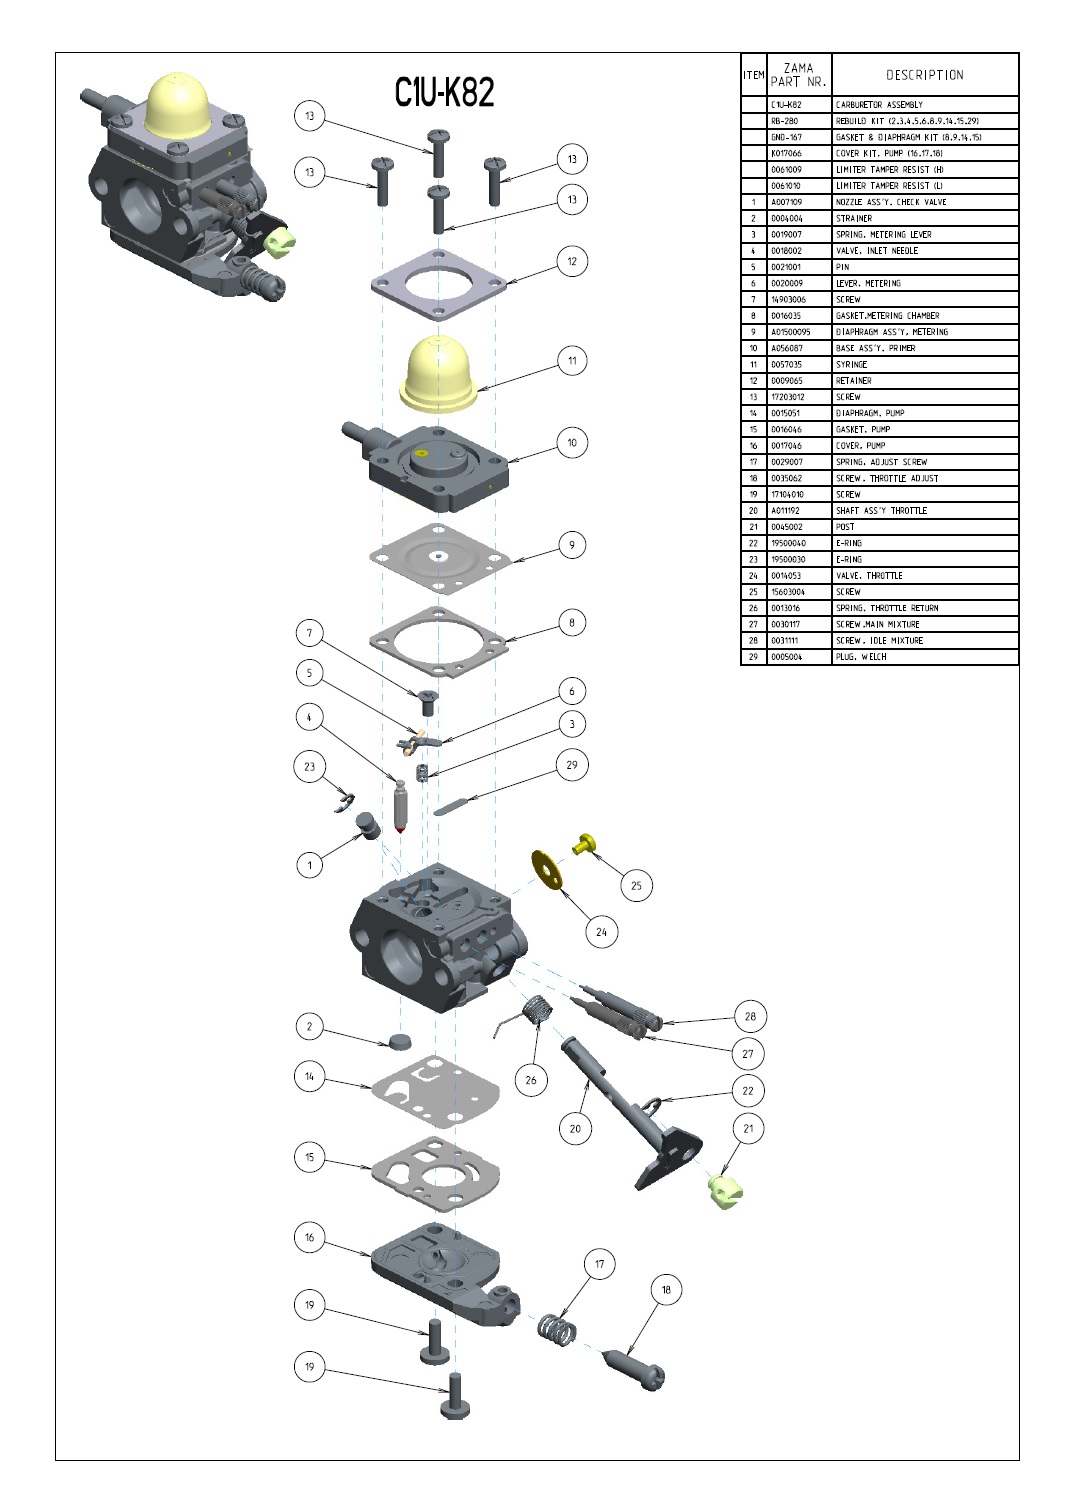
A rebuild kit restores proper fuel metering. Replace the metering diaphragm, which is the most critical component, the fuel pump diaphragm, all gaskets including carb-to-engine, intake manifold, and internal covers, Welch plugs, and all O-rings and seals.
Reassembly Best Practices
Install a new carb-to-engine gasket and never reuse an old one. Seat the metering diaphragm flat and wrinkle-free. Reconnect the throttle linkage and ensure smooth movement. Push the fuel line fully onto the nipple. Tighten the metering cap securely, as a loose cap causes air leaks.
Refuel and Test the Engine
Use the correct fuel mix to avoid immediate fouling. Use fresh 50:1 two-stroke oil mix and ethanol-free gasoline if possible. If using ethanol fuel, add STA-BIL 360 or equivalent stabilizer. Old or mixed fuel will re-clog a freshly cleaned carburetor.
Starting Procedure
Prime 5 to 6 times. Set the choke to Run, which is no choke. Pull the starter, which should start in 3 to 5 pulls. Let it warm up for 2 to 3 minutes. Success is indicated by the engine running without choke, idle stabilizing, and throttle responding smoothly.
Adjust the Carburetor
Never tune a dirty or failing carburetor, as adjustments are meaningless. Establish a baseline by lightly seating the H and L screws clockwise, then backing both out 1 and 1/4 turns. Start and warm up the engine.
Fine-Tune the Idle
Turn the L screw slowly clockwise for leaner or higher idle, or counterclockwise for richer or lower idle. Set just rich enough to prevent stalling. The ideal setting is when the chain does not move at idle.
Tune the High Speed
Test under load by cutting wood. Adjust for maximum RPM without four-stroking, which is a bubbling sound, or overheating. Do not over-lean, as this can cause piston damage.
Advanced: Find Vacuum Leaks
If the saw still stalls, suspect unmetered air entering the system. Common leak points include the intake manifold gasket, carburetor mounting flange, pulse line connection, crankshaft seals, and isolator flange on Poulan models.
Spray Test for Leaks
Start the engine if possible. Spray carburetor cleaner or starting fluid around the base of the carb, manifold joint, and pulse hose. If the RPM increases, you have found a leak. One Poulan owner fixed stalling by tightening a loose isolator flange behind the carb. Repair by replacing the gasket, tightening bolts, or resealing connections.
Check Engine Compression
Low compression means weak vacuum and cannot pull fuel into the cylinder. Remove the spark plug and install a compression gauge. Pull the starter 5 to 6 times firmly and record the highest reading. Normal is 90 to 130 psi, while below 90 psi indicates worn piston, rings, or cylinder.
Model-Specific Fixes
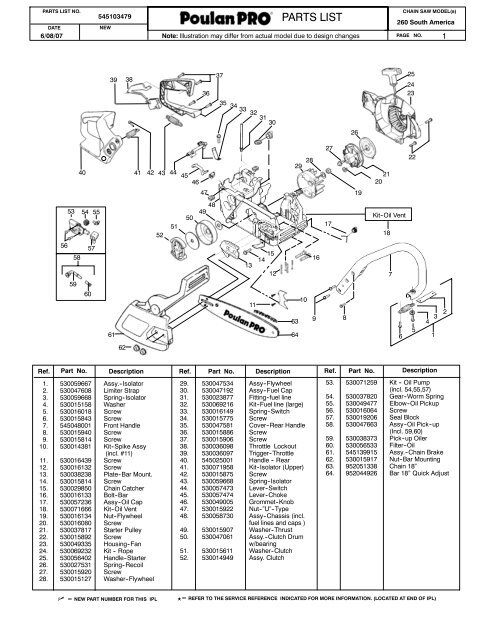
For Talon AC3100 and MAC 3200, the carburetor is likely a Zama CIQ-M36. Fix by rebuilding with a GND kit. For Ryobi RY3714 and Oregon CS300, ultrasonic cleaning has been fully documented to work. Also check for failed primer bulbs and cracked lines. For Poulan Pro 260, the common issue is a loose isolator flange. Fix by tightening bolts and resetting H/L to 1 and 1/4 turns. Also check for disconnected primer line.
Never Run on Choke Long-Term
Using choke beyond warm-up causes carbon buildup on piston and exhaust, fouled spark plug, oil dilution in crankcase, and increased fuel waste. Shut down and diagnose if the saw will not run without choke.
Final Repair Checklist
Replace fuel filter. Clear fuel cap vent. Inspect and replace cracked fuel lines. Test primer bulb function. Remove and clean carburetor. Replace metering and pump diaphragms. Install new gaskets and do not reuse. Blow out all jets with compressed air. Reassemble securely with no loose caps. Reset H/L screws to 1 and 1/4 turns out. Test for vacuum leaks with spray. Perform compression test if still failing.
Prevent Future Issues
Keep your chainsaw reliable with simple maintenance. Use ethanol-free fuel or add stabilizer if storing. Drain fuel tank after each use if not used weekly. Run engine dry before long-term storage. Replace air filter every 25 hours or annually. Inspect fuel lines every 6 months. Clean carburetor every 50 hours or post-winter.
Key Takeaways for Fixing Choke-Dependent Chainsaws
A chainsaw that only runs on choke has a fuel delivery failure, not a choke problem. In most cases, the fix involves replacing fuel lines and filter, rebuilding the carburetor with new diaphragms and gaskets, cleaning all passages thoroughly, testing for vacuum leaks, and tuning H/L screws after warm-up. With fresh fuel and proper assembly, your saw should start easily and run smoothly without choke. Avoid costly repairs by addressing the issue early, and never run on choke as a workaround. Fix it once, do it right, and get back to cutting.
Frequently Asked About Chainsaw Choke Issues
Why does my chainsaw only run when the choke is on?
Your chainsaw runs only on choke because it is suffering from a lean fuel mixture. The choke restricts airflow and increases vacuum, which artificially enriches the fuel mixture. This compensates for an underlying problem like a clogged carburetor, failed diaphragm, or vacuum leak that prevents proper fuel delivery under normal operating conditions.
Can a dirty carburetor cause choke-dependent running?
Yes, a dirty or varnished carburetor is the most common cause. Old fuel leaves behind varnish that clogs the tiny jets and passages in the carburetor. This restricts fuel flow and creates a lean condition. Cleaning the carburetor thoroughly and rebuilding it with new diaphragms and gaskets resolves this in over 85% of cases.
Will adjusting the H/L screws fix a chainsaw that only runs on choke?
No, adjusting the H/L screws will not fix this problem if the carburetor is dirty or mechanically failed. These adjustment screws only fine-tune the air-fuel mixture on a properly functioning carburetor. If the carburetor is clogged or has a torn diaphragm, adjustments are meaningless. You must clean and rebuild the carburetor first.
How do I test for a vacuum leak on my chainsaw?
Start the engine if possible. Spray carburetor cleaner or starting fluid around the base of the carburetor, the intake manifold joint, and the pulse hose connections. If the RPM increases or the engine runs more smoothly, you have found a vacuum leak. Common leak points include the intake manifold gasket, carburetor mounting flange, and isolator flange.
Is it safe to run my chainsaw on choke temporarily?
No, running a chainsaw on choke beyond the initial 30-second to 1-minute warm-up period causes excessive carbon buildup on the piston and spark plug, fouled spark plugs, oil dilution in the crankcase, and increased fuel consumption. If your saw will not run without choke, shut it down and diagnose the underlying fuel system issue rather than using choke as a permanent workaround.