If your chainsaw is leaving scorch marks, emitting smoke, or producing a burning smell while cutting, it is not working properly. Chainsaw burning wood is a red flag indicating excessive friction from mechanical or maintenance issues. Left unresolved, this condition damages the chain, guide bar, and engine while drastically reducing cutting efficiency. The good news? Most causes are preventable and fixable with basic maintenance. This guide walks you through every possible reason your chainsaw burns wood, how to diagnose it quickly, and exactly how to fix it so you can get back to clean, smooth cuts.
Dull Chain Causing Smoke
A dull chain ranks as the top reason for wood burning and smoke during operation. Understanding why dull chains cause this problem helps you prevent it.
Why Dull Chains Burn Wood
A sharp chain cuts cleanly, removing wood chips. A dull chain grinds instead of cuts, creating friction and heat that scorches the wood surface. Even if the chain looks intact, rounded edges mean it is no longer cutting. It is dragging across the wood, generating excessive heat.
Signs Your Chain Is Dull
Watch for these indicators that your chain needs sharpening:
- Produces fine sawdust instead of chunky chips
- Requires excessive pressure to make cuts
- Cuts slowly even at full throttle
- Leaves dark scorch marks on the wood
- Generates visible smoke at the cut line
How to Sharpen Properly

Follow these steps to restore chain sharpness:
- Select the correct round file size based on your chain specifications. Most homeowner saws use 5/32 inch files, while larger models may require 7/32 inch or 3/16 inch. Check your chain pitch before purchasing.
- Maintain the proper filing angle as specified by the manufacturer, typically 25 degrees or 30 degrees.
- File each tooth evenly by applying consistent strokes, usually three to five per tooth. Always file in the same direction, moving away from the saw body.
- Check depth gauges after every three to five sharpenings to prevent high rakers from causing problems.
A properly sharpened chain should cut with minimal pressure and produce coarse wood chips, not dust.
Chain Installed Backward
A reversed chain mimics a dull chain but the fix is simple. Many users accidentally install chains backward, especially when replacing them for the first time.
How to Spot a Backward Chain
On the top of the bar, cutting edges should face forward, pointing away from the engine. On the bottom, they should face backward, toward the engine. If the chain drags instead of biting, it is likely installed backward.
Symptoms of Reverse Installation
Watch for these warning signs:
- Poor cutting despite sharp teeth
- Smoke and heat buildup during operation
- Chain skids across wood instead of slicing cleanly
Fix: Reinstall Chain Correctly
Take these steps to correct the installation:
- Loosen the bar nuts and remove the chain from the guide bar.
- Flip the chain so the cutting teeth point forward on top of the bar.
- Reinstall the chain, re-tension properly, and test before use.
Remember this practical wisdom: there are only two types of chainsaw owners, those who have installed the chain backward and those who are lying about it.
High Rakers Slowing Cuts
Even sharp teeth will not cut well if the rakers, also called depth gauges, are set too high.
What Are Rakers
Rakers sit in front of cutting teeth and control how deeply each tooth bites into the wood. Over time, sharpening shortens the cutters but not the rakers, leading to imbalance and poor cutting performance.
Signs of High Rakers
These symptoms indicate your rakers need attention:
- Chain drags or rubs instead of cutting
- Excessive smoke and heat during operation
- Cuts feel labored even with recently sharpened teeth
How to File Rakers Correctly

Use these steps to set raker height properly:
- Use a raker depth gauge tool to measure current height.
- File down rakers to 0.025 inches, or 0.64 mm, below the top of the cutter.
- Maintain uniform height across all rakers for consistent cutting.
Check raker height every time you sharpen the chain and file rakers every three to five sharpenings.
Poor Lubrication Leading to Smoke
Inadequate oiling creates a fast track to overheating, wood burning, and complete chain failure.
Signs of Lubrication Failure
Watch for these indicators of oil system problems:
- Smoke rising from the chain-bar interface
- Guide bar turns blue or brown from heat discoloration
- Chain loosens during use due to thermal expansion
- Sparks or metal-on-metal grinding sounds
Common Oil System Problems
Several issues can cause lubrication failure:
- Empty oil tank results from forgotten refills. Fill with bar and chain oil every time you refuel.
- Clogged oil hole occurs from sawdust buildup. Clean the bar oil hole and saw outlet regularly.
- Worn oil pump happens when the plastic gear strips under load. This typically requires professional repair.
- Wrong oil type causes poor lubrication. Use proper high-tack bar oil and switch to winter-grade oil in cold conditions.
How to Test Oil Flow
Perform the log spray test to verify oil delivery:
- Position the bar tip near a log without touching it.
- Run the saw at full throttle for five to ten seconds.
- Look for oil spray or a wet stripe on the wood surface.
Alternatively, lift the chain slightly. The underside should appear oily.
How to Clean the Oil System
Follow these steps to restore proper oil flow:
- Remove the bar and chain from the saw.
- Clear debris from the bar groove, oil hole in the bar, and oil exit port on the saw body.
- Flush with compressed air if needed to dislodge stubborn blockages.
Running a dry chain for just 30 seconds can permanently ruin the bar and chain.
Incorrect Chain Tension
Tension that is too tight or too loose causes heat buildup, accelerated wear, and poor cutting performance.
Too Tight: Causes Overheating
These signs indicate your chain is overtightened:
- Chain will not turn freely by hand
- Increased friction produces smoke and heat
- Bar shows discoloration or warping
- Sprocket wears out prematurely
Too Loose: Risk of Derailment
A loose chain presents these problems:
- Chain sags or slaps against the bar
- Can jump off during operation
- Results in poor control and excessive vibration
Correct Tension Settings
Follow these guidelines for proper tension:
- Chain should be snug but still movable by hand
- You should be able to lift the drive links slightly out of the groove
- After tightening, pull the chain around to confirm it rotates smoothly without binding
Never adjust tension on a hot saw. Metal contracts as it cools, so a hot-tightened chain can bind when cold.
Damaged or Pinched Guide Bar
A bent or compressed bar causes binding and localized overheating that leads to wood burning.
Causes of Bar Damage
Common causes include:
- Bar pinched in a log during cutting
- Hitting rocks, nails, or dirt during operation
- Long-term one-sided use without flipping the bar
Symptoms of a Bad Bar
Watch for these indicators:
- Chain binds at one specific spot on the bar
- Cuts veer to one side or feel uneven
- Localized smoke or heat appears during cutting
- Visible groove narrowing or warping
How to Test for a Pinched Bar
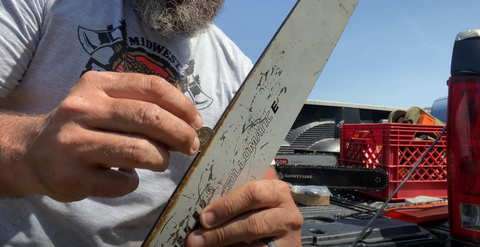
Use the coin test to check groove width:
- A dime fits in a 0.050 inch gauge bar
- A nickel fits in a 0.058 inch gauge bar
- A quarter fits in a 0.063 inch gauge bar
If the coin binds or will not enter, the groove is pinched and needs attention.
Repair or Replace
Choose the appropriate solution based on damage severity:
- Mild pinch: Use a flathead screwdriver and hammer to gently pry open the groove
- Minor wear: File out burrs or debris from the groove
- Severe warp or wear: Replace the guide bar entirely
A pinched bar can mimic oiling issues, so always inspect the bar if smoke persists after addressing oil system problems.
Chain and Bar Compatibility Issues
Mismatched parts cause binding, drag, and excessive heat during cutting.
Gauge Mismatch
Chain drive link gauge must match the bar groove width. Common gauges include 0.050 inch, 0.058 inch, and 0.063 inch. Too tight causes binding. Too loose creates vibration and accelerated wear.
Bar Length vs. Saw Power
Small saws like the Stihl MS170 struggle with dense hardwoods such as oak or hickory. Even with a sharp chain, the engine bogs down, increasing heat and friction. Match your bar length to your saw power class.
Aftermarket Parts
Quality aftermarket bars like Oregon work well as OEM replacements. Ensure proper fit by checking oil hole alignment, correct mounting bolts, and matching bar nose sprockets when applicable.
Step-by-Step Diagnostic Checklist
Use this sequence to pinpoint the exact cause of wood burning.
1. Check Chain Sharpness
Look for rounded edges on the teeth. Perform a test cut. The chain should produce wood chips, not fine dust. Sharpen immediately if you are unsure.
2. Verify Chain Direction
Confirm cutting edges face forward on top of the bar. Reinstall correctly if backward.
3. Inspect Raker Height
Use a depth gauge to measure raker height. File down if over 0.025 inches below the cutter.
4. Adjust Chain Tension
Set tension to snug but movable. Ensure the brake is disengaged before testing.
5. Test Oil Flow
Refill the oil tank. Perform the log spray test. Clean oil holes if no flow appears.
6. Examine Guide Bar
Remove the chain and sight down the bar for warping. Run the coin test on the groove. Repair or replace if damaged.
7. Full System Check
Inspect the sprocket for wear on hooked or elongated teeth. Clean sawdust from the clutch area. Consider a full maintenance cycle if problems persist.
Fix one issue at a time, starting with sharpness and direction, then working down the checklist.
Prevent Chainsaw Wood Burning
Avoid future problems with consistent maintenance habits.
Sharpen Regularly
Sharpen after every two to three hours of use. Sharpen immediately after hitting dirt or rock.
File Rakers
File rakers every three to five sharpenings using a depth gauge to ensure accuracy.
Clean Bar and Chain
Clean after each use, especially in dirty or icy conditions. Scrape out the bar groove and oil holes regularly.
Flip the Guide Bar
Flip the bar every time you sharpen the chain. This ensures even wear and extends bar life significantly.
Use Fresh Bar Oil
Refill with every fuel tank refill. Use high-quality, sticky bar oil designed for chainsaws. Never use motor oil as a substitute.
Pre-Use Inspection
Before starting, always check chain direction, tension, oil level, and sharpness.
Store Properly
Clean and dry the saw before storage. Lightly oil the chain and bar. Store in a dry place away from moisture.
Real-World Fixes That Work
Stihl MS170 Smoke Issue
A user reported heavy smoke and slow cuts on four-inch logs. The chain seemed sharp but was overtightened and the oiler was clogged. The fix involved adjusting tension, cleaning the oil hole, and sharpening. Cutting was fully restored.
Privet Tree Bar Pinch
A user experienced smoke after cutting large privet. The bar had pinched in the log, compressing the groove. The solution required replacing the bar and flushing the oil system.
Seeming Sharp Is Not Sharp
Multiple users reported chains that seemed sharp but still burned wood. In reality, true sharpness allows effortless cutting with zero pressure applied. If you must force the saw, the chain needs sharpening.
Plastic Oil Pump Gear Failure
Technicians note that plastic worm gears in oil pumps commonly fail under load. This repair requires disassembly and is often best left to professionals.
Quick Fix Reference Table
| Issue | Key Sign | Solution | Tools Needed |
|---|---|---|---|
| Dull Chain | Fine dust, slow cut | Sharpen with round file | File, guide |
| Backward Chain | Skidding, no bite | Reinstall correctly | None |
| High Rakers | Dragging, heat | File rakers to 0.025 inches | Depth gauge, flat file |
| Poor Lubrication | Smoke, blue bar | Clean oil system, test flow | Brush, rag, log |
| Overtightened Chain | Hard to turn | Adjust to snug | Wrench, gloves |
| Pinched Bar | Binding at one spot | Pry or replace bar | Screwdriver, coin |
| Oil Pump Failure | No oil flow | Replace gear or pump | Professional repair |
Frequently Asked Questions About Chainsaw Burning Wood
Why does my chainsaw burn wood even with a new chain?
A new chain can still burn wood if installed backward, overtightened, or if the rakers are set too high. Check chain direction first, then verify tension and raker height before assuming the chain is defective.
How often should I sharpen my chainsaw chain?
Sharpen your chain after every two to three hours of use. Sharpen immediately if you hit dirt, rocks, or sand during cutting, as these materials dull blades quickly.
Can using the wrong oil cause wood burning?
Yes. Using motor oil instead of bar and chain oil, or using thin oil in warm weather, causes poor lubrication. This leads to excessive friction, heat, and wood burning. Always use high-quality bar and chain oil.
Why does my chainsaw only smoke when cutting hardwoods?
Hardwoods like oak and hickory require more power to cut. If your saw is too small for the bar length or the chain is dull, the engine bogs down and creates heat that burns the wood. Use a properly sized saw for the wood type or sharpen the chain before cutting hardwoods.
How do I know if my bar is pinched?
Remove the chain and run a coin along the bar groove. If a dime, nickel, or quarter binds or will not enter the groove, the bar is pinched and needs repair or replacement.
Can I fix a chainsaw that burns wood myself?
Most causes of wood burning are fixable at home with basic tools. Dull chains, backward installation, poor tension, and lubrication problems are all DIY repairs. Oil pump failures and severe bar damage may require professional service.
Key Takeaways for Fixing Chainsaw Burning Wood
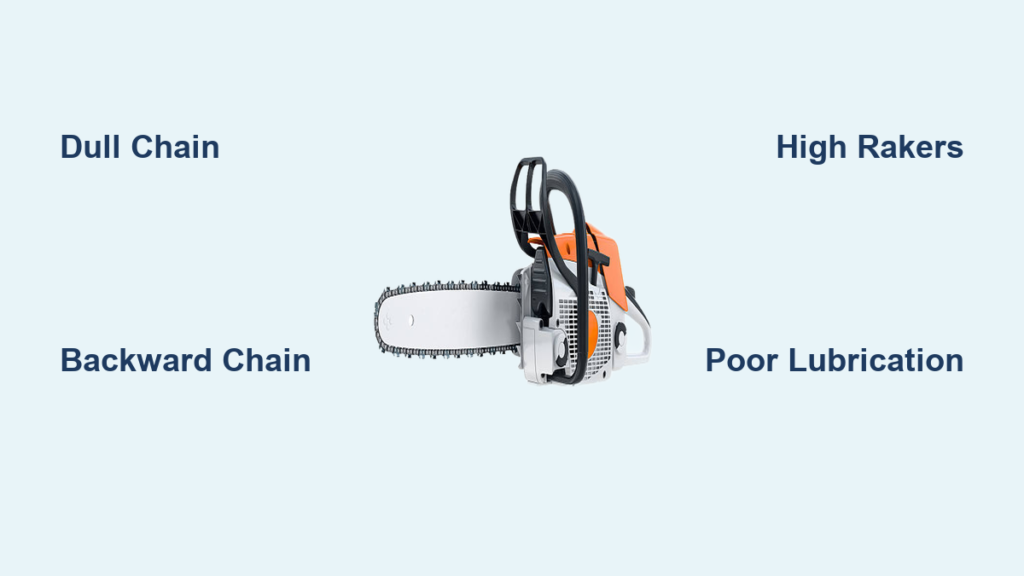
If your chainsaw is burning wood, stop using it immediately to prevent permanent damage. In most cases, the issue stems from one of four common problems: a dull chain, backward installation, high rakers, or poor lubrication. Address these systematically using the diagnostic checklist, working through each potential cause until you find the solution.
Proper maintenance prevents wood burning from occurring in the first place. Sharpen your chain regularly, keep the oil system clean, maintain correct tension, and flip the guide bar periodically to ensure even wear. With the right care, your chainsaw will cut cleanly, efficiently, and without smoke every time you use it.