
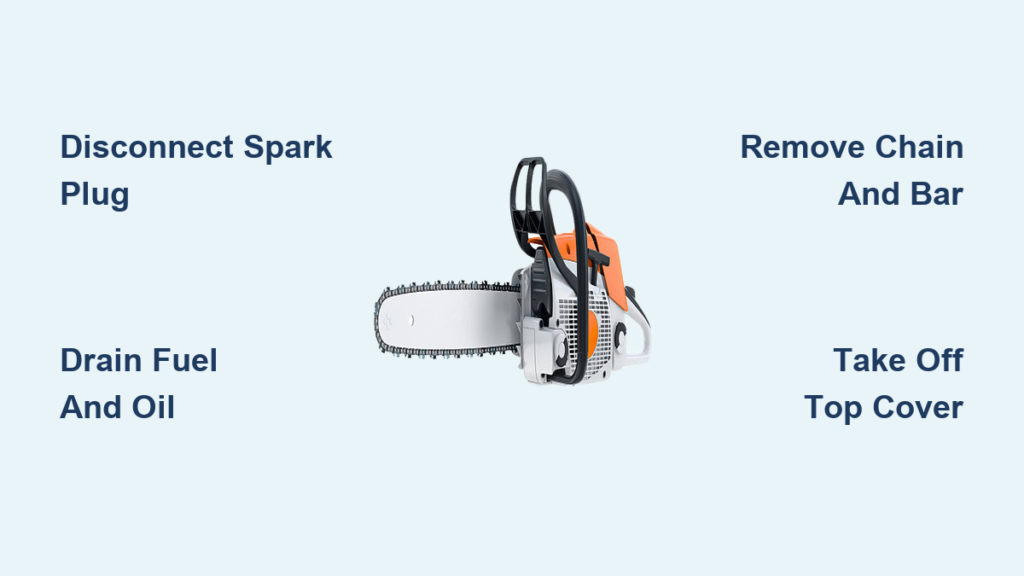
You fire up your chainsaw, only to hear a sputter. Maybe it is overheating, stalling, or simply will not start. The fix is often hidden deep inside: a clogged carburetor, a seized piston, or worn clutch components. To get there, you need to know how to take apart a chainsaw safely and correctly. Whether you are troubleshooting, rebuilding, or performing deep maintenance, disassembly is the first critical step toward restoring full power and reliability.
This guide walks you through the complete teardown process using real-world repair insights from Stihl, Husqvarna, Echo, and other major brands. You will learn the essential tools, safety protocols, cleaning techniques, and inspection checkpoints that separate a successful repair from a frustrating mess.
Essential Safety Steps Before Disassembly
Before touching a single screw, protect yourself and your equipment. These safety measures prevent injury and damage during the entire process.
Disconnect the Spark Plug
Always remove the spark plug and disconnect the wire before starting. This prevents accidental starts during disassembly, which could cause serious injury. Even a slight tug on the starter cord can ignite fuel if the plug is connected.
Drain Fuel and Oil
Empty the fuel tank and bar oil reservoir completely. Gasoline is flammable, and oil creates slippery messes. Draining both reduces fire risk and keeps your workspace clean. Use a siphon pump for safe removal rather than pouring.
Secure the Saw
Place the chainsaw in a vise with soft jaws, such as rubber or wood padding. This holds the saw steady during bolt removal and prevents damage to plastic housings or painted surfaces. Never clamp directly on metal or sharp edges.
Wear Protective Gear
Put on safety glasses and cut-resistant gloves. The chain is sharp, internal parts have burrs, and debris can fly when cleaning. A face shield adds extra protection during aggressive cleaning or flywheel work.
Inspect the Chain Brake
Check the chain-brake handle for cracks or missing material. If damaged, replace it immediately. This component is essential for kickback safety, and you should never operate or disassemble a saw with a compromised brake.
Gather the Required Tools

Having the right tools prevents stripped screws and broken parts. Organize your workspace before beginning the teardown.
Basic Hand Tools
You will need a socket wrench set with metric sizes: 6mm, 8mm, 10mm, and 13mm. Torx bits T20, T25, and T30 are common on Husqvarna and Echo models. Include Phillips screwdrivers numbered 1 and 2, a flathead screwdriver for prying and fuel line removal, and pliers plus needle-nose pliers for clips and wires.
Specialized Tools
A flywheel puller removes stuck flywheels without damage. A flywheel holder or rope-in-cylinder tool stops crankshaft rotation during nut removal. A chain breaker tool disconnects the chain for cleaning or replacement. Snap ring pliers remove wrist pin retainers, and an 8mm wrench or socket loosens the carburetor clamp.
Measuring and Cleaning Tools
Calipers or a micrometer check piston-to-bore clearance and wear. A gasket scraper removes old gasket material cleanly. You will need a stiff brush and degreaser for engine housing, compressed air to blow out sawdust from crevices, and an ultrasonic cleaner to restore carburetors and small parts.
Pro Tip: Label fuel lines and linkages with tape or zip ties as you disconnect them. Misconnecting inlet and return lines causes hard starts or flooding.
Remove Guide Bar and Chain
Start with the outermost components. This step exposes the clutch drum and drive sprocket for inspection.
Loosen the Clutch Cover Nuts
Use a bar wrench or socket to loosen the two or three nuts holding the clutch cover. Turn counterclockwise. Even if the nut is reverse-threaded, the cover itself is not. Remove the nuts and set them aside.
Take Off the Clutch Cover
Lift off the clutch cover carefully. Underneath, you will see the clutch drum, drive sprocket, and part of the chain.
Slide Off the Chain
Pull the chain off the drive sprocket. Inspect it for stretched links, dull cutters, and damaged tie straps. Soak the chain in soda crystals or kerosene to remove pitch and sap.
Remove the Guide Bar
Slide the guide bar off the studs. Check the rail wear using calipers. Uneven height means the bar is worn out. Clear the oil hole with a wire if clogged. Inspect the nose sprocket. It should spin freely. Replace it if stiff or chipped.
Warning: A bent guide bar, sometimes called a banana bar, increases friction and causes overheating. Replace it if visibly warped.
Take Off Air Filter and Muffler Cover
Expose internal components safely by removing the covers that protect the engine bay.
Remove the Muffler Cover
Unscrew the rear housing screws, which are often Torx T25. Lift off the muffler cover to access the air filter and carburetor area.
Pull Out the Air Filter
Remove the foam or paper filter. Clean foam filters with warm soapy water. Replace paper filters if dirty. A clogged filter leans the fuel mix and causes overheating.
Inspect the Filter Housing
Wipe out sawdust and debris from the airbox. Use compressed air after brushing out loose dust to avoid forcing particles into the carburetor intake.
Note: On older Homelite models, plastic housing can become brittle. Handle gently to avoid cracking.
Remove the Spark Plug Early
Prevent accidental ignition by removing this component early in the teardown process.
Disconnect the Spark Plug Wire
Pull the spark plug boot straight off. Do not yank the wire itself.
Extract the Spark Plug
Use a 13/16-inch or 21mm spark plug socket to remove it. Inspect the condition. Carbon fouling appears as black, dry soot and indicates a rich fuel mix. Oil fouling looks wet and oily and suggests bad seals or rings. A burnt electrode indicates overheating or the wrong heat range. Replace the spark plug annually or every 25 to 50 hours.
Remove Top Cover and Expose Engine
Access internal components step by step by removing the main housing covers.
Unscrew the Top Cover
Remove all Torx or Phillips screws from the top cover, which is on the opposite side from the muffler. Keep screws labeled by location so you know where each one goes.
Lift Off the Crankcase Cover
Carefully remove the cover. You will now see the flywheel, coils, recoil starter, and cylinder base.
Critical: On Stihl and Husqvarna models, the cylinder and head are one piece. There is no head gasket to remove.
Disconnect Carburetor and Fuel Lines
Free the fuel system carefully to avoid damaging delicate lines and linkages.
Loosen the Carburetor Clamp
Use an 8mm wrench to loosen the clamp holding the carburetor to the intake.
Pull Back the Carburetor
Gently slide the carburetor backward to expose the throttle linkage, choke lever, and fuel lines.
Label and Disconnect Fuel Lines
Use zip ties or tape to mark the inlet line from the tank to the carburetor and the return line if equipped. Remove lines with a twisting motion. Do not pull straight off.
Detach Linkages
Unhook the throttle and choke cables. Sketch their routing or take a photo for reassembly.
Pro Tip: Soak the carburetor in an ultrasonic cleaner for 20 minutes on and 30 minutes off with hot water and dish soap. Avoid solvents that damage diaphragms.
Remove Muffler and Spark Arrestor
Clear exhaust restrictions to improve performance and safety.
Remove Muffler Bolts
Unscrew the 10mm or 12mm bolts securing the muffler. Apply penetrating oil if they are stuck from heat corrosion.
Extract the Spark Arrestor
Pull out the metal screen from the exhaust port. Clean it with a wire brush or burn off carbon in a fire if safe to do so.
Inspect the Muffler
Check for cracks, internal blockages, and corrosion. Replace the muffler if damaged. Restricted flow reduces power significantly.
Remove Cylinder and Piston
Access the engine core by removing the cylinder assembly.
Remove Cylinder Bolts
Take out the four 6mm or 8mm bolts securing the cylinder. Use a swivel ratchet for tight spaces. Clean the holes with compressed air after removal.
Lift Off the Cylinder
Gently pull the cylinder straight up. If it is stuck, tap lightly with a rubber mallet. Never pry on the cylinder. Inspect the cylinder bore for scoring, glazing, or pitting. Examine the piston for cracks, ring wear, and scuffing.
Diagnostic Clue: A glazed bore has a mirror finish and means the engine overheated. A scored bore suggests debris or lack of oil.
Extract Piston and Connecting Rod
Remove the heart of the engine to inspect internal wear.
Push Out the Wrist Pin
Use a small punch to drive out the piston pin. Support the piston to avoid cracking it.
Remove the Snap Ring
If present, use snap ring pliers to remove the retaining ring on the pin ends.
Pull Off the Connecting Rod
Slide the rod off the crankshaft needle bearing. Inspect the rod bushing for wear or flaking. Check the crankshaft for smooth rotation and no wobble.
Note: On Husqvarna 61, burnt sawdust found under the cylinder indicated poor lubrication, not seizure.
Remove Recoil Starter
Clear the way for flywheel access by removing the starter assembly.
Unscrew the Starter Housing
Remove the 3 or 4 screws securing the recoil assembly.
Pull Off the Starter
Gently lift it off. Inspect the starter rope for fraying. Check the pulley for cracks. Look at the spring for breakage. Replace any damaged components.
Warning: Never unwind the spring fully. It can snap and cause injury.
Remove Flywheel and Clutch
This is the final step before full teardown of the engine internals.
Lock the Crankshaft
Use a rope-in-cylinder tool or flywheel holder to prevent rotation.
Remove the Flywheel Nut
Unscrew the 13mm nut. It is often reverse-threaded, meaning you tighten it clockwise to loosen. Use an impact wrench if it is stuck.
Pull Off the Flywheel
If it will not budge, use a flywheel puller. Never pry on the flywheel. You will damage the stator or keyway. Inspect the magnets for damage. Check the keyway for shearing.
Remove the Clutch and Sprocket
Take off the clutch drum. The nut is reverse-threaded. Inspect the clutch shoes for glazing or wear. Check the springs for weakness. Remove the drive sprocket and check that the needle bearing spins freely. Lubricate or replace as needed.
Clean All Components Properly
Cleaning reveals hidden issues and prepares parts for inspection or reuse.
Degrease Engine Parts
Use degreaser and a stiff brush on housing, covers, and metal parts. Rinse thoroughly and dry completely.
Soak the Chain in Soda Crystals
Mix sodium carbonate in warm water. Soak the chain for 2 to 3 minutes, agitate, rinse, and dry.
Clean the Guide Bar
Clear oil holes with a pin. File rails for even height. Replace the bar if pitch depth exceeds 6mm. It should be 5mm for 3/8-inch pitch.
Ultrasonic Clean the Carburetor
Use a low-heat cycle with mild detergent. Avoid high temperatures that warp plastic components.
Critical: Test the oil pump after cleaning. Spinning the clutch should push oil to the bar tip.
Inspect and Replace Worn Parts
Know when to repair versus replace. Use this table as a guide for common replacement intervals.
Replace These Regularly
| Part | When to Replace |
|---|---|
| Air Filter | Every 10 to 20 hours or when dirty |
| Spark Plug | Annually or if fouled |
| Chain | After 5 uses or when dull |
| Guide Bar | If bent or rails uneven |
| Drive Sprocket | When wear exceeds 0.5mm |
| Fuel Lines | If cracked or brittle |
Check for These Failures
Piston rings that are collapsed indicate the engine needs a rebuild. Crankshaft wobble means the crankshaft requires replacement. Clutch slippage suggests worn shoes or weak springs. No oil flow points to clogged lines or a failed pump.
Organize Everything for Reassembly
Avoid mistakes with smart preparation before putting everything back together.
Use Labeled Containers
Sort screws by location: cylinder, cover, clutch, and so on. Label each container clearly.
Take Photos
Snap pictures at each step. These are especially helpful for linkage routing and component placement.
Sketch Linkage Paths
Draw simple lines showing how throttle and choke connections attach. This prevents confusion during reassembly.
Pro Tip: Store gaskets flat. Replace them if compressed. Never reuse a head gasket.
Reassemble in Correct Order
Reverse the disassembly process with care and attention to detail.
Install Piston and Rod
Slide the piston into the cylinder and align the rings. Insert the wrist pin and secure it with the snap ring. Attach the connecting rod to the crankshaft.
Torque the Cylinder Evenly
Place the cylinder over the piston. Tighten the bolts in a cross pattern to the specified torque.
Reinstall the Flywheel
Slide it on and align the keyway. Tighten the nut securely. Use an impact wrench if needed.
Replace the Clutch and Sprocket
Install a new sprocket with an oiled bearing. Reattach the clutch drum. Remember the nut is reverse-threaded.
Mount Bar and Chain
Ensure the chain runs in the correct direction. Tension it properly. It should be snug but pull freely.
Final Checks
Set the spark plug gap to 0.5mm. Verify the chain brake locks and releases smoothly. Check oil flow by spinning the clutch and observing the bar tip. Test ignition by pulling the starter and looking for a blue spark.
Test Before Full Use
Verify everything works before returning the saw to regular service.
Prime and Start
Use fresh 50:1 fuel-oil mix. Prime the carburetor and pull the starter. The saw should start in 3 to 5 pulls.
Check Idle and Throttle
The engine should idle smoothly and rev cleanly. Adjust the carburetor if needed.
Monitor for Smoke
Blue smoke means too much oil. White smoke indicates overheating. Black smoke suggests a rich fuel mix.
Key Takeaways for Taking Apart Your Chainsaw
Knowing how to take apart a chainsaw gives you control over its performance and lifespan. From removing the chain to extracting the piston, every step builds toward a deeper understanding of your tool. With the right tools, safety habits, and organization, you can diagnose problems, replace worn parts, and restore full power without paying for expensive repairs.
Most failures stem from neglect rather than mechanical breakdown. Clean air filters, fresh fuel, and regular oiling prevent approximately 80% of issues. When in doubt, disassemble, inspect, and clean. Your chainsaw will thank you with years of reliable service.
Frequently Asked Questions About Taking Apart a Chainsaw
What tools do I need to take apart a chainsaw?
You will need socket wrenches in metric sizes, Torx bits, screwdrivers, pliers, a flywheel holder, and a flywheel puller. Calipers, a gasket scraper, and an ultrasonic cleaner are also useful for thorough disassembly and cleaning.
How do I safely disconnect the spark plug before disassembly?
Pull the spark plug boot straight off the wire. Use a spark plug socket to remove the plug. This prevents accidental ignition during the entire teardown process.
What is the correct order for disassembling a chainsaw?
Start with external components: chain, guide bar, air filter, and covers. Then remove the carburetor, muffler, cylinder, piston, and finally the flywheel and clutch. This logical sequence prevents damage and makes reassembly easier.
How do I clean a chainsaw chain without damaging it?
Soak the chain in soda crystals dissolved in warm water for 2 to 3 minutes. Agitate gently, rinse thoroughly, and dry completely. This removes pitch and sap without damaging the steel.
When should I replace the guide bar?
Replace the guide bar if it is bent, if the rails are uneven in height, or if the oil holes are permanently clogged. A banana-shaped bar causes overheating and should be replaced immediately.
How do I prevent losing small parts during disassembly?
Use labeled containers for screws and fasteners. Take photos at each step. Sketch linkage paths before disconnecting them. Label fuel lines with tape or zip ties to ensure correct reconnection.



