
A leaking chainsaw fuel tank is more than just messy. It is dangerous, inefficient, and can lead to complete engine failure. Whether you are dealing with a pinhole in a plastic tank or a seam split on a vintage Husqvarna magnesium model, chainsaw fuel tank repair is a task that demands precision and the right approach. Many users attempt quick fixes that fail under vibration and fuel exposure, leading to repeated downtime. This guide delivers proven, step-by-step solutions based on documented user experiences and material science. You will learn how to diagnose leaks accurately, prepare surfaces correctly, choose the best repair method for your tank type, and avoid the common mistakes that doom DIY repairs.
Diagnose the Leak Accurately
Before any repair begins, confirm the exact source and nature of the leak. Misdiagnosis leads to wasted effort and recurring problems that could have been prevented with proper identification.
Check for Common Leak Locations
Leaks typically occur at stress points and high-vibration areas. Watch these zones carefully when your saw is running.
The most common leak locations include seams on two-piece tanks, mounting screw holes where over-tightening punctures thin walls, fuel line grommets, handle or clutch housing contact zones, and cracks near the filler neck or base. Run the saw horizontally and watch for drips during operation. This mimics real stress and reveals intermittent leaks that would otherwise go unnoticed.
Identify Leak Type
Understanding the leak characteristic helps pinpoint the cause and choose the right repair method.
| Leak Characteristic | Likely Cause |
|---|---|
| Seepage only when full | Stress crack or seam separation |
| Fuel odor, no visible drip | Micro-crack or outgassing |
| Leak near screw | Puncture from over-tightening |
| Swelling or soft spots | Plastic degradation from ethanol fuel |
Drain and Disassemble Safely
Never skip this step. Residual fuel creates serious fire hazards and prevents proper adhesive bonding to the tank surface.
Step-by-Step Tank Removal
Follow these steps to safely remove the tank for repair.
Run the saw dry or siphon remaining fuel into an approved container. Remove fuel lines from both the carburetor and the tank. Unscrew mounting hardware while inspecting for sharp edges or areas where screws may have over-penetrated. Label all components, especially fuel versus oil lines, to avoid dangerous mix-ups during reassembly.
Always work outdoors or in a well-ventilated area. Keep a fire extinguisher nearby and never allow sparks or open flames near the workspace.
Clean and Prepare the Surface

This is the most critical phase of any repair. Over 80% of repair failures stem from poor cleaning and inadequate surface preparation, regardless of the adhesive used.
Deep Cleaning Procedure
Proper cleaning eliminates microscopic fuel residues trapped in pores that would outgas under heat and break adhesive bonds.
Wash the interior with warm, soapy water or brake cleaner. Scrub with a soft brush, avoiding wire brushes that can damage plastic or magnesium surfaces. Rinse thoroughly with acetone or denatured alcohol. Swirl approximately one-quarter cup inside the tank, then drain and repeat until the runoff appears clear.
Dry completely by blowing out moisture with compressed air. Allow the tank to air-dry for 24 to 48 hours in a warm, dust-free area. Use a fan to accelerate drying, but never apply direct heat from torches or heat guns.
Repair Small Leaks: Superglue and Baking Soda
This method ranks number one for small holes under 6mm in both plastic and metal tanks. It delivers the best combination of speed, cost, and durability.
Why This Method Works
Cyanoacrylate, commonly known as superglue, reacts with baking soda to form a rigid, fuel-resistant polymer. This creates an instant composite patch that bonds to the tank material while resisting gasoline, oil, vibration, and thermal expansion.
Step-by-Step Application
Clean and dry the leak site completely. Apply superglue directly over the hole. Sprinkle baking soda liberally over the wet glue, using enough to absorb all the liquid adhesive. Press gently and wait 10 to 15 seconds for full cure. Blow off excess baking soda and inspect the repair. The patch should be hard and glassy.
This method has proven results. Repairs on Stihl 034, 038, and 044 models lasted 18 to 24 months or more under regular use. The main advantages are rapid curing in seconds, resistance to gasoline and oil, minimal cost, and effectiveness on both plastic and metal. Limitations include unsuitability for large cracks or structural gaps and the risk of clogging fuel vents if excess baking soda is applied.
Fix Larger Cracks: Automotive Fuel Tank Epoxy
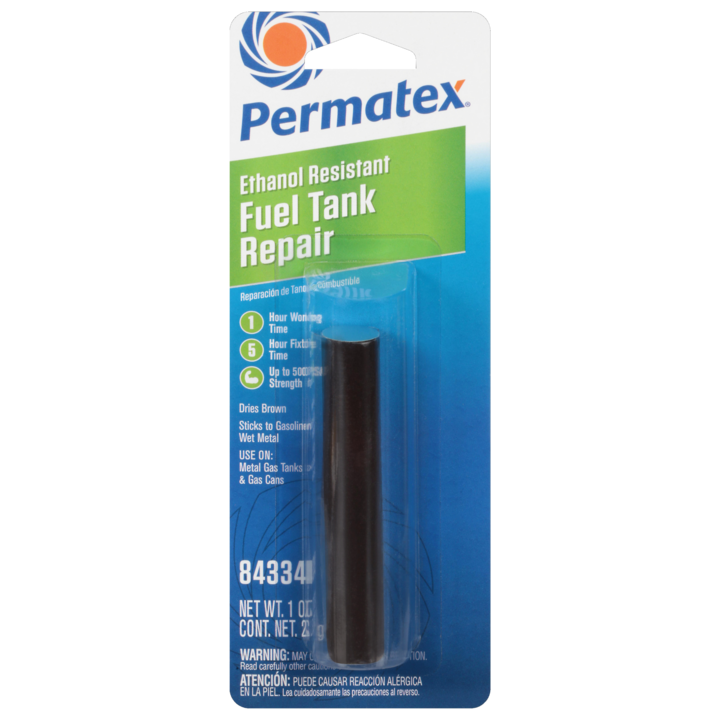
For medium to large breaches where structural integrity is compromised, automotive-grade fuel tank epoxy provides a more robust solution than quick fixes.
Choose the Right Epoxy
Avoid generic JB Weld for fuel tank repairs. Mixed results have been documented, with failures occurring within days due to poor mixing and inadequate surface abrasion. Use automotive-grade fuel tank epoxy available at auto parts stores. These products are specifically formulated for gasoline resistance, and flexible-cure versions handle vibration better than rigid formulations.
Application Steps
Sand the area with 80 to 200 grit sandpaper to create a rough surface for adhesion. Clean thoroughly with acetone, wiping until no residue remains. Mix the epoxy precisely according to package instructions. Apply in layers, with the first layer sealing the crack and the second building thickness. Clamp the repair if possible, especially for seam splits. Allow 24 to 72 hours for full cure. Do not rush this process.
Reinforce Plastic Tanks: Layered Paper and CA Glue
This method mimics fiberglass repair and works exceptionally well for brittle or flexing plastic tanks that need structural reinforcement.
How It Works
Paper fibers act as reinforcement while fuel-resistant cyanoacrylate binds them into a rigid laminate. This is essentially the same principle as fiberglass-reinforced plastic, but using readily available materials.
Build the Patch
Clean and dry the repair zone thoroughly. Apply CA glue directly to the crack. Lay down toilet paper or newspaper, pressing the material firmly into the glue. Allow it to dry, then apply another layer and repeat the process for four to five total layers. Seal the top layer with extra glue to ensure a smooth, fuel-resistant surface.
This technique has been tested on weedeater tanks with successful results lasting over two years. The critical factors are ensuring the first layer bonds to bare, clean plastic and avoiding air bubbles between layers.
Repair Magnesium Tanks: Epoxy or TIG Welding
Husqvarna 2100 and 2101 series tanks are two-piece magnesium casings sealed with aging adhesives. These require specialized approaches that differ from standard plastic tank repairs.
Option One: High-Grade Epoxy with Clamping
Separate the halves carefully and clean all old adhesive from mating surfaces. Sand the surfaces with 120-grit paper. Degrease with toluene or acetone. Apply fuel-resistant epoxy, not standard JB Weld. Clamp tightly and allow 48 hours or more for complete cure.
Be aware that one user reported high-grade epoxy failed after six months of hard use on a Husqvarna 2100. This suggests factory bonds may involve molecular adhesion that is difficult to replicate with consumer-grade products.
Option Two: TIG Welding
TIG welding offers a permanent fix but requires an experienced technician. The process needs argon shielding and magnesium filler rod. The cost may exceed the value of the saw, but this option is viable for rare models where replacement parts are unavailable.
Seal Bonded Tanks Internally: Red-Kote Method
For non-disassemblable composite tanks like the Homelite 925, internal coating with Red-Kote provides an effective seal without requiring disassembly.
Why Red-Kote Works
This thick, solvent-based coating flows into micro-cracks and cures into a flexible, fuel-resistant liner. It is ideal for tanks with degraded internal seals where other external repair methods would be visible or ineffective.
Step-by-Step Coating
Drain and disassemble the tank completely. Clean with detergent followed by acetone. Pour Red-Kote into the tank, using enough to roll it around all interior surfaces. Drain excess into a clean container for reuse. Allow the coating to cure for a minimum of one hour undisturbed. In cold temperatures around 40 to 43 degrees Fahrenheit, extend the cure time. Ensure proper ventilation and do not inhale fumes. Perform a sniff test before reassembly. If solvent odor remains, wait longer before use.
Emergency Fixes: Bar Soap and Silicone
These methods are strictly temporary solutions for stabilization only. Never rely on them as permanent repairs.
Bar Soap Plug
Rub bar soap into a small hole. It hardens on contact with fuel and creates a short-term seal to stop leaks during transport or while preparing for a proper repair. This method has anecdotal support, with one user reporting it worked for weeks on a 1970s car fuel tank.
Silicone and Toilet Paper Field Fix
Mix Seal-All or similar flexible sealant with wet toilet paper. Apply over the leak like papier-mâché and allow full cure for 24 hours or more. One user reported this lasted several years, though they drain fuel after every use to reduce stress on the repair.
Avoid These Common Repair Mistakes
Even the best materials fail if applied incorrectly. These are the most frequent errors that cause repair failures.
Skipping surface preparation is the number one cause of failure. Adhesive delaminates within days when applied to contaminated surfaces. Always clean, sand, and dry thoroughly. Using non-fuel-resistant glue is another common error. Standard superglue or silicone breaks down in gasoline over time. Use only fuel-safe adhesives rated for hydrocarbon exposure. Over-tightening screws after repair can crack repaired zones. Tighten gently, just enough to seal without creating new stress points. Rushing the cure time leads to weak bonds. Epoxy and Red-Kote need full cure time of 24 to 72 hours before refueling.
When to Replace the Tank
Repair is not always the best option. Consider replacement in these situations.
Replace the tank if damage is large or structural, with cracks exceeding 6mm or visible warping. Replace if the internal liner is disintegrated, which is common in tanks exposed to ethanol-blended fuels. Replace if an OEM tank is affordable and readily available. Replace if the saw is used professionally where reliability is critical.
Repair makes sense when the saw is vintage or rare and parts are unavailable. Repair is appropriate when the leak is small and accessible. Repair is practical when the cost of replacement significantly exceeds the value of the saw.
Recommended Repair Hierarchy
This ranking reflects the best methods based on effectiveness, cost, and documented longevity.
| Rank | Method | Best For |
|---|---|---|
| 1 | Superglue + Baking Soda | Small holes, quick fix |
| 2 | Automotive Fuel Tank Epoxy | Medium cracks, structural |
| 3 | Layered Paper + CA Glue | Plastic reinforcement |
| 4 | Quick Steel / Metal Putty | Irregular shapes, metal tanks |
| 5 | Red-Kote Internal Coating | Bonded, non-disassemblable tanks |
| 6 | Loctite 5900 | Oil tanks only |
| 7 | Bar Soap | Emergency seal only |
Final Tips for Long-Term Success
Drain fuel after every use, especially on repaired tanks. Store the saw vertically to reduce stress on the tank walls. Inspect periodically for new leaks or signs of swelling. Label repaired tanks so you know the history of the repair. Use ethanol-free fuel when possible to protect plastic components and internal liners.
Frequently Asked Questions About Chainsaw Fuel Tank Repair
Can I use regular superglue to repair a chainsaw fuel tank?
Standard superglue alone is not recommended for fuel tank repairs because it degrades when exposed to gasoline. The superglue and baking soda method works because the baking soda triggers a chemical reaction that creates a fuel-resistant polymer. Use only fuel-safe adhesives or the baking soda method for reliable results.
How long does a superglue and baking soda repair last?
Documented cases show these repairs lasting 18 to 24 months or more on chainsaws including Stihl 034, 038, and 044 models. The actual longevity depends on how often the saw is used, fuel type, and storage conditions.
What causes chainsaw fuel tanks to develop leaks?
Common causes include material fatigue from vibration, impact damage from drops, seam degradation from aging adhesives, over-tightened screws puncturing tank walls, and chemical exposure to ethanol-blended fuels that degrade plastic and internal liners.
Can I weld a magnesium chainsaw fuel tank?
TIG welding is possible for magnesium tanks like those in Husqvarna 2100 and 2101 series saws, but it requires an experienced welder with argon shielding and magnesium filler rod. The cost often exceeds the saw value, making epoxy repair a more practical option for most users.
Should I replace or repair a leaking fuel tank?
Replace the tank if damage is large, structural, or if an OEM replacement is affordable. Repair is practical for small leaks, vintage saws with unavailable parts, or when the leak is accessible and the saw has sentimental or limited value.
Key Takeaways for Chainsaw Fuel Tank Repair Success
A successful chainsaw fuel tank repair keeps your tool running and out of the landfill, but only a perfect bond ensures lasting results. The superglue and baking soda method remains the proven hero for small leaks, offering the best combination of speed, cost, and durability with documented success spanning 18 to 24 months or longer. Surface preparation is the single most critical factor in repair success. Thorough cleaning, proper drying, and adequate surface abrasion determine whether the bond holds or fails within days. For daily professional use or large damage, OEM replacement or professional TIG welding remains the gold standard, while the various repair methods in this guide provide reliable solutions for hobbyists and vintage saw owners willing to invest the effort in proper preparation.



