
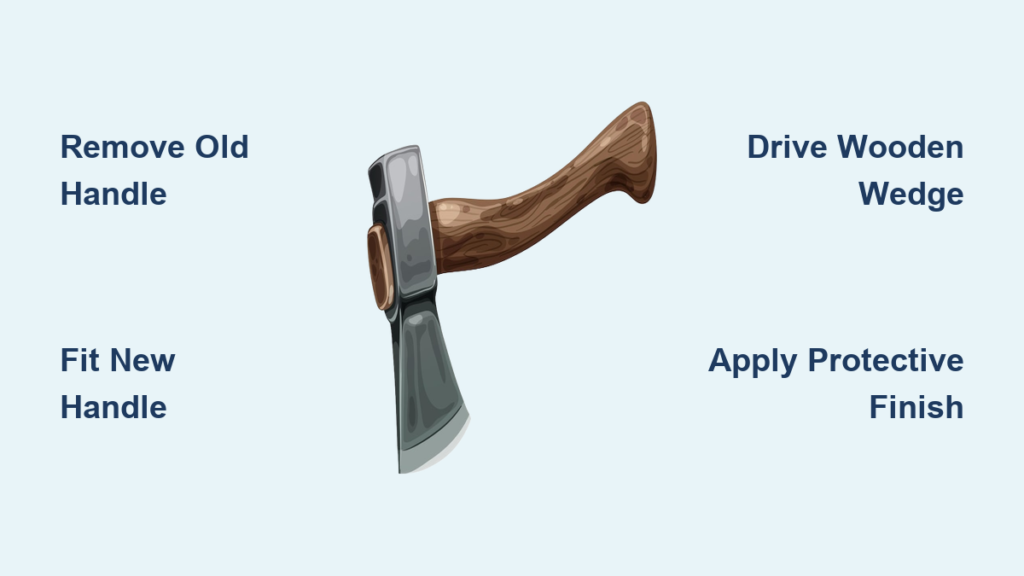
A cracked or loose axe handle is more than an inconvenience—it’s a serious safety hazard. When an axe head flies off mid-swing, the consequences can be severe. Installing a new handle properly restores balance, locks the head firmly in place, and adds decades of reliable service to your tool.
This guide walks you through every step of how to install an axe handle with confidence. You’ll learn how to remove the old handle without damaging the head, fit the new handle with precision, and lock everything in place with wedges and glue for a bond that lasts.
Gather Essential Tools and Materials
Before swinging a hammer, get everything ready. The right tools prevent mistakes and ensure a snug, durable fit.
Tools You’ll Need for the Job
- Hammer or mallet for driving the handle and setting wedges
- Hand saw or reciprocating saw to cut the old handle near the head
- Drill with assorted bits to clear old wood and glue from the eye
- Punch or drift punch to knock out stubborn debris
- Utility knife or chisel to scrape resin and residue
- Files or sandpaper to fine-tune the handle fit
- Bench vise or clamps to hold the head steady while you work
Choose the Right Replacement Handle
Quality matters when picking a new handle. Hickory and ash are top choices for their strength and shock resistance. Gränsfors Bruk handles are crafted by Bröderna Smedbergs in Sweden using kiln-dried wood, which keeps moisture content low and prevents future shrinkage.
A green or wet handle will shrink as it dries, loosening the head and creating a dangerous situation. Always confirm the wood is properly seasoned before installation.
Match the handle profile to your axe model. If the taper feels slightly too thick, sand it down gradually until you achieve a firm friction fit.
Remove the Old Handle Without Damaging the Head
Never burn off an old handle. Heat destroys the temper of the steel and weakens the axe head permanently. Use mechanical methods instead.
Saw, Drill, and Punch Out the Old Handle
Start by sawing the old handle as close to the axe head as possible. This exposes the wedge slot and reduces the amount of wood you need to remove.
Next, drill out the core of the remaining wood using progressively larger bits. Work from the center outward and avoid gouging the inside walls of the axe eye.
Finally, punch out the remaining stump from the poll side (the flat end opposite the blade). Rest the axe head on a wooden block with the bit facing down, then drive the debris through with a punch and hammer.
Clean the Axe Eye Thoroughly
After clearing the bulk of the wood, scrape the inside of the eye with a knife or small chisel. Remove every trace of old glue, varnish, and resin.
Run a dry cloth through the eye to confirm a smooth, debris-free surface. A clean eye ensures the new handle seats fully and evenly.
Fit the New Handle with Precision
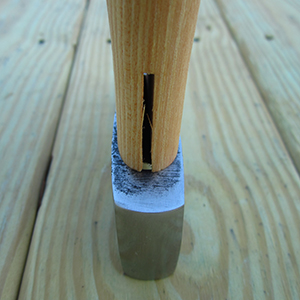
Alignment is everything. A handle installed at the wrong angle affects swing balance, cutting accuracy, and user fatigue.
Drive the Handle into the Axe Eye
Lay two planks on your workbench and rest the axe head on them with the bit facing up and the eye horizontal. This setup protects the blade and lets you tap the handle straight in.
Start by hand pressure. The handle should resist sliding in—if it drops freely, it’s too small. If it refuses to move, sand the tapered end lightly and try again.
Once the handle begins to seat, use a hammer or mallet to drive it fully into place. Stop when the shoulder of the handle meets the head and roughly 6 mm of wood protrudes through the poll.
Check the Blade Alignment
As the handle seats, verify the cutting edge angle matches your preference. Most users want the blade perpendicular to the handle when gripped naturally.
If the handle rotates during insertion, back it out gently and reposition. Once fully seated, adjustments become difficult, so take your time here.
Hold the axe by the head and simulate a swing to confirm the orientation feels right before moving to wedging.
Lock the Handle with a Wooden Wedge

The wooden wedge expands the handle inside the eye, creating the friction that holds the head secure. Glue reinforces this bond and seals out moisture.
Apply Glue and Drive the Wedge
Before installing, coat the wedge kerf and the wedge itself with wood glue. This waterproofs the joint and locks the wedge in place.
Hammer the wedge straight into the kerf, tapping evenly to avoid splitting the handle. Drive it fully but leave it slightly proud—do not sink it flush yet.
If the handle still wobbles after wedging, the initial fit was too loose. A different handle or further shaping may be required.
Add an Iron Wedge for Heavy-Duty Use

Larger axes and splitting tools benefit from an iron wedge. A three-pronged iron wedge resists the vibration and impact that can work a wooden wedge loose over time.
Install the Iron Wedge Diagonally
Position the iron wedge across the wooden wedge at a diagonal angle. This positioning expands the wood in multiple directions and locks the assembly tightly.
Hammer the wedge in until fully seated. The prongs bite into the surrounding wood and resist pull-out far better than a flat metal wedge.
Note that smaller axes and hatchets rarely need an iron wedge. Use one only for heavy chopping or splitting applications.
Trim, Sand, and Seal the Handle
With the handle secured, finish the job by trimming excess material and protecting the wood.
Cut the Excess Flush
Use a fine-tooth hand saw to trim the protruding handle and wedge flush with the poll. Leave about 2 to 3 mm proud so the wood has room to shrink slightly without exposing the wedge.
Take care not to cut into the axe head. A backsaw or flush-cut saw gives the cleanest results.
Sand Smooth and Apply a Protective Finish
Smooth all cut surfaces with 120 to 150 grit sandpaper, then finish with 220 grit for a comfortable grip.
Choose your protective finish:
– Linseed oil penetrates deeply and resists moisture
– Tung oil offers stronger water resistance and durability
– Wax adds smoothness but needs frequent reapplication
Let the oil soak overnight, then buff away the excess. Repeat two or three times for maximum protection.
Test the Rehandled Axe Before First Use
A quick test confirms the handle is secure and balanced before you put the axe to work.
Perform a Tap and Swing Test
Hold the axe by the head and tap the knob end lightly with a hammer. Listen for clicks or rattles—any sound means the handle is loose.
Swing the axe slowly through the air. A balanced axe feels smooth and controlled. Wobble or vibration signals misalignment that needs correction.
If anything feels off, disassemble and inspect the fit. Never use an axe that feels unstable.
Maintain the Handle for Long-Term Reliability
Avoid these common mistakes to keep your handle tight for years:
– Never hammer on the poll, which deforms the eye
– Never pry with the axe, which stresses the joint sideways
– Store the axe in a dry location to prevent swelling and cracking
– Re-oil the handle every few months to preserve flexibility
Inspect the wedge area once a year. Small cracks around the kerf signal it’s time for a replacement before failure occurs.
Frequently Asked Questions About Installing an Axe Handle
Can I burn off an old axe handle to remove it?
No. Burning an old handle can ruin the temper of the steel axe head, weakening it permanently. Always use mechanical methods like sawing, drilling, and punching to remove the old handle safely.
How do I know if my axe handle needs replacing?
Visible cracks, deep splinters, looseness in the head, or any movement when you tap the handle are clear signs the handle needs replacement. A wobbly head is a serious safety hazard.
What type of wood is best for an axe handle?
Hickory and ash are the top choices due to their strength, flexibility, and shock absorption. Always use kiln-dried wood to prevent shrinkage after installation.
Do I need an iron wedge for my axe?
Iron wedges are recommended for larger axes used for heavy chopping or splitting. Smaller hatchets and general-use axes typically perform well with just a wooden wedge and glue.
How tight should the new handle fit?
The handle should require firm hand pressure to start entering the eye and hammer taps to seat fully. If it slides in easily, the fit is too loose and the handle is unsafe.
What finish should I use on a new axe handle?
Linseed oil is the traditional choice for penetrating protection. Tung oil offers greater water resistance. Wax provides a smooth feel but requires more frequent reapplication.
Key Takeaways for a Safe and Lasting Axe Handle Installation
Installing an axe handle is a straightforward process when you follow proven techniques. Start with quality, kiln-dried wood matched to your axe model. Remove the old handle mechanically—never with fire. Drive the new handle in straight, align the blade angle carefully, and lock everything in place with glue, a wooden wedge, and an iron wedge for heavy-duty tools.
Your next step is simple: gather your tools, choose a high-quality handle, and set aside an afternoon to do the job right. A properly rehandled axe feels balanced, cuts cleanly, and stays safe through decades of hard work.



