
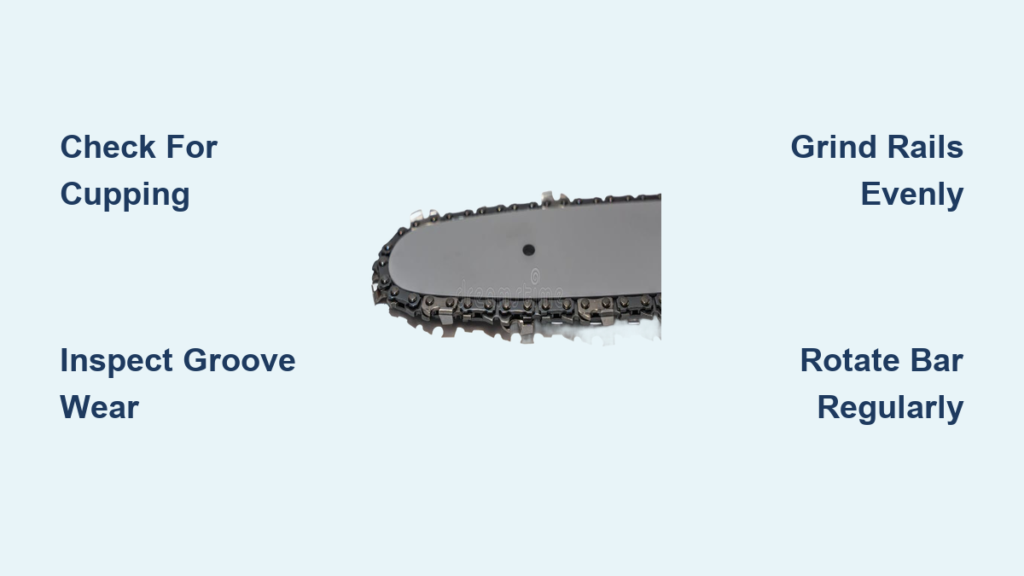
If your chainsaw isn’t cutting straight, overheating, or the chain keeps throwing, the problem might not be the chain. It could be your guide bar. Proper chainsaw bar repair and maintenance are essential for safety, efficiency, and equipment longevity. The guide bar endures extreme stress during operation, from friction and heat to bending and debris impact. This guide delivers a complete, step-by-step approach to diagnosing, repairing, and maintaining chainsaw bars using proven techniques.
Diagnose Common Bar Wear Issues
Check Top Rail Flattening and Cupping
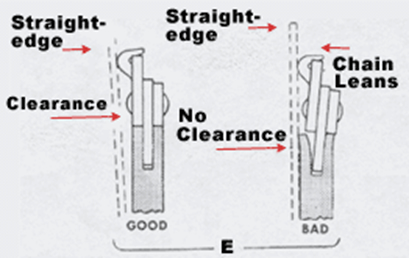
Inspect the top surfaces of both rails for flattening, especially just behind the sprocket. A healthy rail has a slightly rounded profile. When worn, it becomes flat or develops a concave depression known as cupping. This deformation occurs from repeated chain flexing and pressure at the base of the cut. Cupping misaligns the chain, increases friction, and accelerates wear on both the bar and chain. If you notice visible dimpling or uneven contact along the rail, the bar is past mid-life and needs attention.
Identify Guide Groove Wear
The internal guide groove is the most critical wear zone. It holds the chain’s drive links and must maintain precise dimensions. To test it, slide a drive link into the groove and move it side to side. Minimal movement means the chain feels snug and the groove is acceptable. Noticeable wobble or lateral play indicates excessive wear. A loose fit means the chain isn’t properly supported, increasing the risk of derailment, especially under load.
Look for Mushrooming and Spreading Edges
Mushrooming appears as raised, rounded edges on the sides of the rails, caused by metal deformation under heat and pressure. These protrusions restrict chain movement and create drag. Similarly, spreading metal flares outward, making the groove wider than intended. Both conditions reduce cutting accuracy and increase the chance of binding or kickback. Run your fingers along the rails. Any sharp or bulging edge requires immediate smoothing.
Detect Heel and Nose Wear
The bar heel (mounting end) wears from chain slack and improper tension. A narrowed heel profile increases the distance the chain travels outside the groove at the drive sprocket, destabilizing it and raising the risk of chain throw. At the nose, check for deformation, missing parts, or a damaged sprocket. If the nose bearing doesn’t turn freely or feels gritty, internal damage may have occurred.
Perform Visual and Straightness Inspections
Remove Chain and Clean the Bar
Before inspection, shut off the saw and disconnect the spark plug. Remove the side cover and chain. Wipe away sawdust, pitch, and oil residue with a rag or brush. A clean surface reveals hidden damage and allows accurate assessment. Use a bright LED light to illuminate the guide groove. Flashlights often lack sufficient brightness for this critical inspection.
Sight Down the Rails for Bends
Hold the bar at eye level and look down its length like sighting a rifle barrel. This reveals bends or sweeps in the rail, torsional twist (one side higher than the other), and asymmetrical deformation. View from both ends to catch subtle warping. Even slight bends affect cutting accuracy and chain tracking.
Use a Straightedge to Test Rail Flatness
Place a precision straightedge along the top of each rail. A healthy bar will have a small gap between the straightedge and the bar body. If the straightedge sits flush, the rail is worn beyond safe limits. Repeat on both sides. Significant wear means structural integrity is compromised. Consider replacement if the bar fails this test.
Grind Rails to Restore Alignment
Why Rail Grinding Matters
Uneven cutting habits like favoring one side during undercuts cause one rail to wear faster, leading to crooked cuts and misaligned chains. Grinding restores the rails to a level, 90-degree angle relative to the bar side, correcting tracking issues and improving performance. Professional shops use specialized bar rail grinders, but effective DIY methods exist.
Grind Rails Using a Table Saw
You can recondition rails at home with basic tools. You will need a 7-inch diameter by 1/8-inch thick metal cutting disc with a 5/8-inch center hole, a table saw with angle adjustment, safety goggles or face shield, and leather gloves.
Mount the disc securely on the saw arbor. Set the blade to exactly 90 degrees using a precision square. Turn on the saw and let the disc reach full speed. Hold the bar with both hands and pass it steadily over the spinning disc. Move from tip toward base, applying light, consistent pressure. Focus on the middle portion of the disc to avoid edges and prevent vibration. Grind until new, square edges appear along the full rail length. At the tip, blend gently. Do not remove material from the nose structure.
Excessive force can burst the wheel. Let the disc do the work.
Deburr and Clean After Grinding
After grinding, remove wire-like burrs with a fine-tooth flat file. Clean the guide groove thoroughly using a groove cleaner tool or pocket knife. Flush oil passages with compressed air. Lubricate the nose bearing generously before reassembly. Each grinding pass removes metal. Repeated grinding weakens the bar. Monitor thickness and replace when worn.
Remove Burrs and Smooth Rail Edges
Address Wire-Like Burrs
Wire edges form due to metal fatigue or uneven wear. They increase drag, break off easily (potentially taking healthy metal with them), and create stress points that can lead to cracks. These filaments are sharp and dangerous. Always wear gloves when handling.
File or Sand Burrs Safely
Use manual filing with a fine-tooth flat file, using controlled strokes along the rail edges. Alternatively, use power sanding with an electric or pneumatic disc sander. Ensure the disc rotates so it ejects debris away from the bar. Sanding toward the bar forces abrasive grit into the groove, damaging internal surfaces and the nose bearing. Work until edges are smooth but not rounded. Maintain a clean 90-degree profile.
Clean Guide Groove and Oil Passages
Clear Debris to Prevent Wear
Contaminants like pitch, sawdust, and metal shavings accelerate wear and block lubrication. A plugged groove causes chain overheating and rapid failure.
Use a groove cleaner tool (multi-purpose pick), pocket knife, compressed air, and a bright LED panel for internal view. Start at the front of the bar and work backward. Scrape out debris with the groove tool or knife. Never pull debris back toward the sprocket. This risks clogging the oil delivery system.
Inspect the oil port located at the top on one side and bottom on the other. It feeds lubricant through a slot to the bar tip. Blow out residue with compressed air. Verify the lubrication channel is unobstructed. Disassemble bar and chain periodically, even when sharpening in place, to ensure full cleaning.
Set Correct Chain Tension
Avoid Too Loose or Too Tight
Too loose causes chain sagging and throws, accelerating heel and nose wear. Too tight makes the chain bind and overheat, causing premature tip failure and clutch strain. Both conditions damage the bar.
Lift the bar tip to remove slack. Adjust tensioner until drive links lift slightly from the groove but remain engaged. Chain should rotate freely by hand with moderate resistance. No visible sagging should be present. Low tension causes more heel and nose wear than overtightening. Do not underestimate its impact.
Rotate Bar for Even Wear
Flip the Bar Upside Down
Turn the bar over during chain changes or oil maintenance. The bottom rail wears faster due to direct cutting pressure. Like tire rotation, it extends service life. Professionals flip bars routinely. Logos facing down is normal practice.
Distributes wear between top and bottom rails. Can extend service life by up to 100%. Flip at every chain sharpening or oil change.
Assess and Repair Bent or Damaged Bars
Straighten Slight Bends Safely
Sighting reveals sweeps or bends. Even minor deviations are visible. Use a hydraulic press for gradual, controlled straightening. Alternatively, insert bar into a stump cut, anchor it, and apply slow leverage. Bends may hide internal cracks. Inspect carefully before repair.
Handle Cracked Rails
Visible fissures or hairline cracks mean structural failure. Cracked rails are non-repairable. Replace immediately. Risk of catastrophic breakage during operation is too high.
Open Pinched Rails
Guide groove is compressed, causing chain drag and hot spots. Heat alters steel temper, weakening the bar. Secure bar in a vise. Use a hammer and punch or flat-blade screwdriver to gently widen the groove. Test chain movement. If resistance remains, internal burrs are likely still present. Use a small die grinder with thin disc to smooth until chain moves freely.
Replace Twisted Bars
Torsional deformation is extremely hard to correct. High risk of incomplete fix or further damage. Not cost-effective to repair. Replace if twist is confirmed. Some shops charge more for labor than a new bar. Verify quotes.
Choose Compatible Bars and Tools
Match Specifications Exactly
Use correct pitch, gauge, and link count to prevent misalignment. Common length options include 12, 16, 18, 20, and 24 inches. Gauge options include 0.050, 0.043, and 0.063 inches. Pitch options include 3/8, .325, and .404 inches. Drive link count varies by bar and chain combination.
Use replaceable tip bars available on premium models. The tip replaces independently, extending total bar life and reducing cost and waste.
Follow Best Practices for Longevity
Preventive Maintenance Schedule
Inspect after every binding or kickback. Clean groove and oil hole at each chain sharpening. Rotate bar at each chain change. Check machining plug regularly. Use correct chain specs.
Know When to Replace
Replace if cracked rails (non-repairable), twisted bar (impractical to fix), excessive heel or nose wear, seized nose sprocket, or lateral chain play in groove.
Salvage Usable Parts
Harvest intact tip from retired bar for future use. Extends life of next bar. Proper stewardship turns routine maintenance into long-term value.
Frequently Asked Questions About Chainsaw Bar Repair
How Do I Know If My Chainsaw Bar Needs Repair?
Check for visible flattening or cupping on the rail tops behind the sprocket. Test the guide groove by sliding a drive link side to side. Excessive wobble indicates wear. Feel for mushroomed or spreading edges along the rails. Look for cracks, bends, or a narrowed heel. Any of these signs mean the bar needs attention.
Can I Repair a Bent Chainsaw Bar Myself?
You can straighten slight bends using a hydraulic press or by anchoring the bar in a stump cut and applying slow leverage. However, bends may hide internal cracks. Inspect carefully before repair. Twisted bars are not cost-effective to repair. Replace those instead.
How Often Should I Rotate My Chainsaw Bar?
Flip the bar at every chain sharpening or oil change. This distributes wear between top and bottom rails and can double the effective service life. Professional loggers follow this practice routinely.
What Causes Chain Throwing on a Chainsaw Bar?
Chain throwing often occurs when the bar heel has narrowed from wear. This increases the distance the chain travels outside the groove at the drive sprocket, reducing stability. Using a shorter chain brings the heel closer to the sprocket and reduces derailment risk.
Is Rail Grinding Safe for DIY Chainsaw Bar Repair?
DIY rail grinding is viable using a table saw with a metal cutting disc. Set the blade to exactly 90 degrees. Apply light, consistent pressure. Focus on the middle portion of the disc. This method produces results comparable to professional services when done carefully. Never force the disc or apply excessive pressure.
When Should I Replace My Chainsaw Bar Instead of Repairing it?
Replace the bar if rails are cracked, if torsional twist is present, if heel or nose wear is excessive, if the nose sprocket is seized, or if lateral chain play is evident in the guide groove. A general rule: if repair costs exceed half the price of a new bar, replacement is more economical.
Key Takeaways for Chainsaw Bar Repair Success
Proper chainsaw bar repair saves money, improves safety, and boosts productivity. Regular inspection, cleaning, grinding, and rotation can extend bar life by up to 100 percent, even under heavy use. Always prioritize safety by never running a cracked or severely pinched bar. Remember that chain condition affects cutting performance more than bar straightness. A less-than-perfect bar with a great chain outperforms a rifle-straight bar with a dull chain. When in doubt, replace the bar. Proper stewardship turns routine maintenance into long-term value.



