
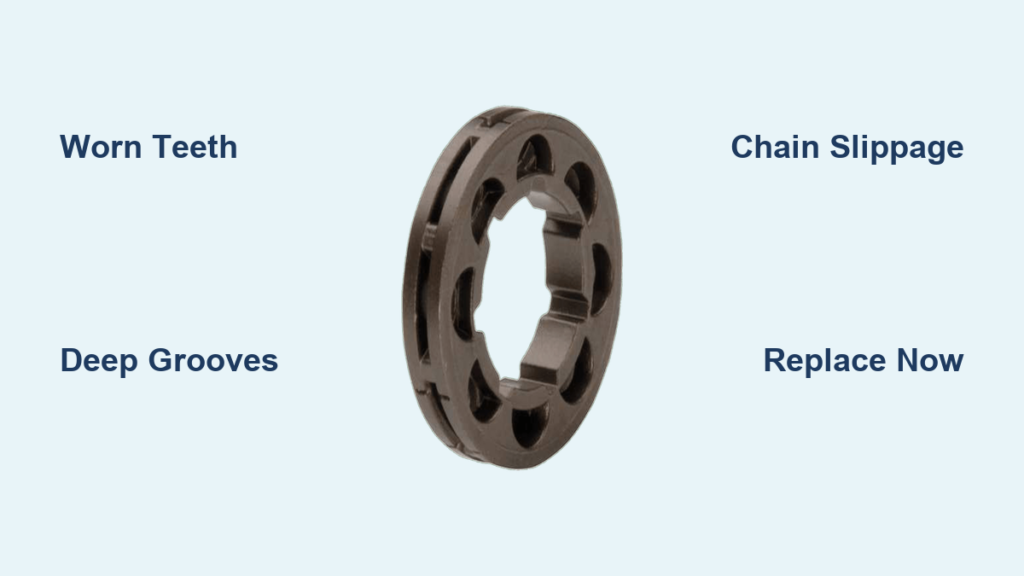
A worn chainsaw sprocket silently ruins cutting performance while damaging your chain and guide bar. Ignoring chainsaw sprocket wear leads to dangerous skipping, poor tensioning, and costly collateral damage to your entire cutting system.
You will learn exactly when to replace this critical component to save money and ensure safety. This guide covers visual inspection signs, the 0.5mm measurement rule, and maintenance tips to extend your equipment life.
Spotting Early Signs of Chainsaw Sprocket Wear

Catching degradation early prevents cascading damage to your expensive chain and guide bar. A worn sprocket degrades gradually rather than failing all at once. Learning to recognize these specific symptoms ensures you stay ahead of total system failure.
Visual Indators of Damage
Inspect your sprocket every time you sharpen or replace your chain. Look for these specific visual cues that signal immediate attention is needed.
- Hooked or Chipped Teeth: Worn teeth develop a distinct hooked profile. Chipping indicates impact damage or severe metal fatigue.
- Deep Grooves Between Teeth: Drive links carve U-shaped valleys into the metal. Replace the sprocket if grooves exceed 0.5mm.
- Thin Webbing: The metal between teeth becomes translucent or “toothpick thin.” This indicates imminent structural failure.
- Asymmetry in Rim Sprockets: A warped or uneven rim sprocket causes chain derailment and must be replaced immediately.
Use a dedicated sprocket wear gauge for accuracy. These inexpensive tools fit both rim and spur types to confirm when wear exceeds safe limits.
Operational Symptoms You Cannot Ignore
Your chainsaw often feels wrong before it completely fails. Pay close attention to these performance red flags during operation.
- Chain Slips Under Load: A worn sprocket cannot grip driver links securely during hard cuts.
- Difficulty Tensioning: Chains feel jumpy when hand-rotated or lose tension quickly after adjustment.
- Increased Vibration: Mismatched wear between chain and sprocket creates imbalance and hand fatigue.
- Frequent Derailments: A worn sprocket fails to guide the chain smoothly, increasing throw-off risk in brushy conditions.
Inspect the sprocket immediately if you notice two or more of these symptoms.
Spur vs. Rim Sprockets Wear Patterns

Your chainsaw uses one of two sprocket types, each with distinct wear patterns and maintenance needs. Knowing the difference helps you make smarter replacement decisions.
Spur Sprocket Durability Issues
Spur sprockets are built into the clutch drum as a single unit. This unibody design makes them robust but difficult to service.
- Pros: Stronger under abuse and less prone to warping.
- Cons: Entire clutch drum must be replaced when worn, which is labor-intensive.
- Best For: Occasional users or smaller saws where longevity outweighs service complexity.
When a spur sprocket fails, it often does so catastrophically. Teeth break off and damage the chain and bar. Follow the two-chain rule for replacement unless operating under very light loads.
Rim Sprocket Advantages
Rim sprockets slide onto a splined hub and rotate independently. This design allows for easier swaps and better chain alignment.
- Pros: Replaceable in minutes without removing the clutch drum.
- Flippable Design: Double lifespan by rotating to the unworn side.
- Safety: Reduces chain derailments due to self-alignment features.
- Gearing: Supports changes in tooth count for performance tuning.
Professionals prefer rim sprockets for their serviceability. Upgrading to a rim system is a smart long-term investment even if your saw shipped with a spur.
Measuring Chainsaw Sprocket Wear Accurately
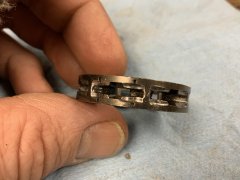
Guessing is not good enough for safety-critical components. Use the industry-standard wear threshold of 0.5mm or 0.020 inches to determine if your sprocket is safe.
How to Use a Wear Gauge
- Clean the Sprocket: Remove sawdust, pitch, and oil buildup with a wire brush.
- Insert the Gauge: Place the gauge into the channel between teeth.
- Check Fit: If the gauge fits flush or sinks below the surface, the sprocket is worn out.
- Inspect Bearings: Spin the sprocket by hand. Roughness or wobble indicates bearing failure.
Without a gauge, use a caliper to measure groove depth. Compare your measurements against new sprocket specifications if available.
When to Replace Without Measuring
Replace the sprocket immediately if teeth are cracked or broken. Heat discoloration like blue or purple tints also signals replacement is due. If you experienced a chain throw or kickback event, inspect closely for hidden damage.
Maintenance Tips to Prevent Premature Wear
Proper care can double or even triple your sprocket service life. Most premature failures stem from poor maintenance rather than heavy use.
Lubricate Needle Bearings Regularly
Most sprockets use caged needle bearings that require periodic greasing. Use white lithium grease for high adhesion and heat resistance.
- Apply grease during every chain change.
- Inject grease into the bearing cavity behind the sprocket.
- Avoid over-greasing as excess attracts sawdust.
STIHL once sold this grease in toothpaste-style tubes for clean application. This method prevents abrasive paste formation.
Maintain Proper Chain Tension
Incorrect tension is a leading cause of accelerated chainsaw sprocket wear.
- Too Loose: Causes slop where drive links hammer into sprocket teeth.
- Too Tight: Overstresses the sprocket, bearings, and bar rails.
Check tension before every use. The chain should snap back when pulled but not sag below the bar.
How Gearing Affects Chainsaw Sprocket Wear
Sprocket tooth count affects chain speed, torque, and wear patterns. Changing gearing alters how the chain engages the sprocket teeth.
Fewer Teeth Mean More Torque
A 6-tooth sprocket acts like a low gear. It increases pulling power for heavy cuts but slows chain speed. Fewer teeth mean each tooth bears more load. This potentially increases wear if the chain is not sharp or lubricated properly.
More Teeth Mean Faster Cuts
An 8-tooth sprocket acts like a high gear. It boosts chain speed for fast limbing and slicing softwood. More teeth spread the load and reduce per-tooth stress. However, this setup requires precise chain alignment to avoid premature wear.
Upgrade Smartly
Stick to factory specs unless you have a specific performance goal. Match pitch and gauge exactly to prevent destruction of chains and bars. Verify clutch drum compatibility before swapping tooth counts.
The Wear Triangle: Chain, Bar, and Sprocket
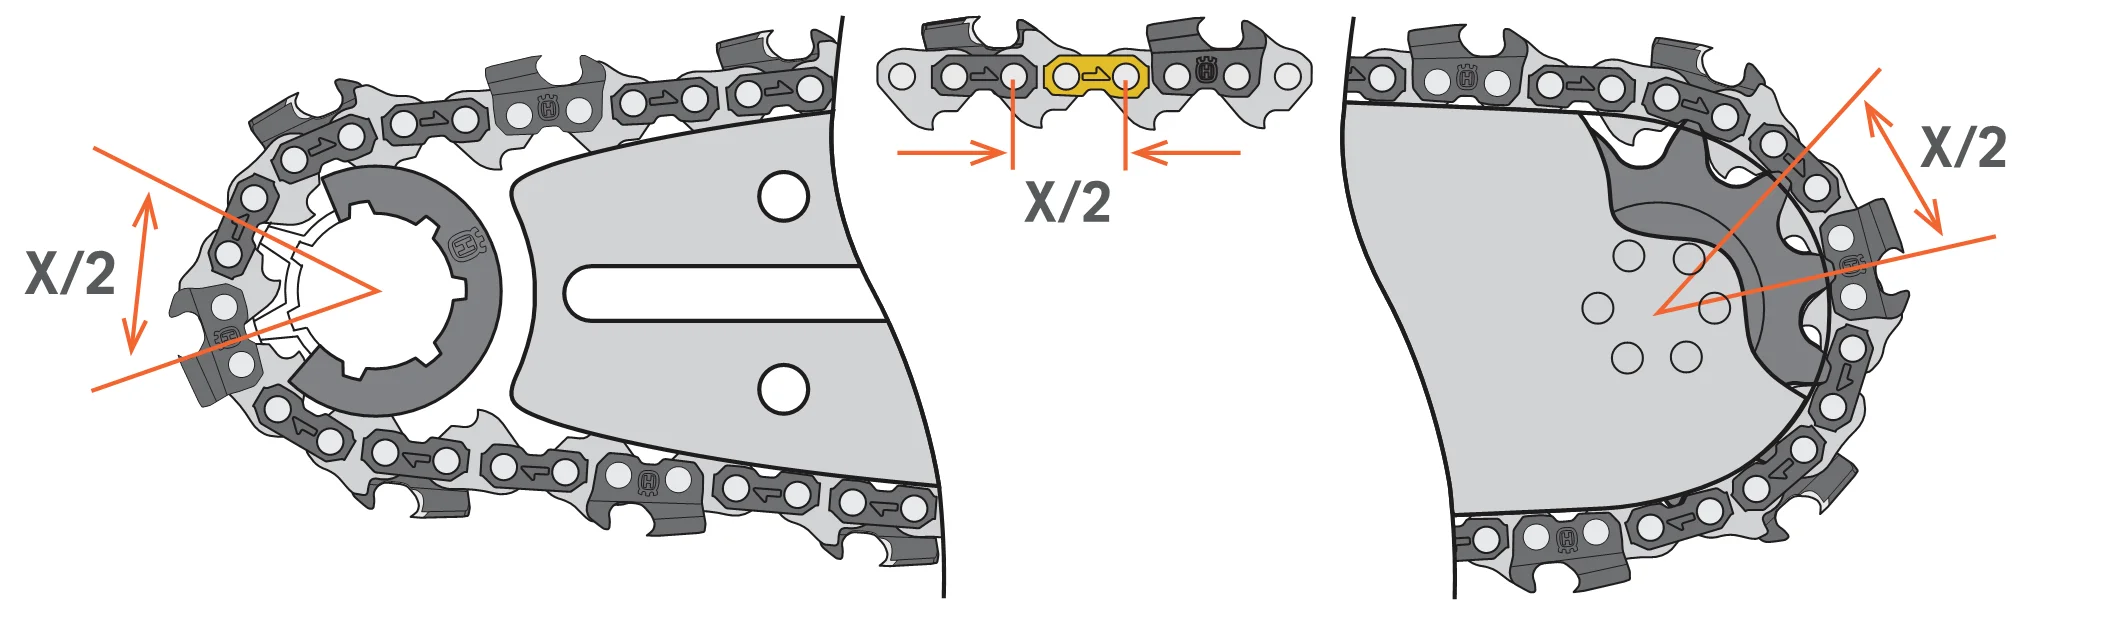
Sprocket wear does not happen in isolation. It is part of a three-way wear system involving the chain, bar, and sprocket. Ignoring one component accelerates wear on the others.
Chain Wear Damages Sprockets
Worn driver links no longer fit snugly on the sprocket. This causes slippage and hammering that degrades teeth. Filing past wear markers on cutters weakens the tooth and increases vibration. Replace chains when cutters reach wear markers or drive links show rounding.
Guide Bar Wear Hurts Sprockets
Worn bar rails let drive links wobble during operation. This leads to erratic sprocket engagement and uneven loading. Pinched or splayed rails cause binding and accelerate wear on both chain and sprocket. Replace the bar every four chains or sooner if grooves are worn below spec.
7 Triggers to Replace Your Sprocket Now
Do not wait for complete failure to act. Replace your sprocket immediately if any of these seven conditions are present.
- Wear Exceeds 0.5mm: This is the hard engineering limit confirmed by a gauge.
- Teeth Are Chipped: Even one broken tooth compromises the entire system.
- Chain Skips Under Load: A sign of poor engagement that is often irreversible.
- Tension Won’t Hold: Distorted sprocket pitch prevents proper tensioning.
- Two to Three Chains Used: Follow the two-chain rule for spurs and three for rims.
- Rim Sprocket Warped: Floating sprockets must remain perfectly round.
- Impact Damage: Inspect after every chain throw or foreign object impact.
Pro Tips for Field Service and Savings
Smart operators plan ahead to avoid downtime. Sprocket failure in the field means lost productivity miles from help.
Carry a Spare Rim Sprocket
Pack a spare rim and retaining clip if you use a rim system. Swapping takes under five minutes with basic tools. This lightweight solution is ideal for arborists and remote cutters. Spur users should keep a spare clutch drum for scheduled maintenance.
Use High-Quality Parts
Avoid cheap, off-brand sprockets that wear faster. American-made brands like 6K last three to four times longer than standard options. Trusted brands like STIHL and Husqvarna offer precise engineering. Counterfeit parts may fit but fail early, risking safety and equipment.
Frequently Asked Questions About Chainsaw Sprocket Wear
How often should I replace my chainsaw sprocket?
Replace the sprocket every two to three chains depending on usage intensity. Professional operators often follow the two-chain rule for spur sprockets. Rim sprockets may last for three chains with excellent maintenance and regular flipping.
What does a worn chainsaw sprocket look like?
A worn sprocket has hooked or chipped teeth and deep U-shaped grooves. The metal webbing between teeth appears thin or translucent. Visual inspection should reveal asymmetry in rim sprockets or severe deformation.
Can I use a sprocket gauge on all chainsaws?
Yes, dedicated control gauges work for both rim and spur sprockets. These tools fit petrol and cordless chainsaws as well as pole pruners. They provide an accurate measurement against the 0.5mm wear limit.
Why does my chain keep falling off the bar?
Frequent derailment often indicates a worn sprocket failing to guide the chain. A warped rim sprocket or hooked teeth disrupt smooth chain tracking. Check sprocket condition before assuming the bar is the issue.
Does changing sprocket tooth count affect performance?
Yes, fewer teeth increase torque while more teeth increase chain speed. Changing tooth count is known as gearing and alters cutting characteristics. Ensure the new sprocket matches your chain pitch and gauge exactly.
Key Takeaways for Preventing Chainsaw Sprocket Wear
Chainsaw sprocket wear is a silent killer of cutting performance and safety. Regular inspection using the 0.5mm rule prevents costly damage to your chain and guide bar. Replacing the sprocket every two to three chains ensures optimal power transfer.
Proper lubrication and tension maintenance extend the life of your entire cutting system. Consider upgrading to a rim sprocket for easier field service and better alignment. Invest in high-quality parts to protect your equipment and yourself.
Take action today by inspecting your sprocket before your next cut. A small investment in a new sprocket saves money on major repairs later. Stay sharp and safe by never overlooking this vital component.



