
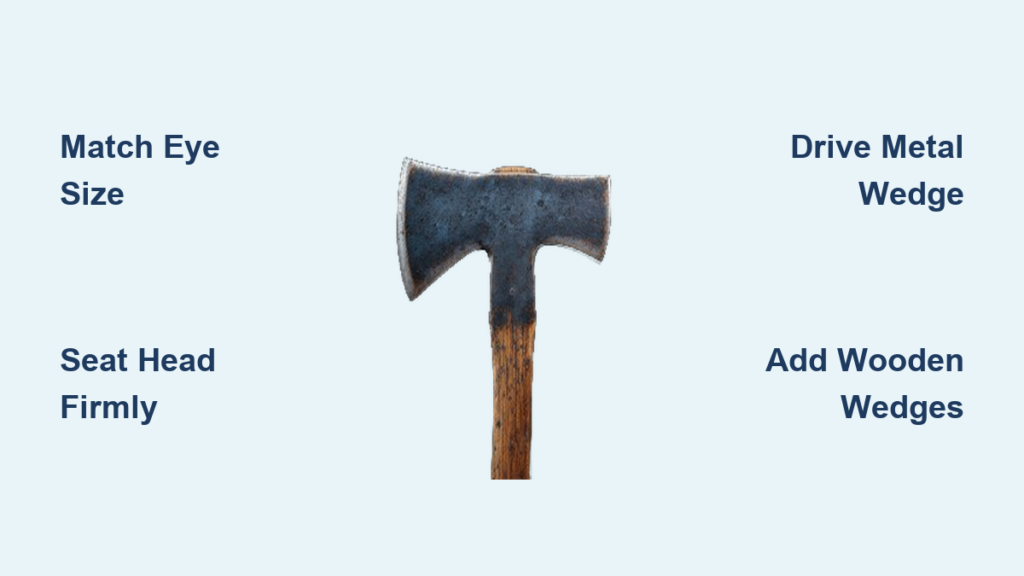
A loose axe head can be dangerous. What starts as a minor wobble can lead to the head flying off mid-swing, putting your safety at serious risk. Whether you’re restoring an old axe, replacing a worn handle, or tightening a newly assembled tool, knowing how to secure an axe head to handle properly is essential for both performance and safety. A securely fitted axe head ensures clean cuts, reduces fatigue, and prevents accidents in the field or workshop.
This guide walks you through every step of fastening an axe head correctly using traditional and modern techniques. You’ll learn how to choose the right handle, seat the head securely, apply wedges effectively, and maintain long-term stability. No guesswork, no unsafe shortcuts, just proven methods that keep your axe solid, reliable, and ready for action.
Choose the Right Handle Fit for Your Axe
Before securing the axe head, ensure compatibility between the head and handle. A poor fit undermines even the best fastening techniques.
Match Eye Size to Handle Width
The axe head’s eye (the hole in the center) must fit snugly over the handle’s shoulder, the thick end designed to support the head. If the handle is too narrow, it won’t fill the eye, leading to movement and splitting. If too wide, it can crack the wood during installation.
Use a handle specifically sized for your axe head. Commercial hickory handles are often labeled by axe type (felling, splitting, hatchet), so match accordingly. For custom fits, shave the handle shoulder gradually with a file or rasp until it slides into the eye with firm hand pressure. Aim for no gaps and no binding.
Test Dry Fit Before Final Assembly
Always perform a dry fit before final assembly:
– Insert the handle into the axe head without lubrication.
– Tap lightly with a mallet to seat it fully.
– Check that the head sits flush with the shoulder.
– Inspect for even contact around the eye.
If one side of the eye lifts away from the wood, the handle may be misshapen or undersized. Adjust until contact is uniform. This step prevents frustration and damage later.
Seat the Axe Head Properly on the Handle
A securely seated axe head transfers force efficiently and resists loosening over time.
Heat and Expand the Axe Eye (Optional)
For stubborn fits or vintage axes, gently heating the axe head can expand the eye metal slightly, allowing easier mounting. Use a propane torch to heat the eye evenly for 30 to 60 seconds. Avoid overheating, which weakens the steel.
Immediately slide the handle into the expanded eye. As the metal cools, it contracts around the wood, creating a tighter bond. Let it cool completely before proceeding.
Caution: Do not use open flame on a handle-mounted axe head. Remove the head first if reheating is needed.
Tap the Head Into Place
With the handle aligned, gently tap the end of the handle on a hard surface (like concrete) to drive the head down until fully seated. Alternatively, use a soft-faced mallet to strike the handle end. Never strike the axe head directly.
Ensure the head sits flush with the handle shoulder. There should be no visible gap. A well-seated head will not move under moderate pressure.
Install Primary and Secondary Wedges
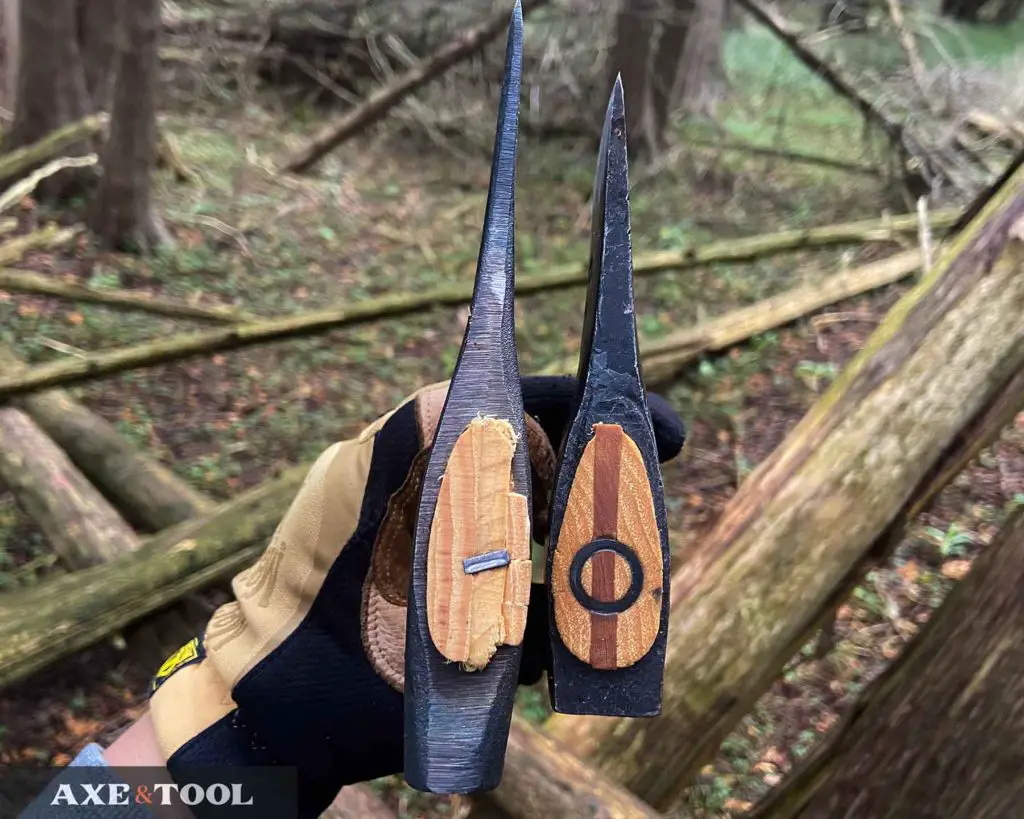
Wedges are critical for locking the axe head in place by expanding the wood inside the eye.
Drive the Metal Wedge First
Once the head is seated, insert a metal wedge into the top of the handle. This wedge runs vertically through the center of the end grain and counteracts splitting forces when chopping.
- Select a wedge that fits snugly into the kerf (cut) at the top of the handle.
- Align it centrally so it splits the wood evenly.
- Use a hammer to drive it fully until the top is flush or slightly below surface level.
The metal wedge strengthens the handle and prevents the head from pushing down during use.
Add Wooden Wedges for Expansion
After the metal wedge, install wooden wedges on either side to expand the handle within the axe eye, increasing friction and grip.
- Cut two small wedges from hardwood (oak, hickory).
- Insert them into pre-cut kerfs on each side of the metal wedge.
- Tap them in opposite directions to evenly spread the wood.
- Stop when resistance increases sharply. Over-wedging can split the handle.
For extra security, apply wood glue to the wedge bases before insertion. Let dry completely before trimming.
Trim and Finish the Axe Handle

A clean finish improves safety and comfort while eliminating weak points.
Cut Excess Handle Material
After wedging, trim protruding wedge ends flush with the handle using a fine-tooth saw or flush-cutting tool.
Then, use a chisel or plane to remove any raised wood around the wedges. Sand smooth with progressively finer grits (80 → 120 → 220).
Seal the Wood
Exposed end grain absorbs moisture, causing swelling and potential wedge failure. Seal the entire handle, especially the top, with:
– Boiled linseed oil (not raw)
– Tung oil
– Dedicated axe handle wax
Apply 3 to 5 coats, letting each dry fully. This protects against splitting, rot, and loosening due to humidity changes.
Reinforce the Axe Head with Epoxy (Optional)
For high-use or heavy-duty axes, epoxy adds permanent reinforcement.
Inject Epoxy Before Wedging
Before inserting wedges:
– Mix a slow-cure two-part epoxy.
– Inject it into the kerf cuts using a syringe.
– Insert metal and wooden wedges while epoxy is still liquid.
Epoxy fills microscopic gaps between wood and metal, bonding the components together and reducing vibration.
Note: Once epoxied, disassembly becomes nearly impossible. Use only if you’re confident in the fit.
Clean Excess Immediately
Wipe away any oozing epoxy with a solvent-soaked rag before it cures. Once hardened, removal requires sanding or chiseling.
Prevent Future Loosening of the Axe Head
Even a perfectly secured axe head can loosen over time due to shock, moisture, and wood movement.
Check Tightness Regularly
Inspect your axe before each use:
– Shake the head gently. No rattling should occur.
– Look for cracks near the eye or protruding wedges.
– Test for movement by gripping the handle and pushing the head side-to-side.
If any looseness is detected, address it immediately.
Retighten with Light Re-Wedging
If the head loosens:
– Remove the old wedges carefully.
– Insert new wooden wedges slightly thicker than before.
– Reapply glue or epoxy as needed.
– Re-seat the head and re-wedge.
Avoid driving the same wedges deeper, as they may not provide enough expansion.
Store Properly
Keep your axe in a dry place away from damp ground or extreme temperatures. Hang it or store it vertically to prevent warping. Never leave it outside or embedded in a log.
Alternative Methods: Bushcraft and Emergency Fixes
In the field, traditional materials can substitute for metal hardware.
Use Natural Fiber Lashing
If a head comes loose mid-trip:
– Wrap strong cordage (paracord, sinew) tightly around the base of the head.
– Use a series of knots or friction hitches to bind it securely.
– Tension the lashing with a stick twist method for maximum grip.
This is temporary. Repair properly as soon as possible.
Insert Dry Twigs or Bark
In a pinch, small dry twigs or folded bark can be hammered into gaps between the handle and eye to fill space and reduce movement. Not a permanent fix, but useful for short-term survival use.
Frequently Asked Questions About Securing an Axe Head
How tight should an axe head fit on the handle?
An axe head should fit firmly enough that it doesn’t move with moderate hand pressure. You should not see gaps around the eye, and the head should sit flush against the handle shoulder without wobbling.
Can I use glue instead of wedges to secure an axe head?
Glue alone is not recommended. Wedges provide the mechanical expansion needed to lock the head in place. You can use glue (wood glue or epoxy) in combination with wedges for added strength, but wedges are essential.
How often should I check my axe head for tightness?
Check your axe head before every use. A quick shake and visual inspection takes only seconds and prevents dangerous loosening during chopping.
What is the best wedge material for securing an axe head?
Hardwood (oak, hickory) and metal are both effective. Metal wedges prevent splitting, while wooden wedges expand the wood within the eye. Using both together provides the strongest, most durable hold.
Can I re-wedge an axe head if it loosens?
Yes. Remove the old wedges, clean the kerf, and install new wooden wedges slightly thicker than the originals. You can also add glue or epoxy for additional security. Avoid driving old wedges deeper, as they may not expand enough.
Key Takeaways for Securing Your Axe Head Safely
Securing an axe head is a blend of proper fit, correct wedging, and ongoing care. Start with a handle that matches your axe head’s eye size, then seat the head firmly before installing both metal and wooden wedges. Finish by sealing the wood to protect against moisture, and inspect the head regularly to catch any loosening early.
Your next step: gather your tools, measure your current fit, and test a dry assembly before making any cuts or driving wedges. A few minutes of preparation ensures years of safe, reliable chopping.



