
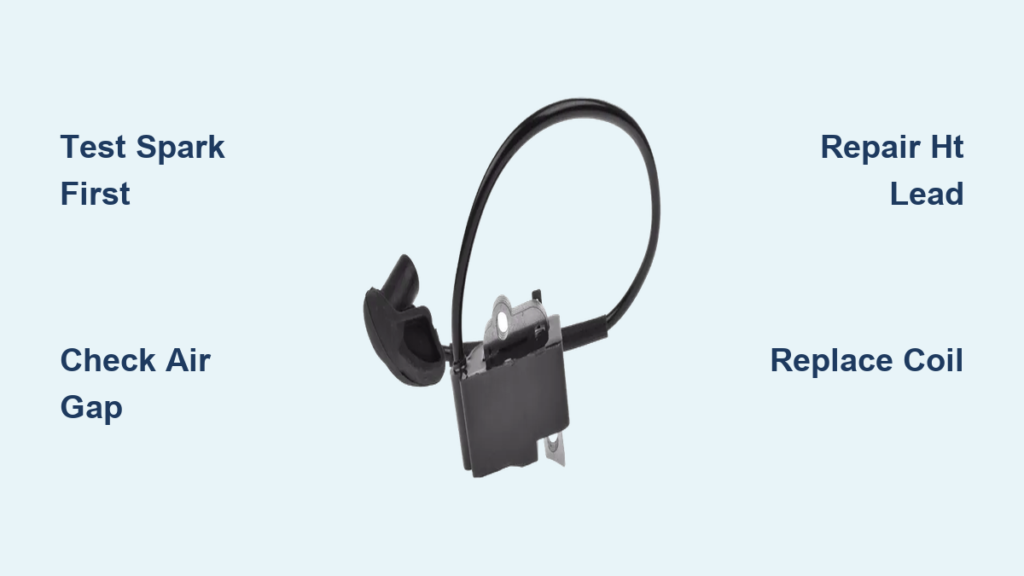
If your chainsaw won’t start and you’ve ruled out fuel, air, and spark plug issues, the ignition coil may be to blame. A faulty chainsaw coil can kill the spark needed to ignite the engine, leaving you with a dead saw. While replacing the coil is often the go-to fix, many wonder: Can you actually repair a chainsaw ignition coil? The short answer: Sometimes, but not how you might think. Unlike simple electrical parts, ignition coils are sealed, potted units with thousands of delicate windings. True internal repair is nearly impossible outside a lab. But there are smart workarounds, especially if only the high-tension lead is damaged.
This guide walks you through diagnosing coil issues, understanding why repair fails, and using proven fixes like the Husqvarna repair wire to save money and time. You’ll learn how to test your coil, set the perfect air gap, avoid common mistakes, and decide when replacement is the only real option.
Diagnose Before You Repair
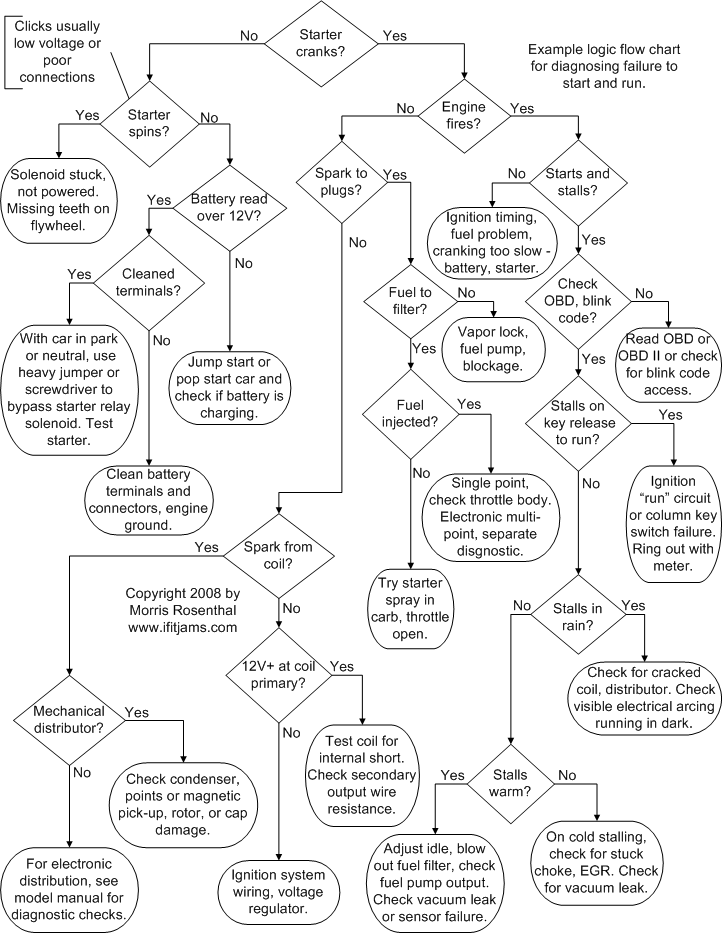
Before assuming the coil is bad, confirm the issue. Many no-start problems stem from the kill switch or wiring, not the coil itself. Skipping this step leads to unnecessary parts spending and wasted time.
Perform a Spark Test First
Remove the spark plug from the cylinder. Reattach it to the boot and hold the metal base against the cylinder. Pull the starter rope sharply and observe the spark.
A strong blue spark indicates the coil is likely functioning properly. A weak yellow spark or no spark suggests possible coil failure. Never hold the plug near the spark plug hole because fuel vapors can ignite.
Use a Hyper Spark Tester
This tool isolates the coil from the kill switch circuit and helps pinpoint the actual problem. Disconnect the coil’s wiring connector and insert the Hyper Spark Tester between the plug and boot. Pull the starter and watch for spark.
If spark appears now, the coil is fine and the kill switch or wiring is grounding the system. If there’s still no spark, the coil or trigger pickup is likely faulty.
Check Resistance with a Multimeter
Test both windings to confirm internal integrity. The primary winding should read between 0.5 and 2 ohms. An infinite reading indicates an open circuit, while a reading near zero suggests a short.
The secondary winding typically reads between 2,000 and 10,000 ohms depending on the model. An infinite reading means a broken wire, while a much lower reading indicates an internal short.
Verify the Trigger Signal
The pickup sends a signal to fire the coil. Use an oscilloscope or test light to rotate the flywheel and look for a pulse. No signal means the trigger is dead, not the coil.
Why Internal Coil Repair Fails

Despite online myths, repairing the inside of a potted ignition coil is not practical. Understanding why helps you avoid wasting hours on a futile effort.
Potting Makes Disassembly Impossible
Coils are filled with epoxy or dielectric resin to block moisture, vibration, and arcing. Removing it without destroying the windings requires chemical baths or grinding. Neither method is safe for DIY repair.
Secondary Wire Is Too Fragile
The secondary winding has 10,000 to 20,000 turns of wire thinner than a human hair. One break kills the entire circuit. Soldering it demands micro-tools, magnification, and a dust-free lab environment.
Rewinding Is Not Feasible
Even if you locate the break, you’d need to unwind thousands of turns, solder the wire, rewind perfectly, and re-pot with vacuum-sealed dielectric resin. The time and specialized equipment required far exceed the cost of a new coil.
Expert Consensus: Do Not Bother
Industry experts agree that internal repair is impractical. The secondary wire is thinner than hair and requires a PhD and machine shop to attempt. For 99% of users, this approach fails.
Fix a Broken HT Lead: Husqvarna Repair Wire
If the coil works but the high-tension lead is damaged, you can save it with a simple repair wire. This is the only widely accepted method for salvaging a potted coil with a broken lead.
Use Part #501081701
This Husqvarna repair wire is designed specifically for broken HT leads on potted coils. It features a self-tapping screw terminal that connects directly to the exposed end of a cut or frayed lead.
The cost runs about $48 compared to $80 to $200 for a new coil. This makes it a smart choice when the coil itself is functional.
Installation Steps
Cut back the damaged HT lead to clean wire and strip insulation to expose the conductor. Insert the wire into the connector and tighten the screw firmly. Seal the connection with heat-shrink tubing or electrical tape. Test spark with a grounded plug before reassembly.
Limitations
This fix only works if the coil itself is good. It won’t fix internal shorts or opens. The repair wire is not universal and is designed for Husqvarna and compatible models only.
Swap Coils Across Models
If OEM coils are expensive or unavailable, try a cross-model swap. Some users have successfully replaced faulty coils with units from different chainsaw models.
What Must Match
The flywheel magnet position, mounting holes and spacers, trigger type, and air gap and timing must all be compatible. Mismatched components lead to poor performance or no spark at all.
Risks
This is a trial-and-error process. Not all combinations work. You may need to retune the carburetor if timing differs. Expect some experimentation before finding success.
Try an Aftermarket Ignition Module
For high-cost coils like SEM or Phelon, a $14 universal module can be a budget fix. This approach replaces just the ignition module, not the entire coil.
How It Works
The module is used with a functional coil housing and windings. Match wiring polarity and confirm trigger signal type before installation. Test spark before final assembly.
Downsides
These modules have lower reliability than OEM parts. There’s risk of incorrect timing. They may fail within months, making them better suited as temporary fixes.
Set the Correct Air Gap
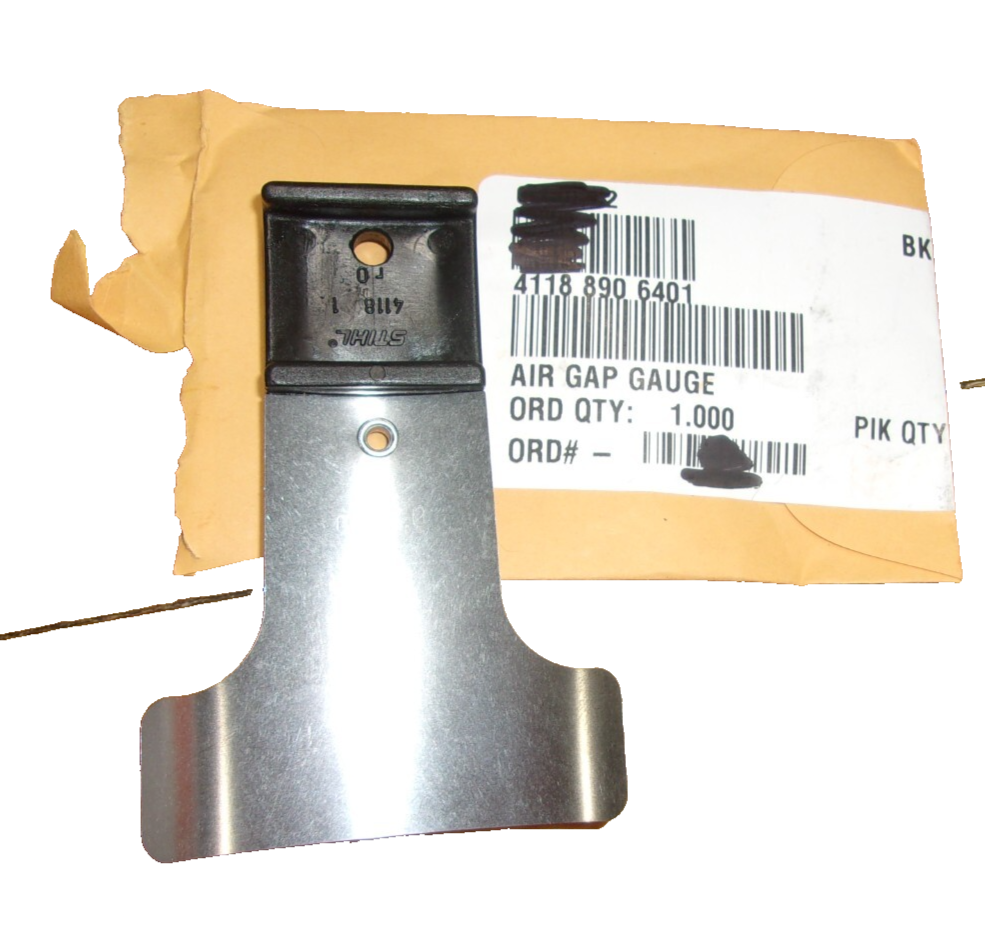
Even a good coil won’t spark if the air gap is wrong. Setting it correctly is crucial for reliable operation.
Ideal Gap: 0.010 Inches
Factory specs recommend 0.008 to 0.012 inches. For best performance, set the gap to 0.010 inches or 0.25 mm. The maximum acceptable gap is 0.014 inches.
A gap too wide produces weak spark. A gap too narrow causes flywheel rub and potential damage.
Use the Right Gap Tool
A piece of spam mail measures about 0.010 inches and works perfectly as a field gap tool. A thick business card at 0.014 inches is acceptable. Standard business cards at 0.0165 inches are too thick. A feeler gauge provides the most precise measurement.
Adjust the Gap
Rotate the flywheel until magnets align with the coil. Place a 0.010-inch shim between the coil and flywheel. Position the coil and begin threading screws by hand. Press the coil against the shim and tighten fully. Remove the shim and spin the flywheel to ensure no contact occurs.
Never use power tools when tightening coil screws. Over-tightening cracks the housing.
Remove and Install the Coil
Proper removal and installation prevents damage and ensures correct gap settings.
Tools You Will Need
Gather a T25 or T27 Torx driver, screwdrivers, a feeler gauge or shim, compressed air, and a crimping tool for wire repairs.
Removal Steps
Lay the saw on its side to prevent fuel spill. Remove the top and side covers, typically four screws. Disconnect the ground wire, positive lead, and kill-switch wire. Remove and save any spacers. Lift the coil out carefully and blow out sawdust with compressed air.
Installation Steps
Confirm the new coil matches OEM specifications. Reinstall spacers if used. Position the coil and insert screws by hand. Insert the 0.010-inch shim, press the coil down, and tighten the screws. Reconnect all wires and route them away from moving parts. Reinstall covers and fuel lines.
Always replace the spark plug when installing a new coil.
Test After Repair
Testing confirms your repair worked and the system is safe to run.
Verify Spark and Kill Switch
Use a Hyper Spark Tester or grounded plug. Expect a strong blue spark. Flip the kill switch to off and the spark should die. Switch back to on and the spark returns.
Cold Start Test
Set the choke on and pull the starter three to five times. The engine should fire and run smoothly.
Warm Restart Test
Run the saw for one to two minutes. Shut it off and restart immediately. It should catch quickly.
Smooth starts mean your ignition system is working properly.
Recommended Parts and Kits
Having the right parts on hand speeds repair and ensures compatibility.
| Part | Brand | Notes |
|---|---|---|
| Ignition Coil | HIPA | High-quality aftermarket for Stihl, Husqvarna |
| Spark Plug | NGK or OEM | Replace every coil change |
| Repair Wire | Husqvarna #501081701 | For broken HT leads |
| Complete Kit | HIPA Store | Coil, plug, gaskets, hardware |
Buying a complete ignition kit ensures everything is fresh and matched. This is the best move for most repairs.
Prevent Future Coil Failures
Regular maintenance extends coil life and prevents unexpected failures.
Maintenance Tips
Avoid sharp bends in the HT lead during installation. Inspect the boot and wire annually. Clean sawdust from the coil and flywheel. Use fresh two-cycle fuel because old fuel causes vapor lock. Hand-tighten coil screws and never use an impact driver. Replace cheap aftermarket coils early because they fail fast.
Cold Weather Tips
Coils work down to 20°F. Use wax-free fuel lines that stay flexible. Lubricate the chain well because cold oil thickens.
Storage Best Practices
Store the saw in a dry location. Disconnect the kill switch during extended storage. Cover the air intake to prevent debris entry.
Final Decision: Repair or Replace?
Understanding when to repair versus replace saves money and frustration.
When to Use Each Option
Use the Husqvarna 501081701 repair wire when the HT lead is broken but the coil is good. Replace the entire coil when there’s an open or short in the winding. Try an aftermarket module when the module is dead but the coil is good. Consider a cross-model swap for rare or obsolete saws. Attempt precision repair only for collector restoration with proper skills.
Economic Reality Check
Internal repair costs about $10 in materials but takes 10 to 20 hours with less than 5% success rate. The repair wire costs $48 and takes 15 minutes with 90% success. A new coil costs $80 to $200 and takes 30 minutes with 100% success. An aftermarket module costs $14 and takes 20 minutes with 70% success.
For most users, replacing the coil or using the repair wire is the most practical solution. True rewinding is for specialists with advanced tools and patience.
Frequently Asked Questions About Chainsaw Coil Repair
Can you repair a chainsaw ignition coil yourself?
Internal repair is not practical for most users. The coil is potted with epoxy and contains thousands of turns of wire thinner than a human hair. However, you can repair a damaged high-tension lead using the Husqvarna #501081701 repair wire if the coil itself is functional.
How do I test if my chainsaw coil is bad?
Perform a spark test by removing the spark plug, holding it against the cylinder, and pulling the starter. A strong blue spark means the coil is good. Weak or no spark suggests failure. Use a multimeter to check resistance on primary and secondary windings. Use a Hyper Spark Tester to isolate the coil from the kill switch circuit.
What is the ideal air gap for a chainsaw coil?
The ideal air gap is 0.010 inches or 0.25 mm. This falls within the factory spec range of 0.008 to 0.012 inches. Use a feeler gauge or a piece of spam mail as a field tool.
How much does a chainsaw coil cost to replace?
OEM coils typically cost $80 to $200 depending on the brand and model. SEM and Phelon coils are on the higher end. Aftermarket modules cost around $14 but offer lower reliability. The Husqvarna repair wire costs about $48.
Why does my chainsaw have no spark even with a new coil?
Check the air gap first. An incorrect gap prevents spark. Verify the kill switch is not grounding the system. Test the trigger pickup for signal. Ensure wiring connections are clean and secure. A dropped screw or loose wire can cause intermittent or no spark.
Can I use a coil from a different chainsaw model?
Yes, but compatibility depends on flywheel magnet position, mounting geometry, trigger type, and ignition timing. Cross-model swaps require careful comparison and adjustment. Not all combinations work, and some retuning may be needed.
Key Takeaways for Chainsaw Coil Repair
Internal repair of potted ignition coils is theoretically possible but practically impossible for most users. The epoxy potting and fragile windings make disassembly and repair too difficult. Instead, focus on proper diagnosis first. Use the spark test, multimeter, and Hyper Spark Tester to confirm the coil is actually bad before replacing it.
When the coil is functional but the HT lead is damaged, the Husqvarna #501081701 repair wire offers the best fix. It costs about half as much as a new coil and takes minutes to install. Set the air gap precisely at 0.010 inches for optimal spark. Always test the kill switch circuit before assuming coil failure.
For most users, replacement is faster, cheaper, and more reliable than repair. Save the micro-soldering for your next electronics project. For now, get your saw running with a proven fix.



