
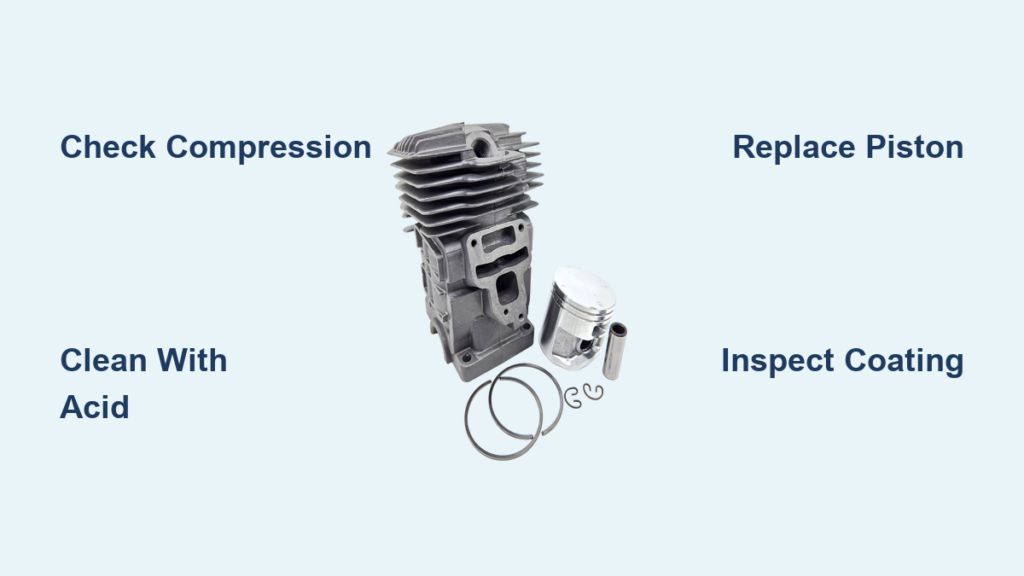
A seized or damaged chainsaw cylinder can bring your cutting work to a sudden halt. When the engine won’t start, lacks compression, or makes strange knocking noises, the problem often lies in the top-end, specifically the cylinder and piston. The good news is that most cylinder issues can be accurately diagnosed and repaired without replacing the entire engine. Whether you’re dealing with a scored piston, aluminum galling, or a complete seizure, understanding the root causes and repair options is key to getting your saw back in action.
This guide walks you through every step of chainsaw cylinder repair. You’ll learn how to diagnose damage, when to clean versus replace, safe methods for removing aluminum deposits, and a complete rebuild process using real-world-tested techniques. You’ll discover what tools to use, how to avoid costly mistakes, and how to ensure your repair lasts for hundreds of hours.
Diagnose Cylinder and Piston Failure
Check for Compression Loss
Compression loss is the most telling sign of top-end damage. If your chainsaw won’t start or feels weak during operation, perform a quick compression check. Remove the spark plug and pull the starter cord. If there’s little to no resistance, compression is compromised.
Low compression, typically below 90 PSI, means one of these problems exists:
- Scoring on the piston or cylinder wall
- Stuck or broken piston rings
- Air leaks from gaskets or seals
Even if the engine turns over, a rattling sound from the crankcase suggests excessive piston-to-bore clearance, a sign of advanced wear.
Inspect Through the Spark Plug Hole
You don’t need to disassemble the entire saw to spot major issues. Remove the spark plug and shine a bright flashlight into the cylinder. Look for deep grooves on the piston surface, shiny smeared aluminum deposits known as galling, or discoloration or melting near the spark plug.
If you see metal shavings or deep scoring, the top-end likely needs repair. For a clearer view, remove the muffler, which gives full visibility of the piston crown and cylinder bore.
Identify Seized vs. Scored Pistons
A seized piston is fused to the cylinder wall due to extreme heat or lack of oil. The starter cord won’t pull, and the engine is completely locked. This usually requires full disassembly and replacement of both parts.
A scored piston still moves but has deep linear grooves from abrasive wear. While it may turn, it can’t maintain proper compression. Use a screwdriver tip to test groove depth. If it catches, the piston must be replaced.
Critical Tip: Even minor scoring above the exhaust port often leads to failure. Replace if grooves are deep or extend past the port.
Understand Common Damage Causes

Stop Running Lean Fuel Mixes
A lean fuel oil mixture, too much gas and not enough oil, is the number one cause of cylinder damage. Without adequate lubrication, the aluminum piston overheats and expands, scraping against the cylinder wall.
Symptoms of a lean condition include closed ring grooves, full-circumference scoring, and melted piston crown near the spark plug. Straight gassing, running pure gasoline, destroys a two-stroke engine in minutes. Always use the correct 2-stroke oil ratio, typically 40:1 or 50:1.
Prevent Overheating From Dull Chains
A dull chain forces the engine to run at high RPMs, over 13,000, to cut, increasing heat in the cylinder. The exhaust port area gets hottest, making it the most common location for scoring and galling.
Keep your chain sharp. A sharp chain reduces engine load, lowers operating temperature, and extends cylinder life significantly.
Fix Air Leaks Early
Air leaks in the intake system, loose carburetor, cracked gaskets, or damaged filter housing, let in unfiltered air, creating a lean fuel condition. Common leak points include the manifold gasket, carburetor mounting bolts, and air filter housing.
Even small leaks degrade performance over time. Always replace gaskets during reassembly and inspect hoses for cracks.
Clean Air Filters Regularly
Dust and debris entering through a clogged or torn air filter act like sandpaper between the piston and cylinder. This causes progressive scoring and accelerates wear dramatically.
In dusty environments, clean or replace the air filter after every few uses. Ensure the housing seals tightly to prevent bypass.
Cylinder Material and Coating Types
Nicasil Coating: Handle With Care
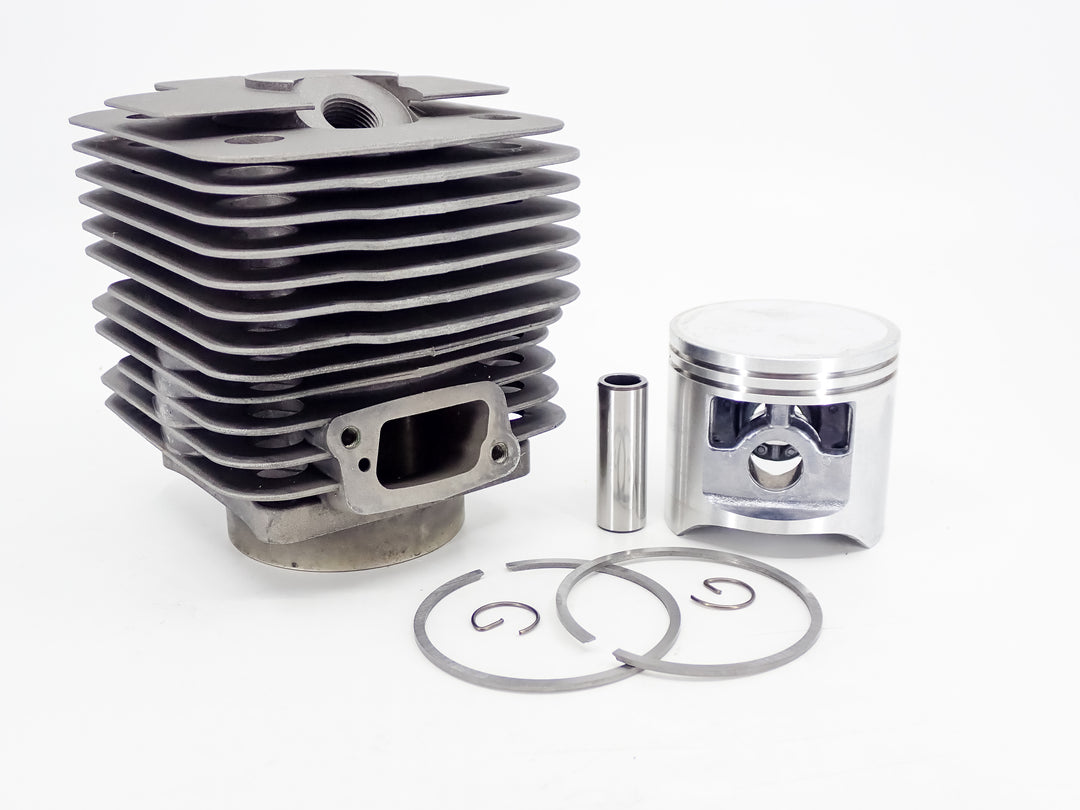
Most modern chainsaws from Stihl, Husqvarna, and Echo use aluminum cylinders with a Nicasil coating. This is a hard nickel-silicon carbide layer that resists wear and heat, protecting the softer aluminum base.
Never hone a Nicasil-coated cylinder. Abrasives remove the protective layer, exposing the base metal and leading to rapid failure. Instead, use chemical cleaning with muriatic acid to remove aluminum deposits. It dissolves galling without damaging the plating.
Steel and Cast Iron Cylinders: Rare but Durable
Older or industrial chainsaws may have steel or cast iron cylinders. These can be safely honed with 400-grit wet/dry paper to smooth minor scoring.
But for modern saws, honing is not an option. Stick to non-abrasive cleaning methods only.
Repair Aluminum Transfer With Muriatic Acid
Prepare the Cylinder Safely
To safely remove aluminum galling from a Nicasil cylinder, remove the cylinder if possible for easier access. Heat it to 200°F in an oven, which speeds up the acid reaction. Work in a well-ventilated area with gloves, goggles, and a respirator. Keep baking soda nearby to neutralize spills.
Never use acid on a cylinder still mounted on the engine. Protect surrounding components completely.
Apply Acid to Remove Galling
Use a long-handled cotton swab dipped in muriatic acid, available at pool supply stores, to dab the affected areas. Aluminum deposits will bubble and fizz. The surface may turn white, which is normal and indicates cleaning is working. Stop when bubbling ceases, meaning the aluminum is gone.
Avoid pouring acid into ports. Bare aluminum in these areas lacks Nicasil protection and can corrode.
Neutralize and Clean Thoroughly
After each application, rinse with water immediately. Use 300 to 400 grit wet/dry sandpaper with detergent to remove residue. Inspect with a flashlight. The bore should look smooth and mirror-like.
Staining is normal after acid treatment. As long as no aluminum remains and the surface is smooth, the cylinder is safe to reuse.
When to Repair vs. Replace the Cylinder
Repairable Cylinder Conditions
You can safely reuse a cylinder if aluminum transfer is gone and the Nicasil coating is intact. Scoring must be below the exhaust port and shallow, not catching a fingernail. There should be no pitting, cracks, or plating lift. Compression must reach 140 PSI after rebuild.
Real-World Example: A Husqvarna 562 XP with moderate scoring ran for three years and hundreds of hours after cleaning and piston replacement.
Replace If These Signs Appear
Replace the cylinder if scoring extends above the exhaust port. Replace if the Nicasil coating is worn through or bubbling. Replace if acid causes bubbling in non-deposit areas, indicating base metal is exposed. Replace if previous improper honing damaged the bore. Replace if the cylinder is warped or cracked.
When in doubt, replace it. A new cylinder costs less than repeated repairs.
Choose the Right Piston and Kit
OEM vs. Aftermarket Pistons
OEM pistons from Stihl, Husqvarna, or Bailey’s guarantee fit and durability but cost more, for example $65 for a Husqvarna 335 piston. Aftermarket pistons from Mako, Meteor, or Highway cost $25 to $50 and often match OEM quality. Check reviews and verify port alignment before buying.
Pro Tip: Some aftermarket kits include mismatched rings. Always inspect dimensions carefully.
Use Complete 7-Piece Repair Kits
A full top-end kit typically includes a cylinder, piston, two piston rings, piston pin, circlips, cylinder gasket, and manifold gasket. Price runs about $85.81 with free shipping from reputable eBay sellers.
Ensure all parts are new and undamaged. Reusing old gaskets risks air leaks and repeat failure.
Rebuild the Top-End: Step-by-Step
Disassemble the Engine
- Remove the muffler to inspect the piston.
- Detach the starter and ignition module by disconnecting wires and removing the air shroud.
- Remove the carburetor by pushing fuel lines off with your thumbnail, removing three long bolts, and extracting the carb with fuel line attached.
- Pull the fuel tank by removing the screw and feeding lines through the frame.
- Expose cylinder screws by holding the flywheel and lifting the cylinder.
Install New Piston and Rings
- Lubricate rings and piston with fresh 20W-40 oil.
- Insert rings into grooves, first ring at the bottom.
- Align ring gap over the piston’s gap area for even sealing.
- Use the zip-tie method to compress rings. Wrap a zip-tie around the piston, lower the cylinder over the piston, then cut and remove the zip-tie once the piston clears the crankshaft.
Never stretch rings — they can break or lose tension permanently.
Reassemble With Proper Torque
- Install the needle bearing and washers on the crankshaft.
- Insert the wrist pin and secure with circlips, ensuring they are fully seated.
- Place the cylinder gasket and align mounting holes.
- Lower the cylinder over the piston.
- Tighten fasteners in a criss-cross pattern, two 8 mm nuts and four 4 mm Allen bolts, applying even moderate torque.
Final Check: Rotate the flywheel by hand. It must spin freely with no binding whatsoever.
Test and Commission After Repair
Verify Spark and Fuel Flow
Before starting, install a new spark plug. Test for spark using a spark plug tester. Prime the carb; fuel should flow into the chamber. Clean the muffler to prevent exhaust restriction.
If no fuel flows, check for clogs in the filter, line, or carburetor inlet.
Adjust Carburetor Idle
If the engine starts but races or stalls, turn the top carb screw in 1/8-turn increments. Adjust until idle stabilizes and the chain doesn’t move.
Avoid full-throttle operation until the engine breaks in properly.
Use Correct Fuel Mix
Refuel with fresh 40:1 mix, which means 40 ml oil per 1 liter of petrol. For 0.5 liters, use 20 ml oil. Use JASO-FD or ISO-L-EGD certified 2-stroke oil. Avoid ethanol-blended fuels.
Warning: Using wrong oil or ratio will cause immediate repeat damage to your rebuilt engine.
Troubleshoot Common Post-Repair Issues
No Spark After Rebuild
Check the spark plug condition, replace if fouled. Check the ignition coil wiring. Check the ground connection. Test with a spark tester. No spark means a faulty coil or module.
No Compression After Assembly
Likely causes include rings not seated properly, damaged or reused gasket, or loose cylinder bolts. Recheck ring alignment and bolt tightness. Retorque if needed.
Engine Starts but Stalls
Common fixes include cleaning or replacing the air filter, checking for air leaks at the manifold, adjusting the idle screw, or replacing old fuel. Post-repair failures often stem from overlooked maintenance items.
Prevent Future Cylinder Damage
Sharpen the Chain Regularly
A sharp chain is the best defense against overheating. It cuts efficiently at lower RPMs, reducing thermal stress on the cylinder. Resharpen when the saw produces fine sawdust instead of chips, when you must push the saw to cut, or when the chain drifts off line.
Use High-Quality 2-Stroke Oil
Never skimp on oil. Use JASO-FD or ISO-L-EGD certified oil. Use synthetic or semi-synthetic blends. Use oil rated for air-cooled engines. Avoid automotive 2-stroke oils, which burn poorly and leave harmful deposits.
Replace Air and Fuel Filters
Clean or replace the air filter every 5 to 10 hours in dirty conditions. Replace the fuel filter every 25 hours or if fuel flow is weak. Replace the carburetor if clogged or leaking. Fresh filters prevent contamination and maintain proper fuel mix.
Monitor Compression Periodically
Use a compression gauge every 50 hours. Healthy readings are 130 to 150 PSI for most chainsaws. Below 90 PSI indicates wear or damage. Early detection prevents catastrophic failure.
Frequently Asked Questions About Chainsaw Cylinder Repair
How Do I Know If My Chainsaw Cylinder Is Damaged?
The most obvious signs are loss of compression, difficulty starting, reduced power, and unusual rattling noises. You can inspect directly through the spark plug hole looking for grooves, scoring, or aluminum deposits. A compression test reading below 90 PSI confirms top-end damage.
Can I Repair a Scored Cylinder Without Replacing It?
If the scoring is shallow and located below the exhaust port, and the Nicasil coating remains intact, you may clean the cylinder and replace the piston only. However, if scoring extends above the exhaust port or the coating is damaged, complete cylinder replacement is necessary.
Is Muriatic Acid Safe for All Chainsaw Cylinders?
Muriatic acid is safe only for Nicasil-coated cylinders. It dissolves aluminum deposits without damaging the plating. Never use acid on steel or cast iron cylinders, and never use it on a cylinder still mounted to the engine.
How Long Does a Cylinder Repair Last?
When done correctly with quality parts, a top-end rebuild can last hundreds of hours. One real-world example shows a Husqvarna 562 XP running for three years and hundreds of hours after repair. Longevity depends heavily on proper maintenance afterward.
What Is the Cost of a Complete Cylinder Repair Kit?
A quality 7-piece top-end kit with cylinder, piston, rings, gaskets, and hardware costs approximately $85.81. OEM kits run higher, around $65 for the piston alone. Total repair cost depends on whether you do the work yourself or pay for labor.
Key Takeaways for Successful Chainsaw Cylinder Repair
Chainsaw cylinder repair is a precise but manageable task. By diagnosing the root cause, whether it’s a lean mix, air leak, or dull chain, and following proper cleaning, replacement, and reassembly steps, you can restore full engine performance. Always use fresh oil at the correct ratio, replace all gaskets, and verify free rotation of the flywheel after tightening.
The most critical factors for long-term success are prevention. Keep your chain sharp, use high-quality 2-stroke oil, and maintain clean air and fuel filters. Monitor compression periodically to catch problems early before they cause catastrophic damage.
With the right tools, quality parts, and attention to detail, a top-end rebuild can extend your chainsaw’s life for years to come.



