
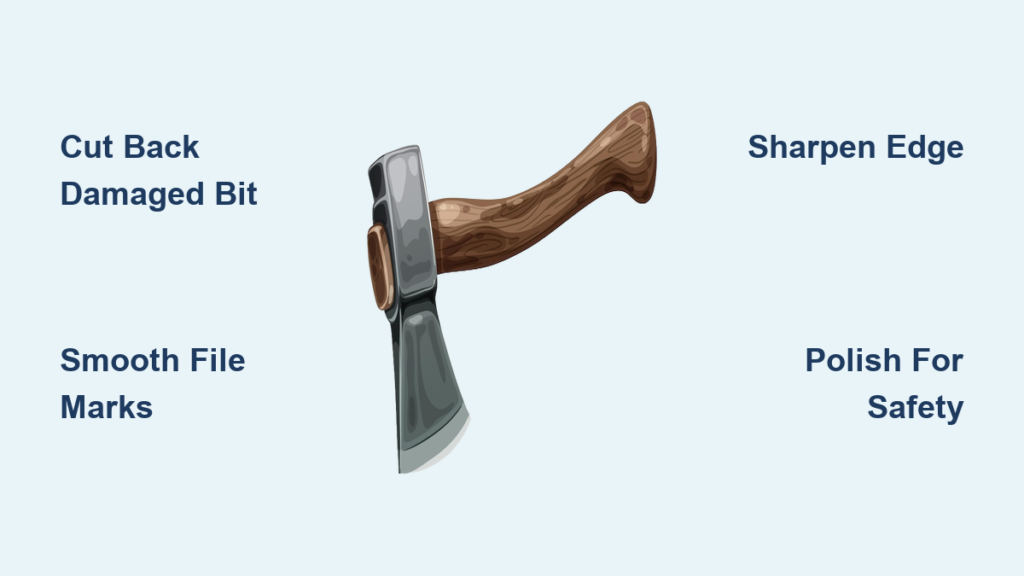
You swing your axe into a log and the bit bounces off without biting. Sound familiar? A dull axe wastes your energy and turns simple splitting into exhausting labor. Worse, a poorly maintained edge is dangerous. It glances off wood unpredictably, sending force back toward you. Learning how to sharpen an axe properly transforms it into a safe, efficient tool that does the hard work for you.
Sharpening isn’t about grinding away metal until something looks shiny. It’s about understanding your axe’s geometry, working through progressive stages, and respecting the process. Whether you own a budget hardware store model or a premium hand-forged axe, the same four-stage method applies. This guide walks you through every step, from identifying parts to achieving a mirror-polished edge that glides through wood.
Know Your Axe Parts Before You Begin
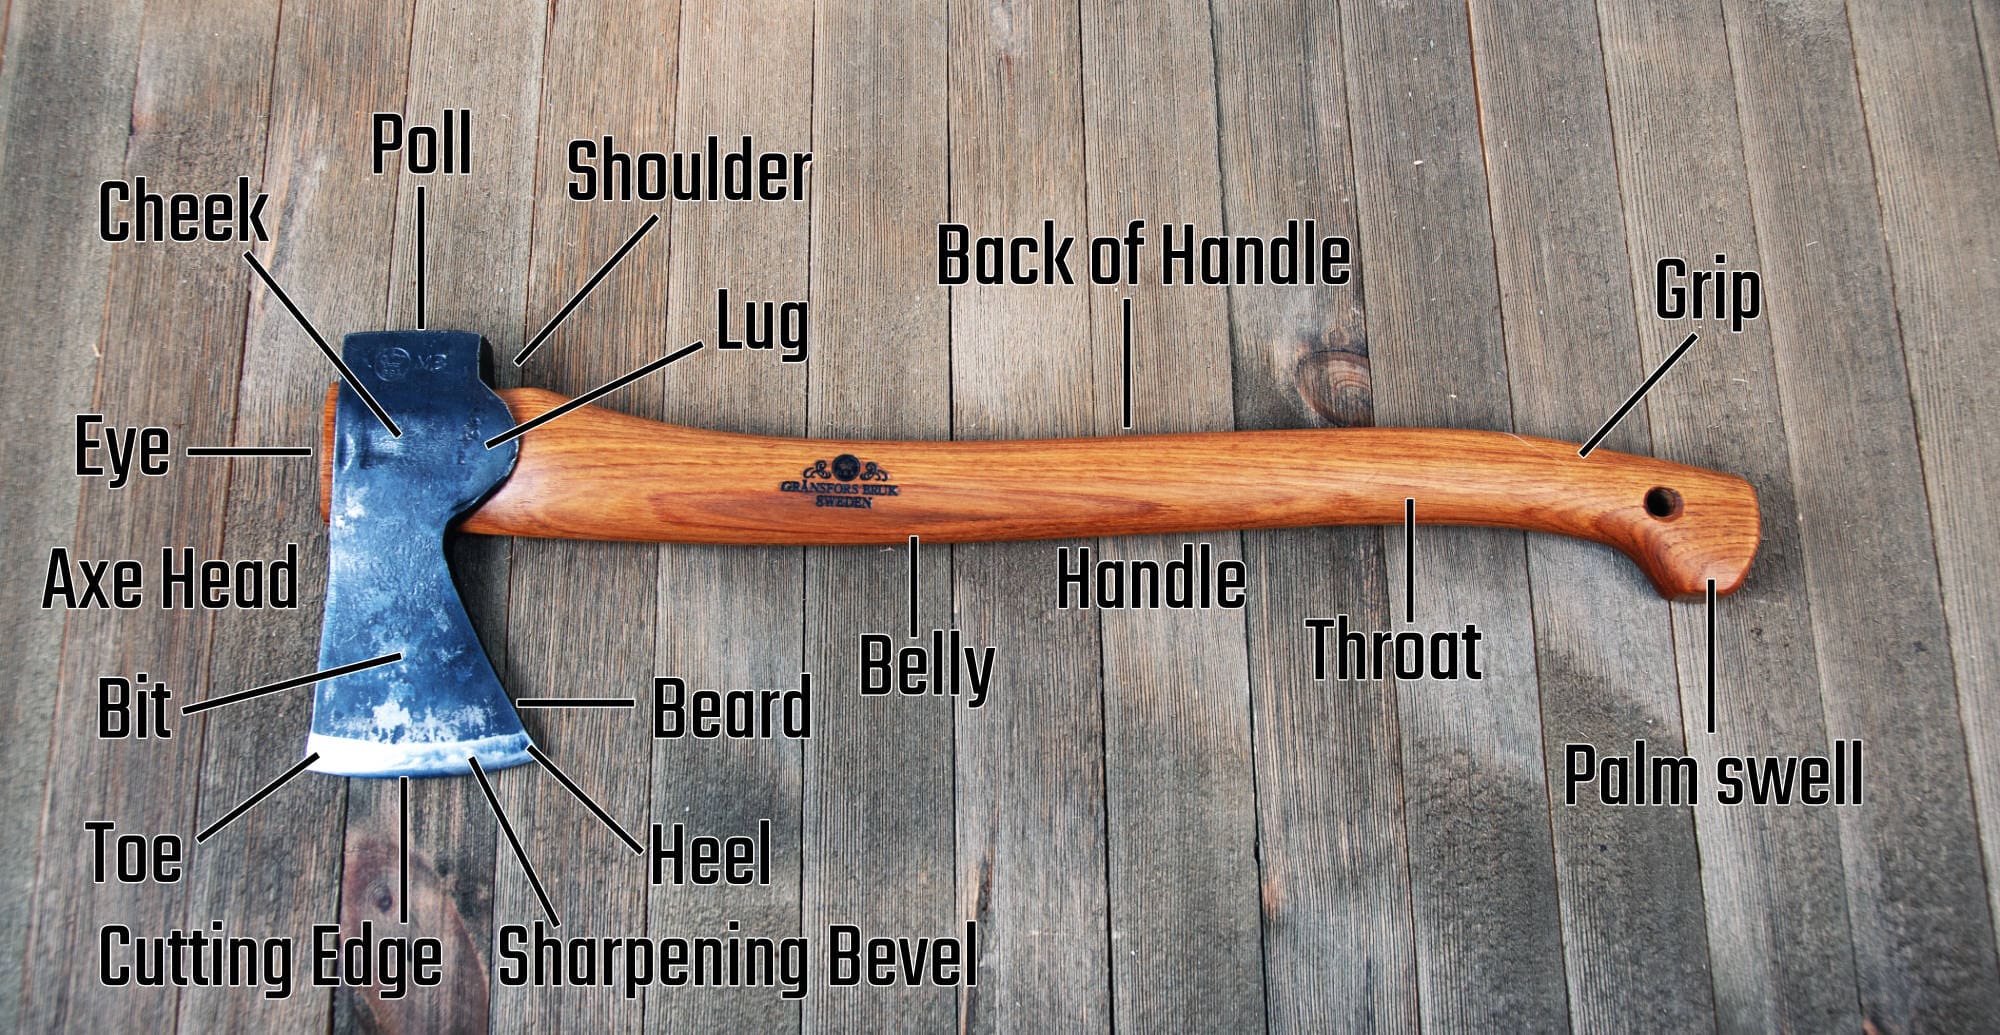
Sharpening becomes easier when you can name what you’re working on. These terms also help you follow tutorials and troubleshoot problems.
Components Worth Identifying
- Bit: The actual cutting edge and your main focus
- Heel and Toe of Head: The back and front ends of the bit
- Cheek or Ramp: The convex side leading up from the bit
- Poll: The flat back of the head, used for hammering
- Eye: The hole where the handle fits
- Wedges: Wooden and metal pieces that secure the head
Before sharpening, check for loose wedges, cracks in the head, or damage to the haft. A loose head can fly off during a swing. Fix structural problems first.
Understand the Axe’s Edge Geometry
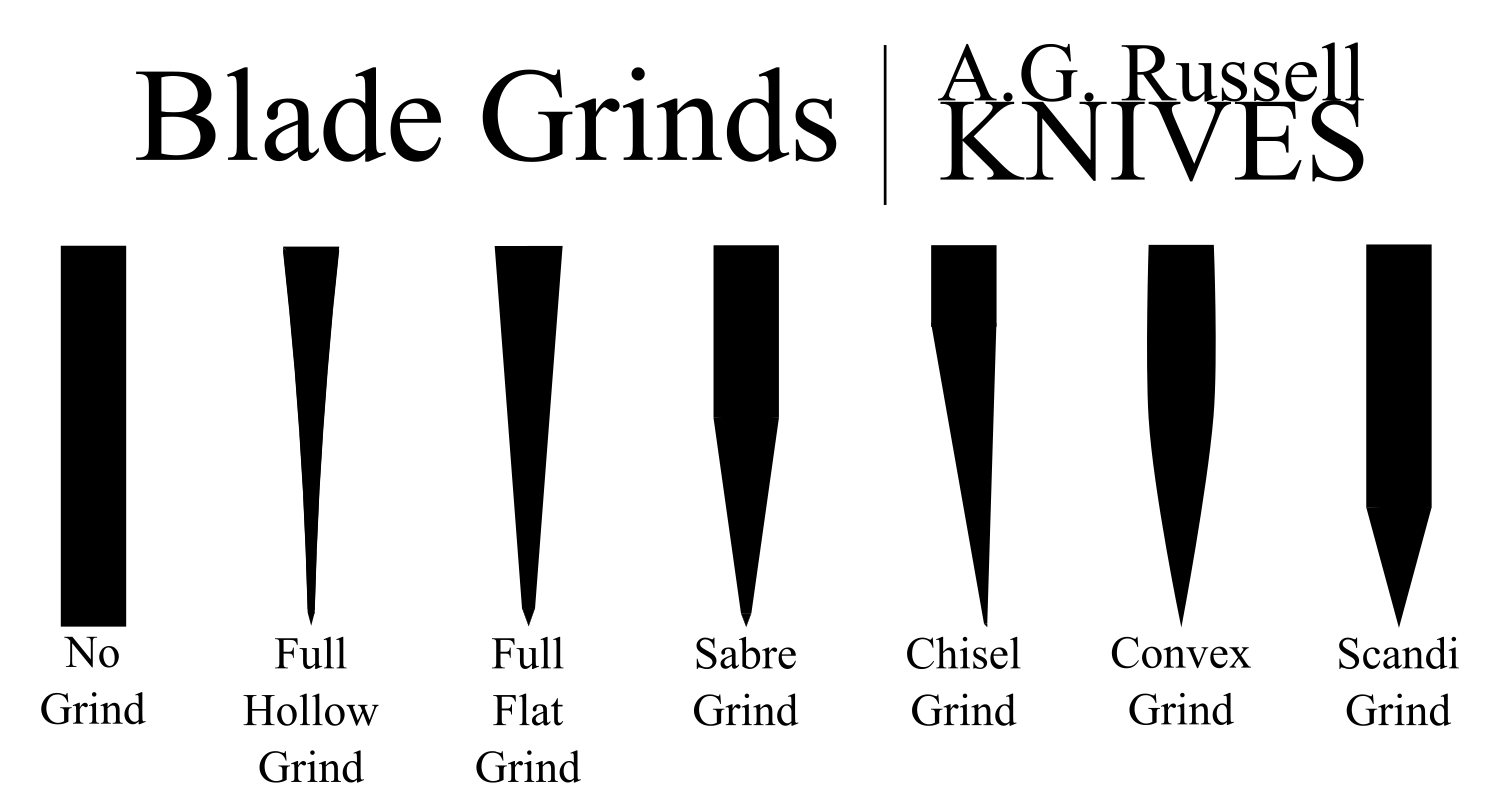
The shape of your axe’s edge determines how it cuts and how you should sharpen it.
Why Convex Grind Matters
Most chopping and splitting axes feature a convex grind. This outward curve from the bit to the cheek is stronger than a flat grind and cuts more efficiently. Once the bit penetrates wood, the ramp (the convex side) does the actual splitting work. A smooth, polished ramp reduces friction and drives the axe deeper.
Why the Bit Curves
The bit isn’t a straight line. It arcs gently from heel to toe. This curve concentrates force on a small contact area initially, then expands as the axe bites deeper. Maintaining this curve during sharpening preserves your axe’s cutting power.
Follow These Safety Rules Every Time
An axe is built to cut wood, which means it can cut you just as easily. Respect the tool and protect yourself.
Non-Negotiable Precautions
- Wear cut-proof gloves such as Kevlar or heavy-duty rigger gloves
- Never sharpen in your lap; a slip could be fatal
- Secure the axe head high in a vise or by kneeling with the head elevated
- Move the sharpener over the axe, never the reverse
- Keep your workspace stable and your focus sharp
Rushing causes accidents. Take your time.
Gather the Right Sharpening Tools
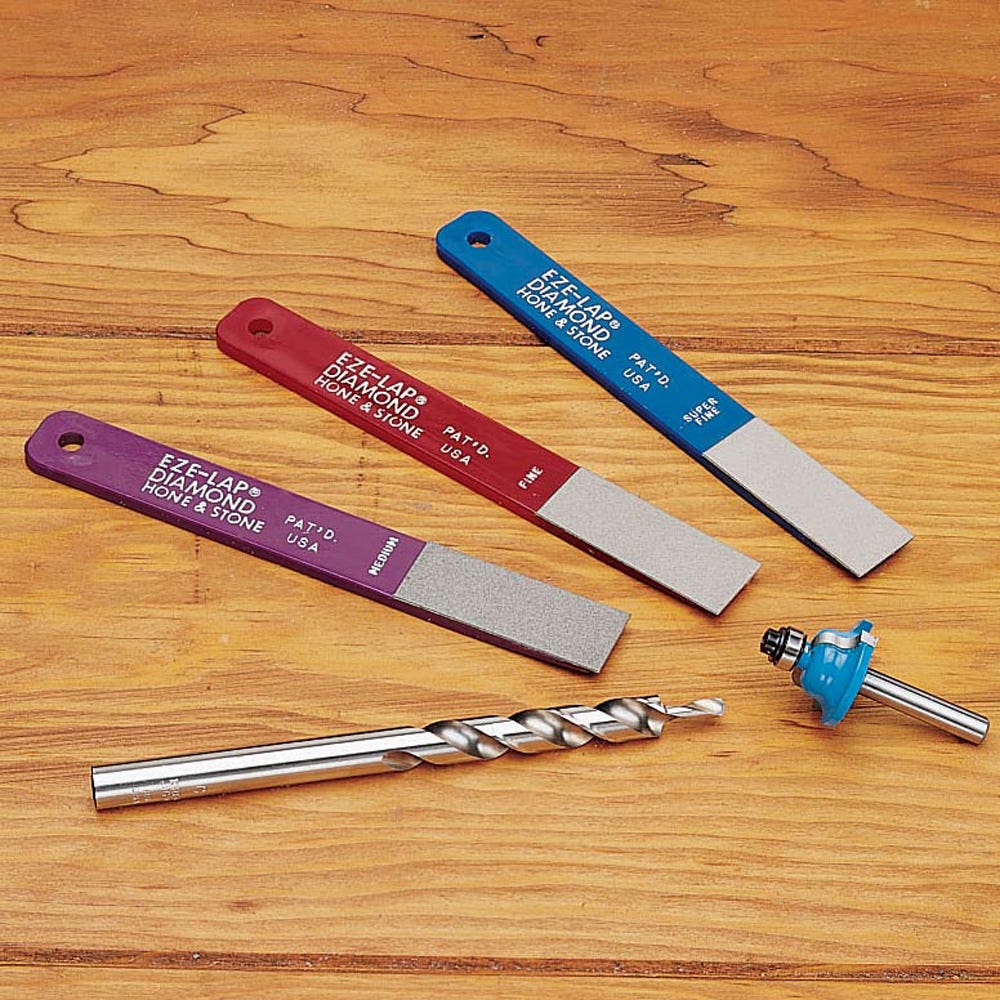
You don’t need a professional shop to get professional results. Two tool systems work well.
Purpose-Made Kit (Gransfors Bruks Style)
- Axe file for aggressive shaping
- Diamond file for refining
- Dual-sided axe stone (coarse and fine) for sharpening and polishing
DIY Hardware Store Setup
- Coarse crosscut file
- Fine metal file
- Diamond hone set (coarse, medium, fine)
- Sanding block with mousemat glued to the back
- Wet/dry sandpaper in 240 to 1200 grit
- Green buffing compound
- Scrap leather for polishing
Both systems achieve the same goal: a sharp, polished, convex edge.
Step 1: Cut Back the Damaged Bit
This stage restores shape when your bit is chipped, dented, or flattened from use.
Why This Step Comes First
Impacts and wear distort the bit over time. Cutting back removes damage and re-establishes the original convex profile.
How to File the Correct Way
- Use a coarse file
- File from the bit toward the poll, never toward the cutting edge
- Use a sweeping motion across the bevel
- Angle the file from toe to heel, then reverse direction on the next pass
- Lift and roll the file over the curve to preserve the bit’s arc
- Work both sides evenly, alternating 5 to 10 strokes per side
- Rest your index finger on top of the file to guide pressure
Filing toward the edge creates a wire edge that dulls almost immediately. Always file away from the bit.
Check Your Progress
Sight down the bit to confirm it looks straight and aligned with the haft. Run your finger along both cheeks to feel for symmetry. Stop when damage is gone and the curve is restored.
Time estimate: 10 to 20 minutes depending on damage.
Step 2: Smooth Out File Marks
Now refine the shape you just restored.
Switch Your Approach
- File from heel to toe, perpendicular to the previous angle
- Use a fine file or diamond hone
- Progress through coarse, medium, and fine diamond hones in sequence
Technique Tips
- Keep the hone flat against the convex bevel
- Flex the hone slightly so it maintains full contact with the curve
- Apply even pressure with your guiding finger
- Rinse the hone often if using it dry; water prevents clogging and heat buildup
All coarse file marks should disappear, leaving a uniformly smooth surface.
Step 3: Sharpen the Cutting Edge
Now create a keen, functional bit.
Using a Purpose-Made Axe Stone
- Wet the coarse side of the stone
- Move in a spiral motion from heel to toe and back
- Let water and stone particles form a slurry; don’t wipe it off, it acts as extra abrasive
- Continue until all diamond file marks vanish
- Flip to the fine side and repeat the spiral motion
Using the DIY Sanding Block
- The mousemat backing creates a flexible surface that conforms to the convex bevel
- Wrap wet/dry paper around the block, starting at 240 to 400 grit
- Push straight back from the bit toward the eye, never following the curve
- Progress through grits: 400, 600, 800, and finally 1200
- Keep the paper wet to reduce heat and prevent clogging
The soft backing is what preserves the convex shape. Without it, you’ll flatten the bevel and ruin your axe’s geometry.
Step 4: Polish for a Safe, High-Performance Edge
Polishing isn’t cosmetic. It makes your axe safer and more effective.
Why Polishing Matters
- Removes microscopic wire edges that catch and tear
- Reduces friction so the axe glides deeper with less effort
- Prevents glancing or rebounding, which causes most axe accidents
Purpose-Made Stone Method
- Use the fine side of the axe stone, wet
- Move from poll to bit, the opposite direction of sharpening
- Use light pressure and slow, deliberate strokes
- Aim for a mirror-like finish
DIY Buffing Method
- Cut scrap leather to fit your sanding block with the rough side out
- Apply a thick, even layer of green buffing compound
- Polish from poll to bit with light pressure
- Wipe residue and repeat if needed
The result is a reflective bevel that cuts effortlessly and stays safe.
Test That Your Edge Is Truly Sharp
Don’t trust appearance alone. Verify performance with simple tests.
Quick Sharpness Checks
- Thumb test: Gently drag your thumb across the bit (not along it). A keen edge feels sharp but shouldn’t cut you from a light touch.
- Paper test: Hold a sheet of paper vertically. A sharp axe slices through cleanly with minimal pressure.
- Wood test: Take a light swing at softwood. The bit should bite deeply without bouncing or glancing.
If the axe hesitates or slips, return to Step 3 or Step 4.
Keep Your Edge Sharp With Regular Maintenance
A sharp axe stays sharp when you care for it consistently.
Field Touch-Ups
- Carry a diamond hone or small axe stone
- After every 30 to 50 swings, do 3 to 5 strokes per side to remove micro-burrs
- No need for full sharpening sessions, just quick realignment
Proper Storage
- Keep the axe dry to prevent rust
- Apply a light coat of oil to the head after use
- Store indoors, away from moisture and humidity
Avoid These Common Sharpening Mistakes
Even experienced sharpeners make errors that hurt performance.
Mistakes That Ruin Your Edge
- Flattening the convex bevel by using a rigid tool without flexibility
- Filing toward the edge, which creates a wire edge that dulls instantly
- Skipping the polish, leaving a rough surface that catches and rebounds
- Ignoring symmetry, causing the axe to pull to one side during swings
Respect the convex geometry and work evenly on both sides.
Frequently Asked Questions About Sharpening an Axe
How often should I sharpen my axe?
Sharpen after every few hours of heavy use, or whenever the bit stops biting cleanly. For light occasional use, once or twice a season may suffice. Touch up with a stone every 30 to 50 swings during heavy work sessions.
Can I sharpen an axe with a regular knife sharpener?
Standard knife sharpeners won’t work well because axes have a convex grind, not a flat edge. You need files, diamond hones, or stones that can follow the curved bevel. Purpose-made axe tools or a DIY setup with flexible backing work best.
What grit sandpaper should I use to sharpen an axe?
Start with 240 to 400 grit for removing damage, then progress through 600, 800, and 1200 grit for refinement. The mousemat backing on your sanding block is essential; it lets the paper conform to the convex shape without flattening it.
How do I know if my axe has a convex grind?
Look at the bevel from the side. If it curves outward from the cutting edge to the cheek rather than forming a straight line, it’s convex. Most modern chopping and splitting axes use this design because it’s stronger and cuts more efficiently.
Is it dangerous to sharpen an axe?
Yes, if done carelessly. Always wear cut-proof gloves, secure the axe head in a vise or elevated position, and move the sharpener over the axe rather than the reverse. Never sharpen in your lap, and never rush the process.
What’s a wire edge and why is it bad?
A wire edge is a thin, fragile sliver of metal that forms when you file or sand toward the cutting edge. It feels sharp initially but folds over and dulls almost immediately. Always file or sand away from the bit, and remove any wire edge through polishing.
Key Takeaways for Sharpening an Axe
A dull axe is both ineffective and dangerous. The four-stage method (cut back, smooth, sharpen, polish) restores your axe’s geometry and creates a safe, high-performance edge. Respect the convex grind, file away from the bit, and never skip the polish.
Start by inspecting your axe and gathering the right tools. Work through each stage patiently, checking your progress frequently. Maintain your edge with regular touch-ups and proper storage. Your axe will cut cleaner, last longer, and keep you safer every time you swing it.
Now grab your tools and bring that edge back to life. Your next wood-splitting session will feel effortless.



