
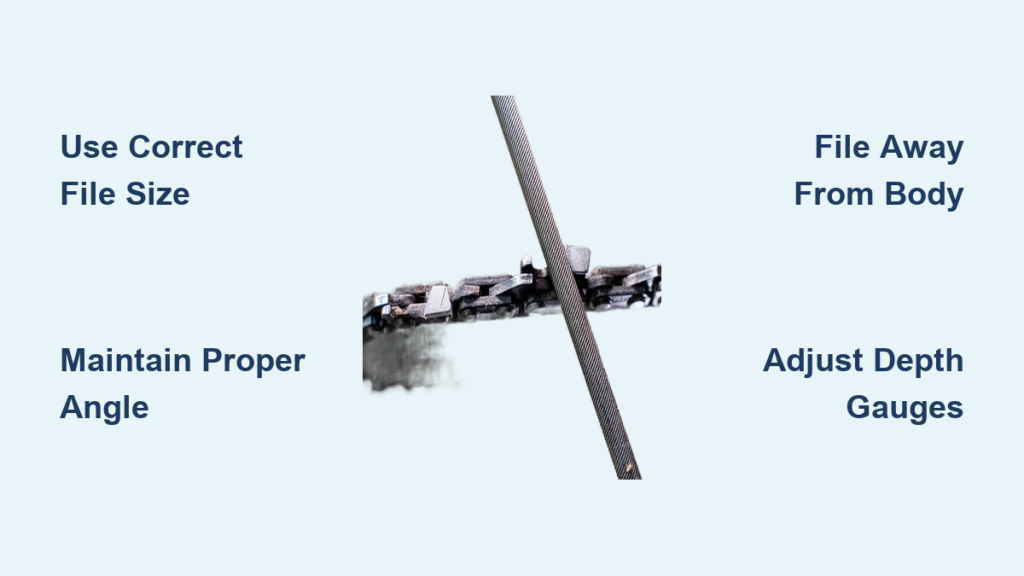
A dull chainsaw chain does not just make your job harder. It increases the risk of kickback, reduces cutting speed, and strains your equipment. Knowing how to use a chainsaw file properly is essential for maintaining peak performance, safety, and longevity of your tool. Whether you are in the woods or in the workshop, hand filing with a round file is a reliable, portable method to restore sharpness quickly. This guide walks you through every step from identifying when to sharpen to adjusting depth gauges and verifying results.
Identify Chain Specifications First

Before filing, confirm your chain specifications to avoid using the wrong file or angle.
Check Chain Pitch and File Size
Chain pitch determines the correct round file diameter. Common combinations include:
• .325″ pitch requires a 5/32″ file
• 3/8″ low-profile requires a 5/32″ file
• .404″ pitch requires a 7/32″ file
If you are unsure, check the owner’s manual, chain packaging, or look for stamped markings on the bar tip.
Determine Filing Angle
Most chains use a 30° top-plate angle, but some require 25° or 35°. Look for small hash marks on the cutters. One mark indicates 25°, two marks indicate 30°, and three marks indicate 35°. Using the wrong angle reduces cutting efficiency and can cause uneven wear.
Gather Essential Sharpening Tools

Having the right tools ensures accuracy, safety, and consistency during sharpening.
Required Tools for Hand Filing
You will need several key items to sharpen your chain properly:
• Round file in the correct diameter for your chain
• File guide or gauge for angle and height control
• Flat file for depth gauge adjustment
• Depth gauge measuring tool
• Work gloves and cut-resistant gloves
• Safety glasses
• Stump, block, or bench vise to secure the bar
Oregon and other brands offer complete filing kits that include all necessary tools in one package.
Pro Tip: Use a file guide until you are confident in freehand filing. Consistency matters more than speed when learning this skill.
Recognize When to Sharpen the Chain
Sharpening too late risks safety. Doing it too early wastes chain life. Knowing the right timing protects both you and your equipment.
Signs of a Dull Chain
Watch for these indicators that your chain needs sharpening:
• Produces fine sawdust instead of coarse wood chips
• Requires excessive pressure to cut through wood
• Smokes during operation even with adequate oil
• Pulls to one side while cutting
• Increases operator fatigue and fuel consumption
Recommended Sharpening Frequency
Field sharpen every 2 to 3 hours of use. Inspect the chain before each use. A quick touch-up takes just 5 minutes and restores cutting power significantly. A sharp chain cuts smoothly and efficiently, so do not wait for it to fail before sharpening.
Secure the Chainsaw Safely
Stability is critical for accurate and safe sharpening. Take time to properly secure your equipment before beginning.
Turn Off and Lock the Chain
First, shut off the engine completely. Engage the chain brake to prevent movement. Wear cut-resistant gloves and eye protection throughout the entire process.
Immobilize the Guide Bar
For field sharpening, place the bar upside down in a firewood stump or sturdy block. For workshop sharpening, clamp the bar in a bench vise using soft jaws to prevent damage. Ensure the chain does not move during filing. A moving chain leads to inconsistent angles and poor results.
Adjust Chain Tension Before Filing
A loose chain shifts position during filing, leading to inconsistent filing angles and poor results.
Set Proper Tension
Loosen the pinch bolts on your chainsaw. Turn the tensioning screw until the chain is snug against the bar. You should still be able to rotate the chain by hand with some resistance. Correct tension means the chain is tight but mobile. A loose chain causes misaligned cuts and poor sharpening results.
Clean and Inspect the Chain
Debris and damage affect filing quality and safety. Always start with a clean, undamaged chain.
Remove Dirt and Resin
Wipe down the chain and bar with a rag to remove accumulated oil, grease, and debris. Use a wire brush or solvent if buildup is heavy. This prevents debris from interfering with the filing action.
Check for Damage
Inspect the chain carefully for these issues:
• Broken or chipped teeth
• Stretched or cracked drive links
• Missing rivets
• Blue discoloration indicating overheating
Replace the chain if structural damage is present. Filing a damaged chain wastes time and can be dangerous.
Position the File Correctly
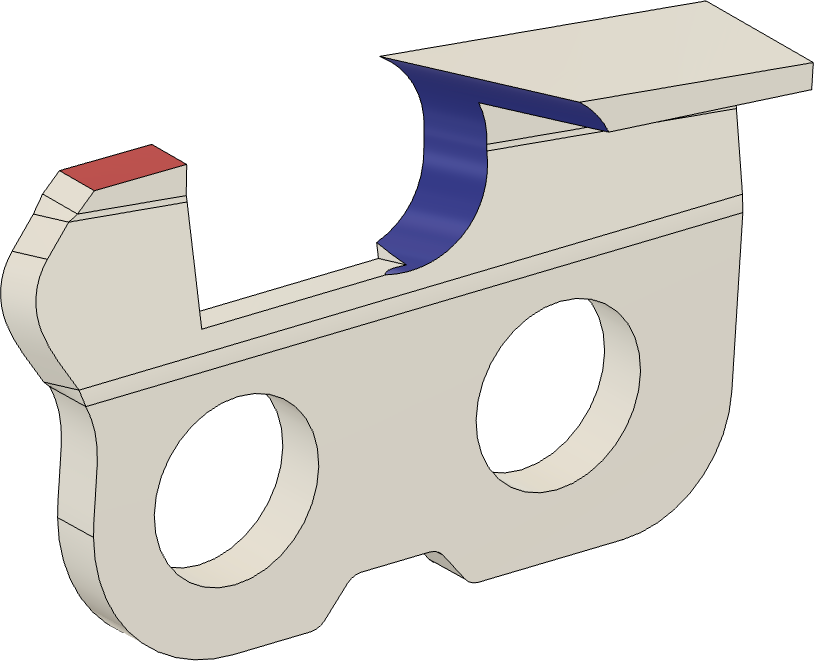
Proper file placement ensures correct cutting geometry and effective sharpening.
Insert the File into the Gullet
Place the round file in the gullet, which is the curved area behind the cutter tooth. Slide it forward so it contacts the cutting edge of the tooth.
Set File Height: 1/5 Above Top Plate
Approximately 20% of the file diameter should extend above the top plate. For a 5/32″ file, about 0.03 to 0.04 inches should be visible above the cutter surface. Use a file guide to maintain this height consistently across all teeth. The file should sit slightly above the cutter top surface, not flush and not too high.
Align the File at the Correct Angle
Angle determines how aggressively the chain bites into wood. Proper alignment is crucial for effective cutting.
Maintain 90° to the Bar
Hold the file perpendicular to the guide bar. This ensures even contact across the entire cutter edge.
Match the Top-Plate Angle
Most chains use a 30° angle, but check your specific chain. Some require 25° or 35°. Align the file parallel to the centerline of the chain. Use a reference block marked with common angles to verify your alignment before proceeding.
Pro Tip: Correct alignment means the file follows the natural curve and angle of the cutter. Incorrect angles cause poor cut quality and chain pull.
File With Proper Stroke Technique
The way you push the file affects sharpness and tooth shape. Technique matters as much as positioning.
Push Away From Your Body
Always file in a backward motion, pushing away from yourself. Never pull the file toward your body. This risks injury and can damage the tooth by catching the file on the edge.
Use Full-Length, Even Strokes
Apply light, consistent pressure throughout each stroke. Stroke the entire length of the cutter edge. Continue until the face of the cutter is bright and reflective. Do not count strokes. Assess each tooth visually instead. Let the file do the work. Excessive force creates burrs and shortens file life.
Sharpen All Cutters on One Side First
Filing side-by-side teeth together maintains balance and symmetry in your chain.
Work in Sequence
Start with the first cutter facing you. File all cutters on that side before flipping the chain. Move from inside to outside of the bar to distribute wear evenly across the chain.
Match Tooth Lengths
If one tooth is shorter due to damage, file the other cutters down to match it. Uneven teeth cause vibration and poor tracking. The goal is uniform length, angle, and shine across all cutters on one side.
Flip and Sharpen the Opposite Side
Symmetry prevents the chain from pulling to one side during operation. Do not skip this step.
Reposition the Chainsaw
Rotate the saw or flip the bar to access the reverse-facing cutters. Repeat the same filing process used on the first side.
Use Same Stroke Count and Angle
Match the number of strokes per tooth on this side to maintain symmetry. Maintain identical angle and pressure applied to each cutter. Skipping this step causes one-sided cutting and significantly increases kickback risk.
Adjust Depth Gauges Every 3-5 Sharpenings
As cutters are filed shorter, depth gauges become relatively taller, reducing the chain’s bite into wood.
Measure Raker Height
Place the depth gauge tool over the raker. If the cutter tip extends above the gauge, the raker is too tall and needs to be filed down.
File Down Excess Height
Use a flat file for this task. File in the same direction as the cutter, toward the nose of the bar. Take light strokes and recheck with the gauge after each pass. Never file with the gauge in place, as it can overheat and warp.
Round the Front Edge
After achieving correct height, lightly round the sharp front corner of the raker. This improves chip ejection and reduces cutting resistance. Do not touch the cutter during this step.
Perform Final Quality Checks
Verify your work before returning the saw to service. Rushing this step leads to problems later.
Inspect All Cutters
Ensure all teeth are equally sharp and shiny. Check that angles are consistent across every cutter. Verify no burrs remain on the sides or top of any tooth. Use the file to scrape off any remaining burrs for a clean edge.
Confirm Raker Uniformity
Every raker should match the depth gauge measurement. Front edges must be smoothly rounded. Inconsistent rakers cause uneven cutting and vibration.
Reinstall, Lubricate, and Test
Proper reassembly ensures safe and efficient operation when you return to cutting.
Lubricate the Chain
Soak the chain in bar and chain oil overnight for deep penetration. Wipe off excess before installation to prevent dripping.
Reattach and Tension
Mount the chain on the bar. Adjust tension so the chain is snug but still hand-rotatable. Re-engage the chain brake before testing.
Test on Scrap Wood
Cut a small log and observe the results. Coarse wood chips indicate a sharp chain. A smooth, straight cut indicates balanced sharpening. No pulling or vibration means even tooth lengths. Success means effortless cutting, minimal smoke, and no kickback tendency.
Choose Field vs. Bench Sharpening Wisely
Match the method to your needs and skill level. Each approach has specific advantages.
Field Sharpening: Fast and Portable
Field sharpening keeps the chain on the saw. It takes approximately 5 minutes. This method is ideal for routine touch-ups during work. It uses basic hand tools and requires minimal setup.
Bench Sharpening: Precision Control
Bench sharpening requires removing the chain and mounting it in a vise. This provides full access to all angles. It works better for damaged or overheated chains. This method takes 15 to 30 minutes but offers superior precision.
Tip: Use bench sharpening when teeth are uneven or show blue discoloration from overheating.
Avoid Common Filing Mistakes
Even small errors reduce performance and increase danger. Learn to recognize and prevent these issues.
Using Wrong File Size
A file that is too big rounds off the cutting edge. A file that is too small fails to contact the full surface of the cutter. Both scenarios damage cutting performance.
Filing Toward Your Body
This risk causes loss of control. The file can hook the tooth and damage the cutter or injure you.
Ignoring Depth Gauges
Skipping depth gauge adjustment leads to inefficient cutting or dangerous kickback. This is a common mistake that compromises safety.
Skipping One Side
Failing to sharpen both sides equally causes the chain to pull and wear unevenly. This creates a serious safety hazard.
Over-Filing
Filing too much shortens chain life significantly. File only until the edge is sharp and bright. More is not better.
Understand the Safety and Performance Benefits
A well-filed chain is not just sharper. It is safer and more efficient than a dull one.
Why Proper Filing Matters
Proper filing reduces kickback risk by up to 70%. A sharp chain cuts 2 to 3 times faster than a dull chain. It lowers fuel consumption and reduces engine strain. Proper filing extends chain and bar life. It improves control and reduces operator fatigue. A sharp chain is a safe chain. Dull chains require more force, which increases accident risk.
Master the Skill Over Time
Like any trade skill, chain filing improves with practice. Be patient with yourself as you develop this ability.
Build Consistency
Start with a file guide for accuracy. Practice on an old chain before working on your primary chain. Keep a sharpening log recording strokes, usage, and results.
Advance to Freehand Filing
Use your left hand to stabilize the angle. Use your right hand to push the file. Develop muscle memory for repeatable results. The goal is to sharpen confidently in the field, anytime, anywhere.
Frequently Asked Questions About Using a Chainsaw File
What size file do I need for my chainsaw chain?
The file size depends on your chain pitch. A .325″ pitch chain uses a 5/32″ file. A 3/8″ low-profile chain also uses a 5/32″ file. A .404″ pitch chain requires a 7/32″ file. Always check your owner’s manual or chain packaging to confirm the correct size.
How often should I sharpen my chainsaw chain?
Sharpen your chain every 2 to 3 hours of use. Inspect the chain before each use for damage or wear. In the field, a quick 5-minute touch-up restores cutting power significantly. Sharpen more frequently when cutting dirty or abrasive wood.
What happens if I do not adjust the depth gauges?
If depth gauges are too high, the chain cuts inefficiently. If they are too low, kickback risk increases significantly. Adjust depth gauges every 3 to 5 sharpenings as cutters become shorter. This maintains proper cutting depth and safety.
Can I sharpen a damaged or bent tooth?
Minor damage can be addressed by filing all teeth to match the shortest one. However, severely damaged teeth, blue discoloration from overheating, or bent teeth require chain replacement. Attempting to file severely damaged teeth wastes time and compromises safety.
Why does my chain pull to one side after sharpening?
This happens when cutters on one side are sharper or longer than the other. It means you did not file both sides equally. Flip the chain and re-sharpen the duller side. Match stroke count and angle on both sides for balanced cutting.
Key Takeaways for Using a Chainsaw File
Knowing how to use a chainsaw file correctly transforms your chainsaw from a struggling tool into a precision cutting machine. With the right tools, proper technique, and attention to detail, you can maintain a razor-sharp chain that performs safely and efficiently. Always file away from your body with light, even strokes until the cutter face is bright and reflective. Maintain 20% of the file above the top plate for correct angle. Sharpen all cutters on one side first, then flip and repeat on the opposite side. Use a file guide and depth gauge tool for precision, especially when learning. Adjust rakers every 3 to 5 sharpenings to maintain optimal cutting depth. Spend five minutes sharpening now, and save hours of hard labor later. A sharp chain is safer, faster, and extends the life of your equipment.



