
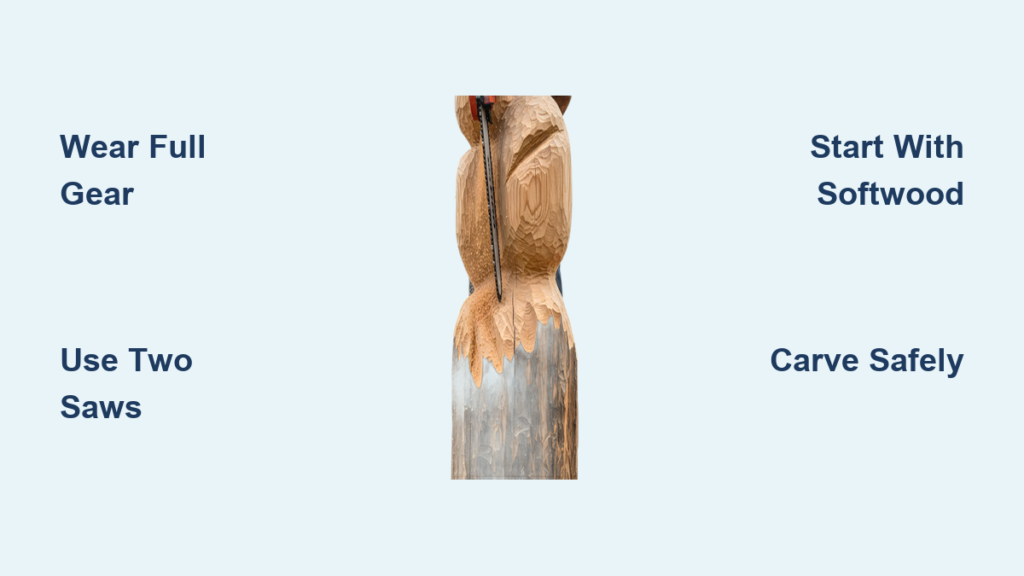
Chainsaw carving transforms raw logs into bold, expressive sculptures using power, precision, and creativity. Whether it is a whimsical mushroom for your garden or a towering bear for a public display, this high-energy art form lets you shape wood fast and dramatically. If you have ever watched a live carver at a festival and thought, “I could try that,” you are right. Anyone can learn how to make chainsaw carvings, but doing it safely and successfully starts with the right foundation.
This guide walks you through every step of how to make chainsaw carvings, from choosing your first log to finishing with professional flair. You will learn essential safety practices, the best tools for control and detail, how to plan your design, and techniques used by experienced carvers.
Gear Up: Essential Safety Equipment for Chainsaw Carving
Your life depends on respecting the saw. Chainsaws are not yard tools when carving. They are high-speed sculpting machines that demand full attention and proper protection.
Must-Have Protective Gear
Skip any piece of gear and you risk serious injury. Always wear the following when learning how to make chainsaw carvings:
• Helmet with face shield to block flying chips and protect against kickback
• Hearing protection such as earmuffs or plugs, since gas saws exceed 100 dB
• Chainsaw chaps with Kevlar lining to stop the chain on contact, especially critical for your left leg
• Steel-toed boots to prevent foot injuries from slips or falling logs
• Leather gloves to improve grip and guard against vibration and splinters
• Safety goggles for full eye coverage, even with a face shield
Pro tip: Treat every start like a live-fire drill. Both hands on the saw, firm stance, and eyes on the cut.
Understanding and Preventing Kickback
Kickback happens when the tip of the guide bar hits resistance, causing the saw to snap back toward your face or chest. To prevent this dangerous reaction when you learn how to make chainsaw carvings:
• Never use the upper quarter of the bar tip, known as the kick zone
• Keep both hands on the saw at all times during operation
• Use a low-kickback chain and ensure proper tension
• Practice controlled, shallow cuts instead of deep plunges
Bottom line: If you would not use a chainsaw without training in the woods, do not start carving without proper preparation.
Choose the Right Chainsaw for Carving Projects

Not all chainsaws are built for carving. The wrong saw leads to poor control, fatigue, or stalled progress.
Gas vs. Electric: Which Works Best
| Type | Best For | Limitations |
|---|---|---|
| Gas-powered | Large logs, outdoor work, professionals | Loud, smoky, needs fuel mix |
| Electric corded | Beginners, quiet zones, small projects | Cord limits movement |
| Battery-powered | Light trimming only | Low power, short runtime |
Avoid battery saws for carving because they lack the sustained power needed for deep cuts.
Recommended Models for Carvers
For corded electric saws, consider the Stihl MSE 170C-BQ or Makita US4051A. For gas-powered carving, the Stihl MS 261 or Echo CS-590 deliver professional results. Most experienced carvers prefer gas for power and freedom of movement.
Why Two Saws Are Better Than One
Smart carvers use two saws for better results. A large saw with a 16 to 20 inch bar handles roughing out big shapes. A small detail saw with an 8 to 12 inch bar or 017 tip works for eyes, claws, and fine lines. A dime-sized tip, approximately half-inch radius, lets you carve tight curves and lettering with precision.
Select and Prepare the Right Wood for Carving

Your canvas matters. The wrong log cracks, dulls your chain, or collapses mid-carve.
Best Wood Types for Beginners
Stick to softwoods when learning how to make chainsaw carvings. They cut easier and are gentler on chains. Recommended options include lodgepole pine, white pine, cedar, spruce, and cottonwood. Avoid oak, maple, or wet green wood at first because they are harder to carve and wear down chains fast.
Where to Find Free Carving Logs
You do not need to buy expensive lumber. Ask tree services or arborists for storm-felled logs. Check Craigslist, Facebook Marketplace, or Nextdoor for free offerings. Look for deadfall with landowner permission.
Warning: Always inspect logs for hidden metal. Nails, staples, or wire can shatter your chain and cause serious injury.
Prepare the Log Before Carving
Before starting your project, follow these steps:
- Remove bark to check for debris and see grain direction
- Clean dirt and rocks off the surface
- Level the base so the log sits flat and stable
- Seal end grain with wax or paint to prevent cracking
Pro tip: Elevate the log to waist height. This reduces back strain and improves control.
Set Up a Safe Carving Workspace
A good carving space keeps you safe, efficient, and focused.
Work Outdoors with Proper Cover
Carving creates dust and noise, so do it outside. Use a tarp or canopy to block sun and rain. Keep the area clear of children, pets, and tripping hazards.
Handle Power Cords Safely
For electric saws, use a 12-gauge extension cord with a maximum length of 100 feet to avoid voltage drops. Plug into a GFCI outlet to prevent shocks. Route cords away from your cutting path so you do not accidentally cut through them.
Stabilize Your Log for Safe Carving
An unstable log is dangerous and ruins precision.
Best Clamping Methods
The Jawhorse from Rockwell provides adjustable clamping with 360-degree access, making it perfect for beginners. For a DIY option, screw a 12-inch by 12-inch plywood square to the log bottom, then mount it to a larger log or bench with screws. A wood bench vise works great for small, detailed pieces. For massive logs on the ground, ensure they are level and cannot roll.
Key tip: Never carve a log that wobbles. Stability prevents slips and injuries.
Plan Your First Carving Project
Skipping planning leads to lopsided, unbalanced sculptures. Start simple and scale up.
Beginner-Friendly Project Ideas
Pick forgiving, symmetrical shapes when starting. A mushroom, pumpkin, Christmas tree, welcome sign, or log chair make excellent first projects. Avoid 3D animals like bears or eagles as your first project because they require advanced proportion skills.
Transfer Your Design to the Wood
Sketch your idea on paper first. Mark key points on the log, including head, shoulders, hips, limbs, centerline, and eye level for animals. Use a permanent marker or chalk for visibility.
Pro tip: For a bear holding a sign, mark hand positions and cut a V-shaped groove from neck to hands.
The Carving Process: Rough Shape to Detail
Follow a proven workflow to transform a log into a finished sculpture.
Step 1: Rough Out the Shape First
Level the top of the log to establish a base. Block in major forms like head, body, legs, and tail using deep, sweeping cuts with a large saw. Alternate sides to maintain symmetry. Leave extra wood because you can always remove more later.
Rule: Make shallow, controlled cuts. Deep plunges reduce control.
Step 2: Refine the Proportions
Now shape with intention. Shoulders should be higher than hips for a stable stance. Short legs create a stronger base. Exaggerate features such as big arms for a bear holding a sign. Softened edges look better than sharp, blocky corners. Check your work from all angles and step back every few minutes.
Step 3: Add Detail and Texture
This is where your sculpture comes alive.
Creating Realistic Fur Texture
Follow natural hair flow down the spine and around muscles. Use both sides of the chainsaw tip for layered strokes. Vary depth and pressure for dimension. Pull the saw in the direction of hair growth.
Pro advice from seasoned carvers: If you think you have gone deep enough, go deeper.
Carving Facial Features
Use a dime-sized tip to carve recessed eye sockets. Make a triangular cut or shallow gouge for the nose. Create a small notch or open grin for the mouth. Cut straight down for ears, then angle inward.
Shaping Claws and Paws
Cut slots between toes. Angle front edges to suggest sharpness. Use a grinder or torch to define tips.
Add Signs and Accessories to Your Carving

Functional elements add charm and storytelling to your work.
Carve a Bear Holding a Sign
Cut a V-shaped groove from the neck down to the hands. Insert a flat board into the groove with no glue or screws needed. Carve letters separately using freehand technique with a detail saw and back-and-forth motion to deepen cuts. Torch and sand the letters for contrast.
Tip: Attach the sign after carving the bear to prevent accidental damage during the carving process.
Finish Your Carving for Beauty and Durability
A great finish protects your work and makes details pop.
Clean and Smooth the Surface
Blow off sawdust with compressed air. Lightly sand with 80 to 120 grit for smooth areas, though this is optional for textured sections. Grind any rough edges or transitions.
Use Torch for Depth and Protection
The Shou Sugi Ban technique works beautifully. Pass a propane torch over recessed areas like eye sockets, nose, mouth, ears, and claws. Evenly blacken the surface, then wire brush to remove loose carbon. This technique adds dramatic contrast, waterproofs the wood, and resists insects while removing fuzzy wood fibers.
Stain and Seal for Long Life
Apply dark wood stain with two coats to enhance grain. Seal with spar urethane, a marine-grade product that withstands rain, sun, and temperature swings. Apply two to three coats, lightly sanding between each. Optionally, glue in glass or acrylic eyes for realism.
Pro tip: Never skip sealing. Unprotected wood cracks and rots fast outdoors.
Protect Your Body While Carving
Carving is physically intense. Prevent injury with smart habits.
Understanding the Physical Demands
Arms, shoulders, back, and core all engage during carving. Vibration from the saw strains joints and nerves. Most sessions last two to three hours before fatigue hits.
Prevent Injury with These Habits
Stretch before and after carving. Take breaks every 30 to 60 minutes. Stay hydrated. Use proper posture by bending your knees, keeping your back straight, and not overreaching.
Recover Like a Pro
After carving, soak in an Epsom salt bath for sore muscles. Ice joints if swollen. Take anti-inflammatory medication if needed. Rest for one to two days before the next session.
Reality check: Even experts rarely finish large pieces in one day.
Adopt the Right Mindset for Success
Your attitude matters more than talent. Progress comes from doing, not waiting.
Start Now: Perfection Is Not Required
Your first carving will likely be rough, and that is okay. Every pro started with a lopsided mushroom or imperfect bear. Action beats hesitation.
Quote to remember: Would-be woodcarvers would be woodcarvers if they would carve wood.
Learn from Mistakes
Wood is forgiving. A miscut can become a scar, a feature, or a lesson. Watch YouTube tutorials, read books like Chainsaw Carving a Bear, or binge Carver Kings on Netflix. Join online forums and ask questions.
Have Fun and Keep Going
Live carving draws crowds. Enjoy the attention. Celebrate small wins like a smooth curve, a deep texture, or a finished piece. Your style will evolve. Just keep carving.
Final truth: Someone, somewhere, will love what you make, even if it is not perfect.
Quick Carving Checklist
Use this before every project:
• Wood: Softwood log, 3 to 4 feet, dry, bark removed
• Stabilize: Use Jawhorse or plywood base
• Saws: Large saw for roughing, small saw for detail
• Safety: Helmet, chaps, gloves, boots, hearing protection
• Workspace: Outdoor, shaded, stable, power access if electric
• Plan: Sketch design, mark key points, start simple
• Carve: Rough shape, refine, detail, texture
• Finish: Clean, torch, stain, seal
• Sign: V-groove from neck to hands, carve letters separately
• Body care: Stretch, hydrate, take breaks, recover
Frequently Asked Questions About How to Make Chainsaw Carvings
What is the best wood for chainsaw carving beginners?
Softwoods work best for beginners. Lodgepole pine, white pine, cedar, spruce, and cottonwood cut easily and are gentle on chains. Avoid hardwoods like oak or maple until you have more experience.
Do I need a special chainsaw for carving?
You can use a standard chainsaw, but many carvers prefer two saws. A large saw with a 16 to 20 inch bar handles rough shaping. A smaller saw with an 8 to 12 inch bar or detail tip handles fine work like eyes and lettering.
How dangerous is chainsaw carving?
Chainsaw carving is inherently dangerous without proper training and equipment. Always wear full protective gear including helmet, face shield, hearing protection, chainsaw chaps, gloves, and steel-toed boots. Understand kickback risks and how to prevent them.
How long does it take to learn chainsaw carving?
Most beginners can create simple pieces like mushrooms or pumpkins within a few sessions. More complex projects like lifelike animals require months or years of practice to master.
Can I use an electric chainsaw for carving?
Yes, electric chainsaws work for beginners and quieter work environments. However, they lack the sustained power of gas saws for deep cuts. Battery-powered saws are not recommended for serious carving due to short runtime and lower power.
Key Takeaways for Learning How to Make Chainsaw Carvings
Safety must always come first when learning how to make chainsaw carvings. Wear full protective gear, understand kickback risks, and train before you start. Choose the right tools, including a quality chainsaw and possibly a second detail saw. Start with softwoods like pine or cedar and simple projects like mushrooms or signs. Follow a proven workflow from rough shaping through refining and detailing to finishing. Protect your body with proper posture, stretching, and regular breaks. Most importantly, start now. Your first piece will not be perfect, but every expert began exactly where you are today. Now fire up the saw and let the creativity flow.



