
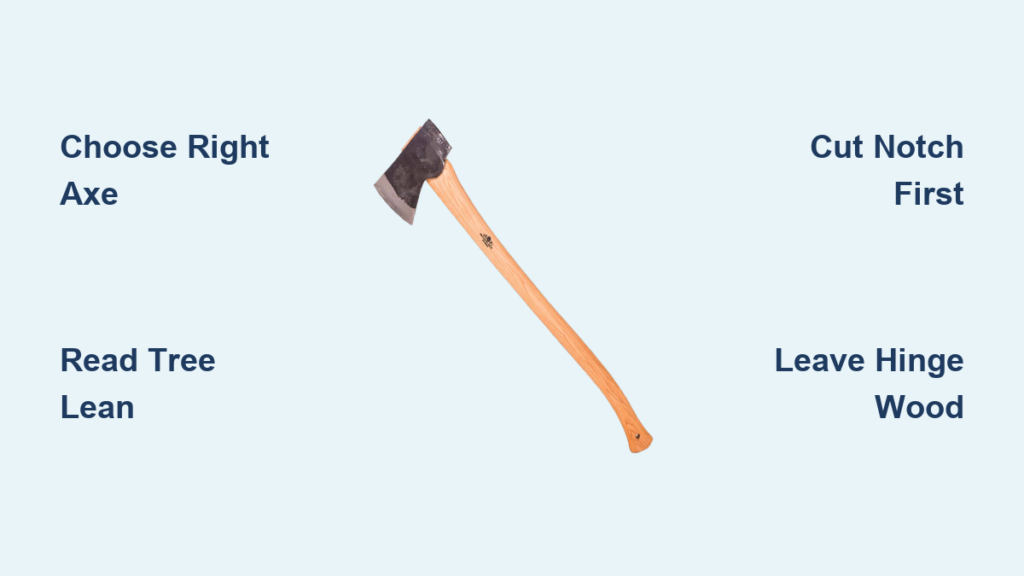
You step into the woods with your axe, ready to bring down a tree, but uncertainty hits the moment you face the trunk. Where do you swing first? Which way will it fall? Felling a tree with an axe is a timeless bushcraft skill that rewards patience and precision, yet it intimidates beginners because one wrong move can send wood, tools, or the whole tree in a dangerous direction.
This guide removes the guesswork. You will learn how to choose the right axe, read a tree’s natural lean, shape a proper notch, execute a controlled back cut, and keep yourself safe from start to finish. Each step builds on the last, giving you a clear path from your first assessment to a clean, predictable fall.
Choose the Right Axe for the Job

Match Axe Size to Tree Diameter
Using the wrong axe wastes energy and produces poor cuts. A full-sized felling axe is essential, since hatchets lack the mass and geometry to penetrate a trunk efficiently. For trees 6 to 10 inches across, a 3.5 to 4 pound head works well. Medium trees between 10 and 18 inches need a 4.5 to 5 pound head. Anything larger requires a 5.5 to 6 pound head for deep, decisive bites per swing.
Prioritize Handle Length and Control
Handle length affects power and safety. A handle between 28 and 36 inches lets you generate force through your whole body rather than just your arms. Shorter handles limit swing power, while excessively long handles reduce control. Choose a length that lets you swing comfortably without overextending.
Keep the Edge Razor Sharp
A dull axe bounces off wood and slips unpredictably. Hone your edge to a clean 25 to 30 degree bevel before every felling session. The bit should reflect light evenly with no nicks or rolled sections. Inspect the handle for cracks and ensure the head is tight. Treat wooden handles with linseed oil to prevent drying and splintering.
Assess the Tree and Surroundings

Read the Natural Lean and Branch Weight
Every tree leans, even if subtly. Stand back and observe the trunk from multiple angles to spot its dominant lean direction. Note heavy limbs on one side, since they pull the tree off course during the fall. Your cuts must work with these natural forces, not against them.
Scan for Hazards in Every Direction
Look around the full 360 degrees before cutting. Identify structures, power lines, vehicles, trails, and people who could be struck. Look up for dead branches known as widowmakers that could drop mid-cut. Clear brush and debris from the base so you can move freely and spot your footing.
Pick a Safe Fall Zone and Escape Route
Choose a fall direction with the most open space and the least risk. The ideal zone lies away from the wind and into a clearing. Once you commit to a direction, plan two escape paths at 45 degree angles behind the tree, opposite the fall line. These paths keep you clear of the trunk and the kickback zone.
Plan Your Notch and Back Cut
Understand the Three-Part Cutting System
Felling with an axe relies on a notch cut, a back cut, and hinge wood. The notch cut opens the side facing the fall direction. The back cut releases the tree from the opposite side. Hinge wood is the uncut strip between them that guides the tree as it falls. Together, these three elements control direction without any engine power.
Size the Notch to One-Third of the Trunk
The notch should reach one-third of the trunk’s diameter and span 80 to 90 degrees like a pie slice. It consists of two cuts: a horizontal top cut and a downward-angled bottom cut that meet precisely. Too shallow, and you lose control. Too deep, and the trunk may split.
Position the Back Cut Above the Notch
Make the back cut on the side opposite the notch, 1 to 2 inches higher than the notch’s bottom edge. This height creates a pivot point and prevents the stump from kicking up. Cut horizontally until only 1 to 2 inches of hinge wood remain. Never cut all the way through, or you lose control completely.
Make the Notch Cut
Start with a Level Top Cut
Stand on the fall side and swing horizontally into the trunk. Aim for a depth equal to one-third of the diameter. Keep the cut level by sighting along it or using a small reference stick. This cut defines the upper edge of your notch.
Add the Angled Bottom Cut
Below the end of the top cut, swing at a 30 to 45 degree angle to meet the first cut. When both lines converge, a clean triangular notch falls free. Knock out loose chips often so you can see your work clearly.
Refine the Notch Corners
Chisel away any leftover wood to crisp up the notch edges. Sharp corners give you accurate directional control. Rounding or widening the notch weakens its structure and reduces your ability to predict the fall.
Execute the Back Cut
Cut from the Opposite Side
Move to the back of the tree, directly across from the notch. Begin a horizontal cut at the same height as the notch’s top edge. Work steadily, removing wood in even chips rather than hacking wildly.
Stop at the Hinge Point
Leave 1 to 2 inches of uncut wood between the back cut and the notch. This hinge guides the tree as gravity takes over. Cutting too far invites kickback or a sideways slide.
Use a Wedge if the Cut Closes
If the back cut pinches shut, common in windy conditions or dense wood, drive a wooden or plastic felling wedge into the kerf. Tap it with a mallet or the back of your axe head to keep the cut open and tip the tree toward your planned direction.
Control the Fall
Watch and Listen for Movement
As you near the final fibers, pause and observe. Creaking sounds and subtle leans signal that the tree is about to move. Stay alert and ready to move.
Retreat Along Your Escape Route
Once the hinge is thin enough to fail, stop cutting. Step back along your 45 degree escape path immediately. Never turn your back on a falling tree, and put at least two tree lengths between you and the trunk.
Let Gravity Finish the Job
Resist the urge to push or pull. Allow the tree to fall on its own. Forced intervention often causes loss of control and serious injury.
Finish the Job Safely
Confirm the Tree Is Settled
Wait at least one minute before approaching the downed tree. Look for movement, settling limbs, and hanging branches that could swing loose. Never walk under a partially suspended trunk.
Limb the Tree from Base to Top
Start at the base and work upward. Cut each branch at a slight downward angle to keep your axe from striking dirt. Maintain stable footing and swing away from your body.
Buck the Trunk into Firewood Lengths
Cut the trunk into manageable sections, typically 16 to 24 inches for firewood. Place the log on a stable platform or raised support. Make top-side cuts first to prevent the axe from binding in the wood.
Maintain Safety from Start to Finish
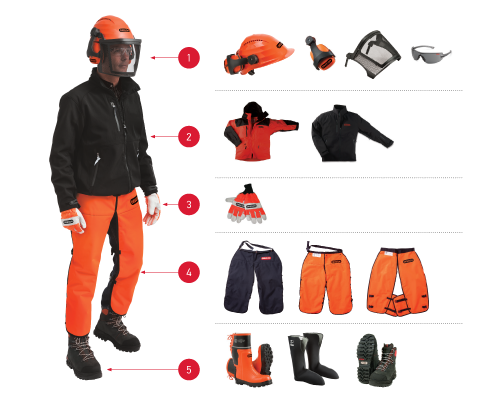
Wear Proper Protective Gear
Always put on steel-toed boots to protect against axe slips and falling wood. Wear gloves to improve grip and absorb vibration. Use eye protection to block flying chips and hearing protection during long sessions. Long pants and sleeves guard against cuts and insect bites.
Avoid These Common Mistakes
Cutting above shoulder height reduces accuracy and tires you quickly. Swinging with your arms alone wastes energy, so engage your legs, hips, and torso. Never stand directly behind the axe, since a slip can strike your legs. Ignoring wind direction is risky, because strong gusts can override a well-shaped notch.
Know When Not to Fell a Tree
Skip trees that lean more than 20 degrees away from your planned fall path. Hollow or rotten trunks split unpredictably. Trees tangled in others can barber-chair or kick sideways. Postpone work during high winds, heavy rain, or icy conditions that make footing unsafe.
Build Skill Through Practice
Start with Small Trees
Begin with saplings or trunks 4 to 8 inches in diameter. Small trees let you focus on clean cuts, stance, and consistent swings without overwhelming force. Each successful fall builds confidence for larger jobs.
Sharpen Frequently in the Field
Resharpen every 15 to 20 minutes of active cutting. A quick touch-up with a file keeps the edge biting deep and reduces the effort per swing.
Learn from Every Cut
No two trees behave identically. After each felling, review what worked and what did not. Did the notch guide the fall cleanly? Did the back cut bind? Adjust your approach with each new tree.
Frequently Asked Questions About Felling a Tree with an Axe
Can a beginner safely fell a tree with an axe?
Yes, beginners can fell small trees safely by starting with trunks under 8 inches in diameter, wearing protective gear, and following a clear step-by-step plan. Practicing on smaller trees builds skill before attempting larger ones.
How long does it take to fell a tree with an axe?
Felling a small tree (6 to 10 inches) typically takes 30 to 60 minutes for a beginner. Larger trees can take several hours because each swing removes less wood than a chainsaw.
What is the most common mistake when felling with an axe?
Cutting the back cut too low or all the way through is the most dangerous mistake. It removes the hinge wood and leads to kickback or uncontrolled falls. Always leave 1 to 2 inches of hinge intact.
Do I need a wedge to fell a tree with an axe?
A wedge is not required for small trees, but it helps on larger trunks or when the back cut starts to close. Carry at least one wooden or plastic felling wedge for safety.
How do I know which direction the tree will fall?
The fall direction is controlled by the notch and the hinge wood. Cut the notch on your chosen side, leave a properly sized hinge on the opposite side, and the tree will follow your plan unless wind or rot interferes.
What size tree should I avoid felling with an axe?
Trees over 18 inches in diameter require significant time and stamina to fell with an axe alone. Consider a chainsaw or professional help for very large trunks, especially if they lean or show signs of decay.
Key Takeaways for Felling a Tree with an Axe
Felling a tree with an axe comes down to three essentials: the right tool, a clear plan, and disciplined safety. Choose a felling axe matched to your tree size, keep the edge sharp, and never skip protective gear. Assess lean, hazards, and escape routes before making a single cut, then shape a notch that reaches one-third of the trunk. Finish with a back cut that leaves 1 to 2 inches of hinge wood intact.
Your next step is simple. Find a small, straight tree in an open area, gear up, and walk through the full process. Each swing teaches you something, and soon the technique becomes second nature.



